Configure Jira
Overview
This guide describes how to set up Jira for Code Review.
Jira can be used with the following features in Code Review:
At the end of this tutorial, you will be able configure Jira to get started with Code Review solution for your application(s).
Prerequisites
Setup Jira
After you get access to CloudAEye SaaS, do the following steps:
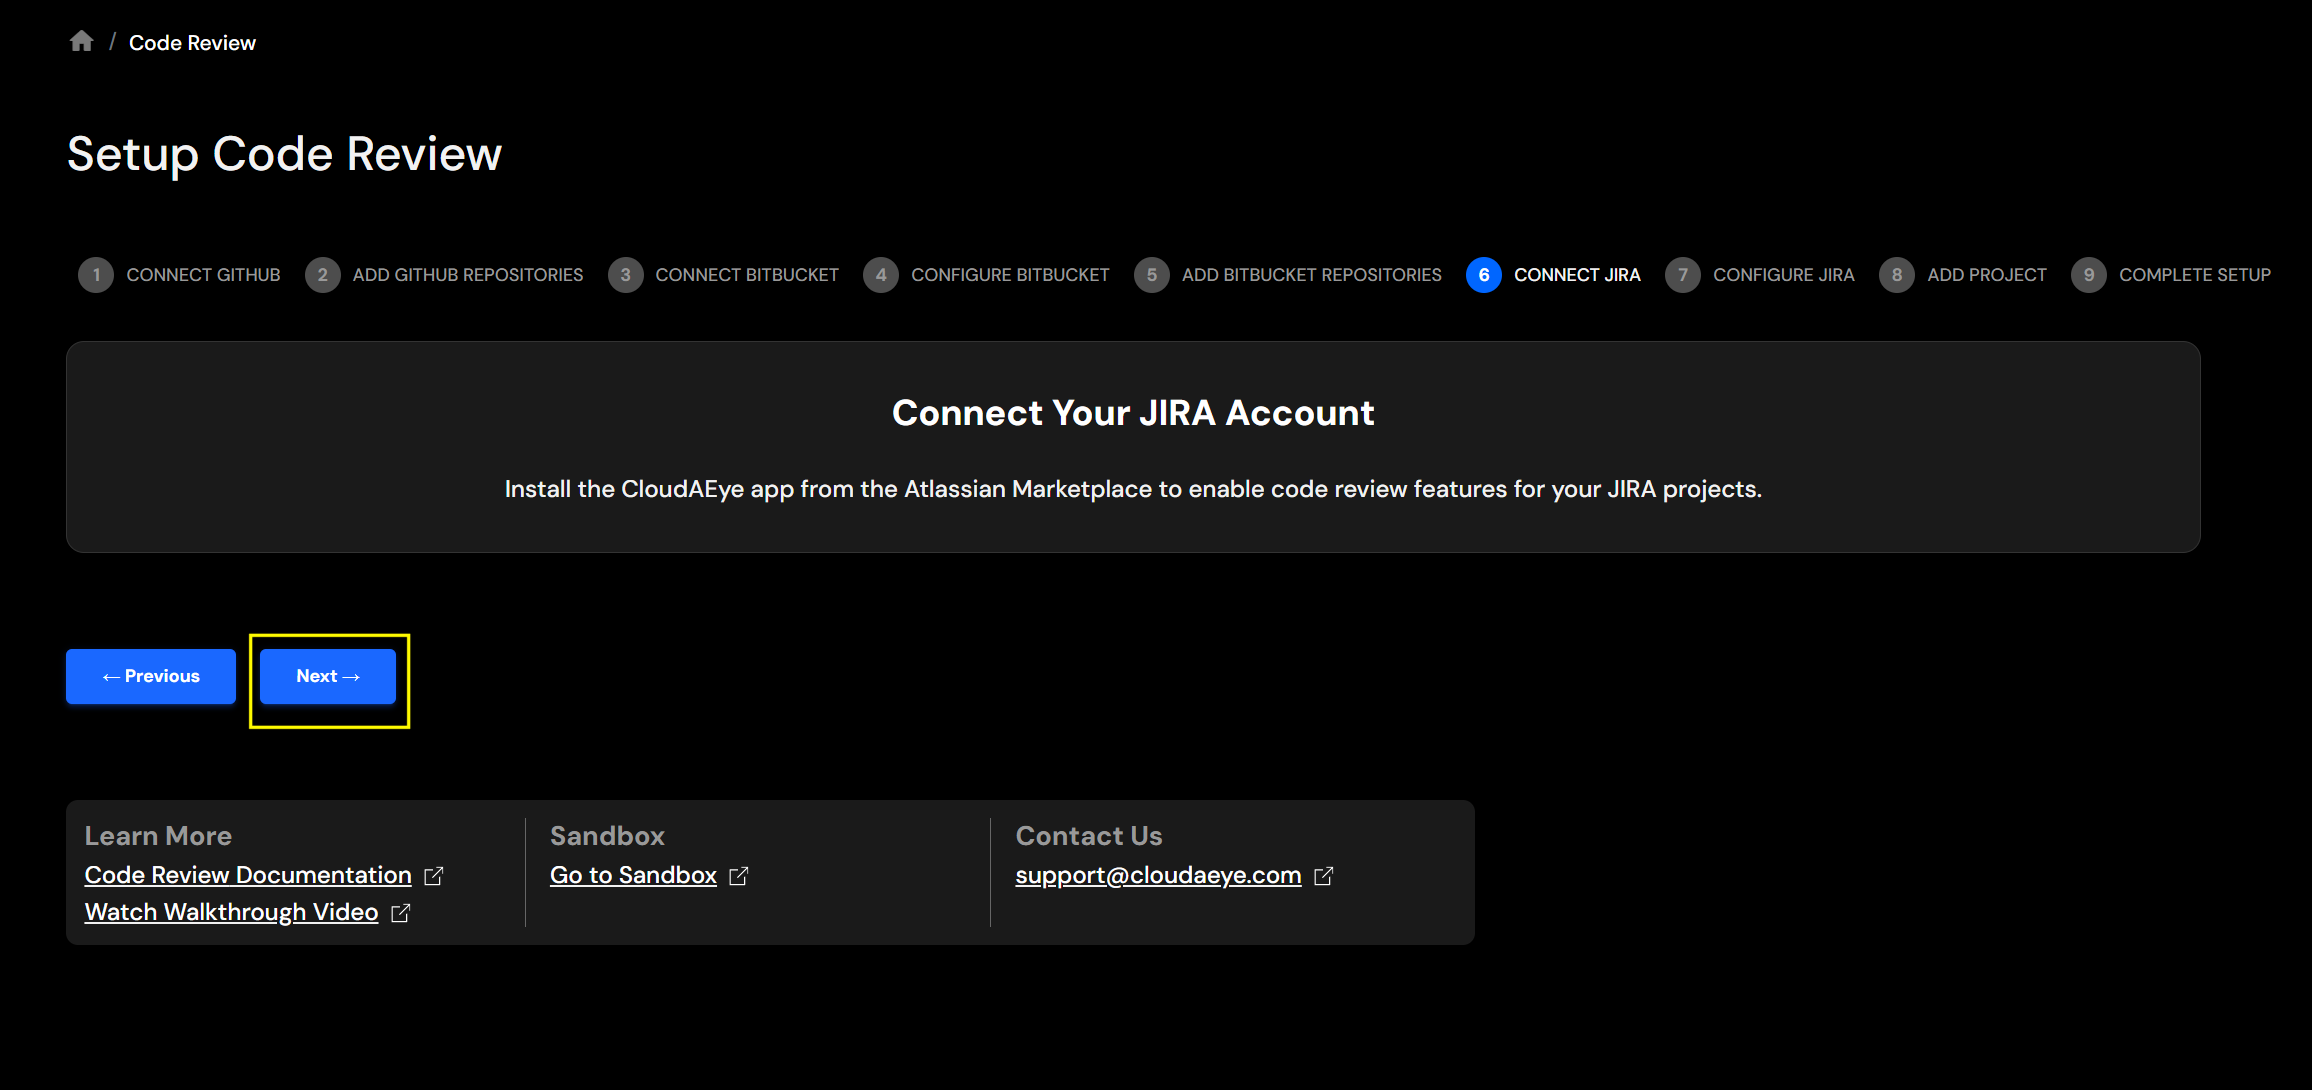
Step 2: Connect Jira
In the Code Review setup flow, choose Jira. You will be asked to connect your Jira account.
Install CloudAEye Jira App
In the next screen, you will install the CloudAEye Jira app.
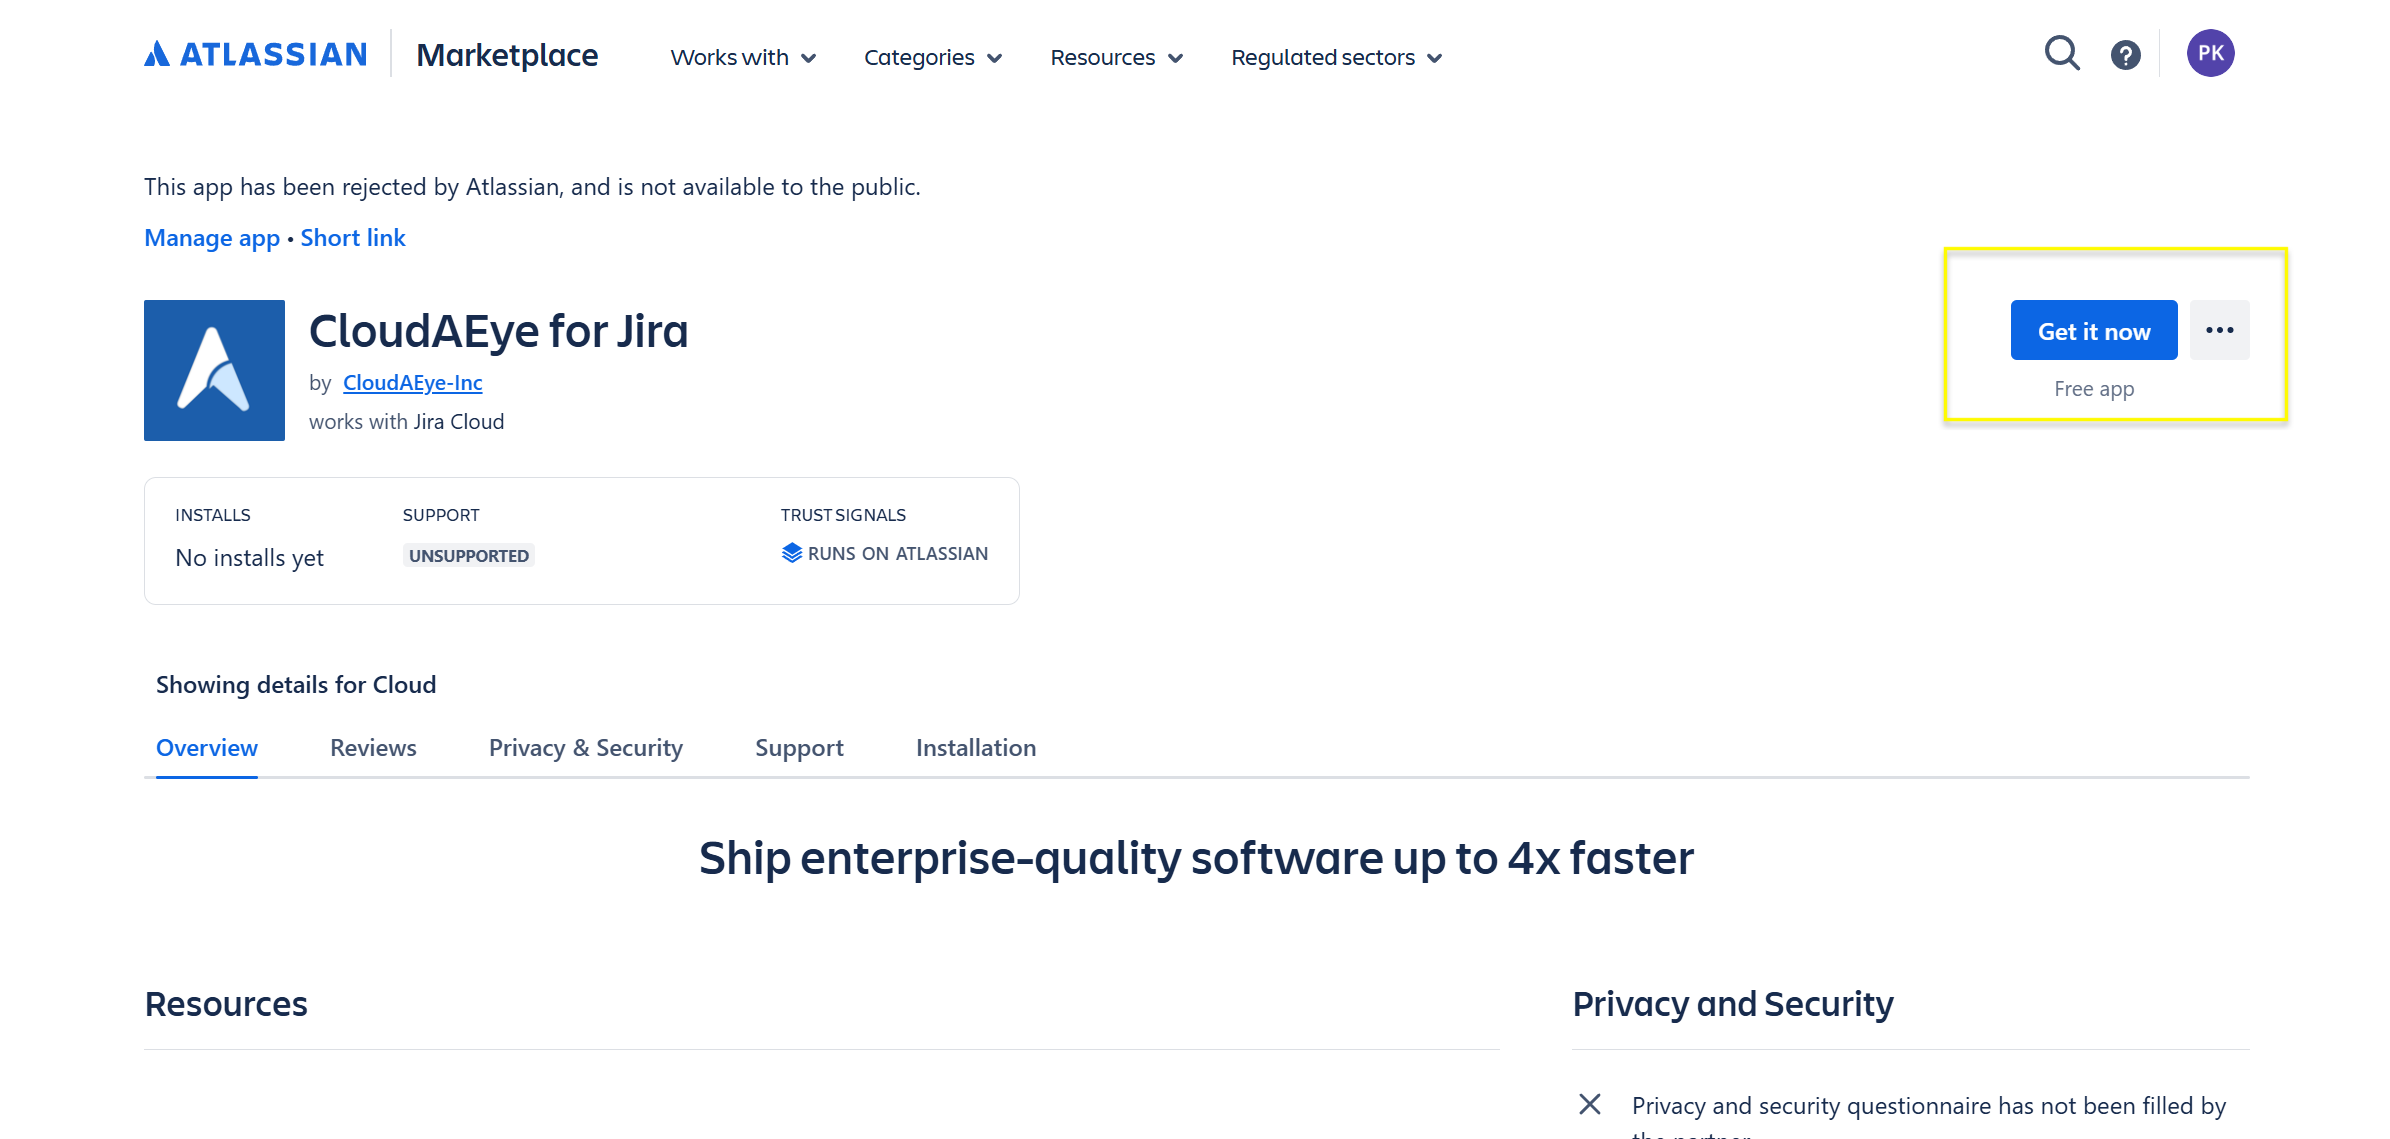
Click on Get it now button to install the app.
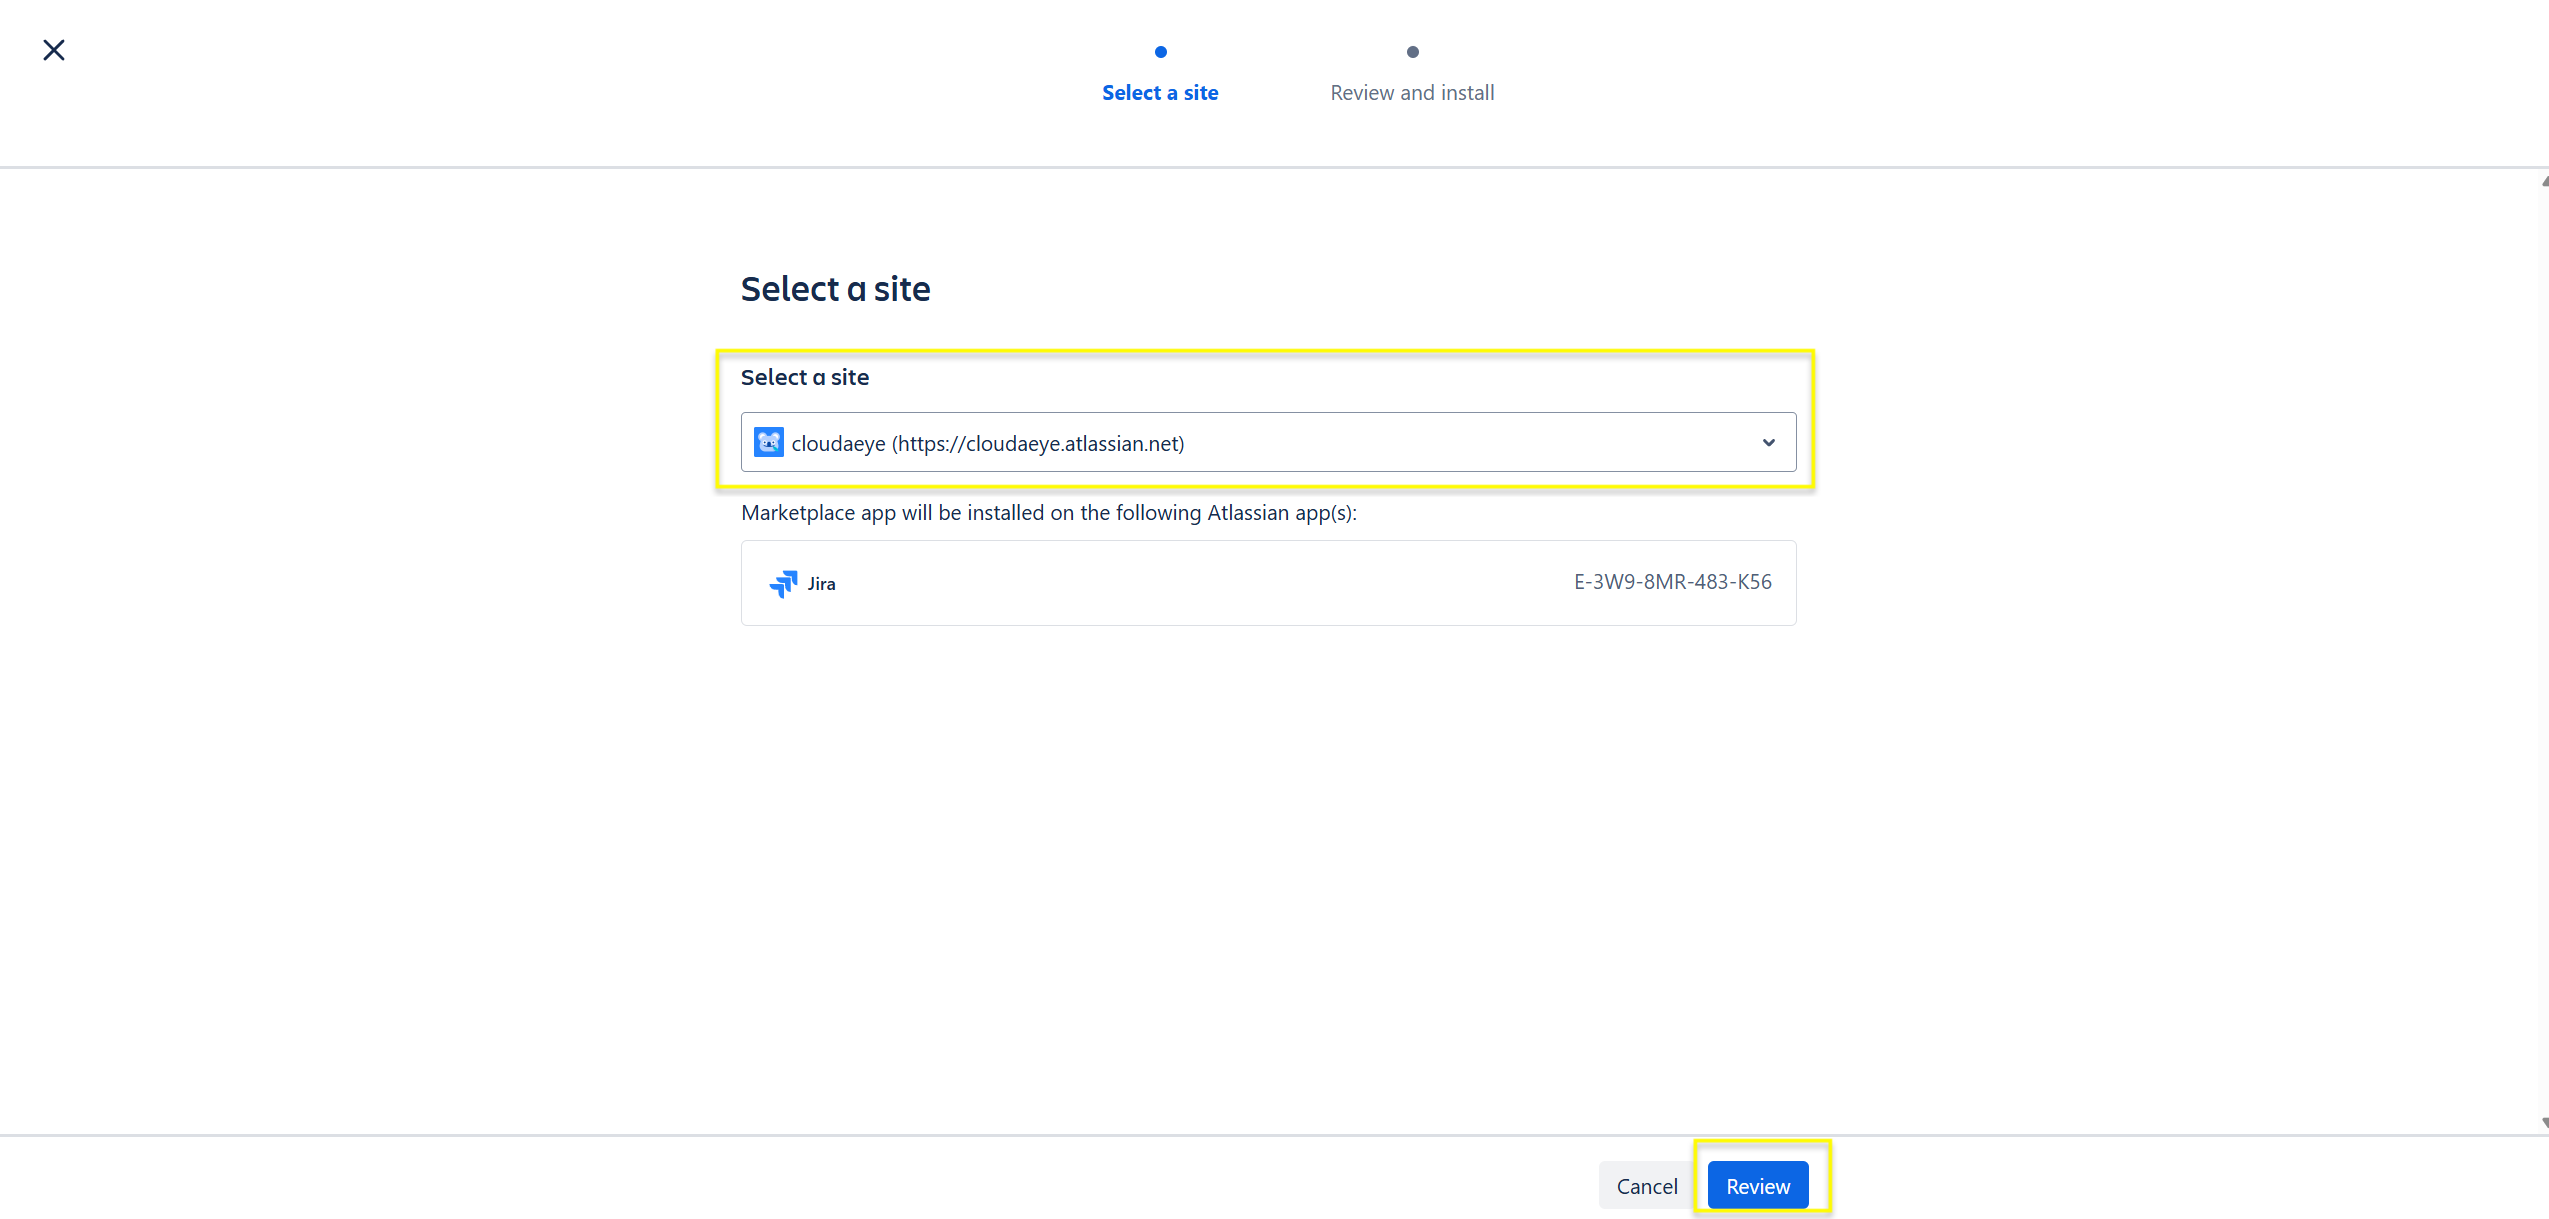
Site
Atlassian will prompt you to choose a site. Select from the drop-down and click on Review.
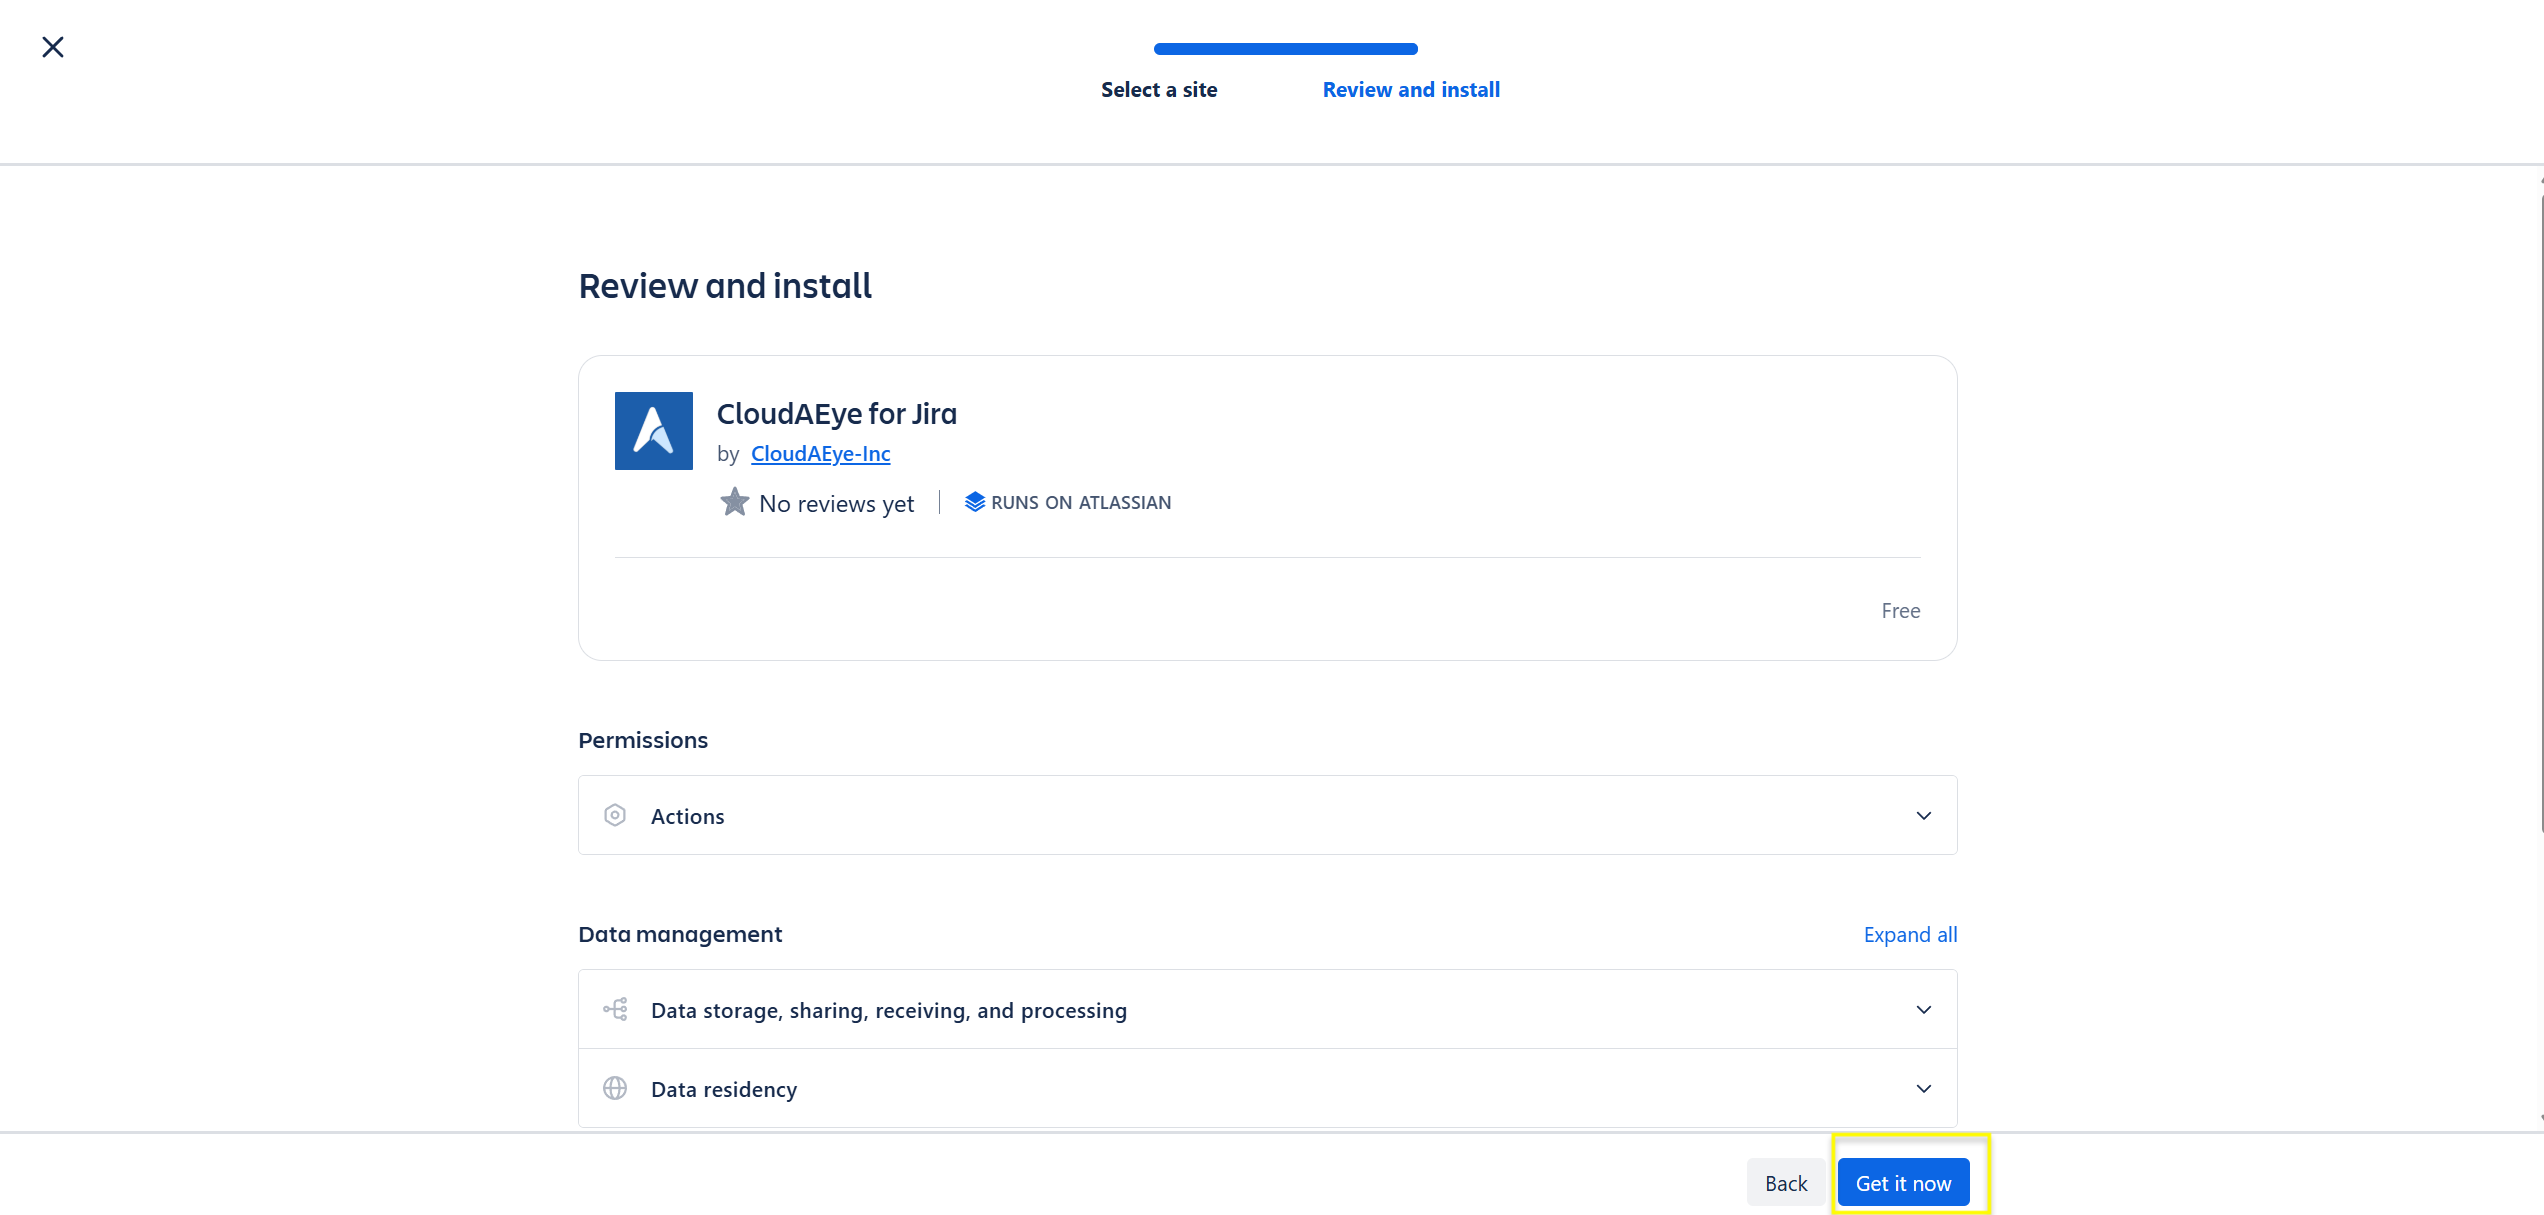
Review and install
In the next screen, review the app details. Click on Get it now to complete the installation.
Workspace
In the next screen, enter the name of your Jira site to check connectivity with Jira. For example, if the URL is https://cloudaeye.atlassian.net', entercloudaeye`.
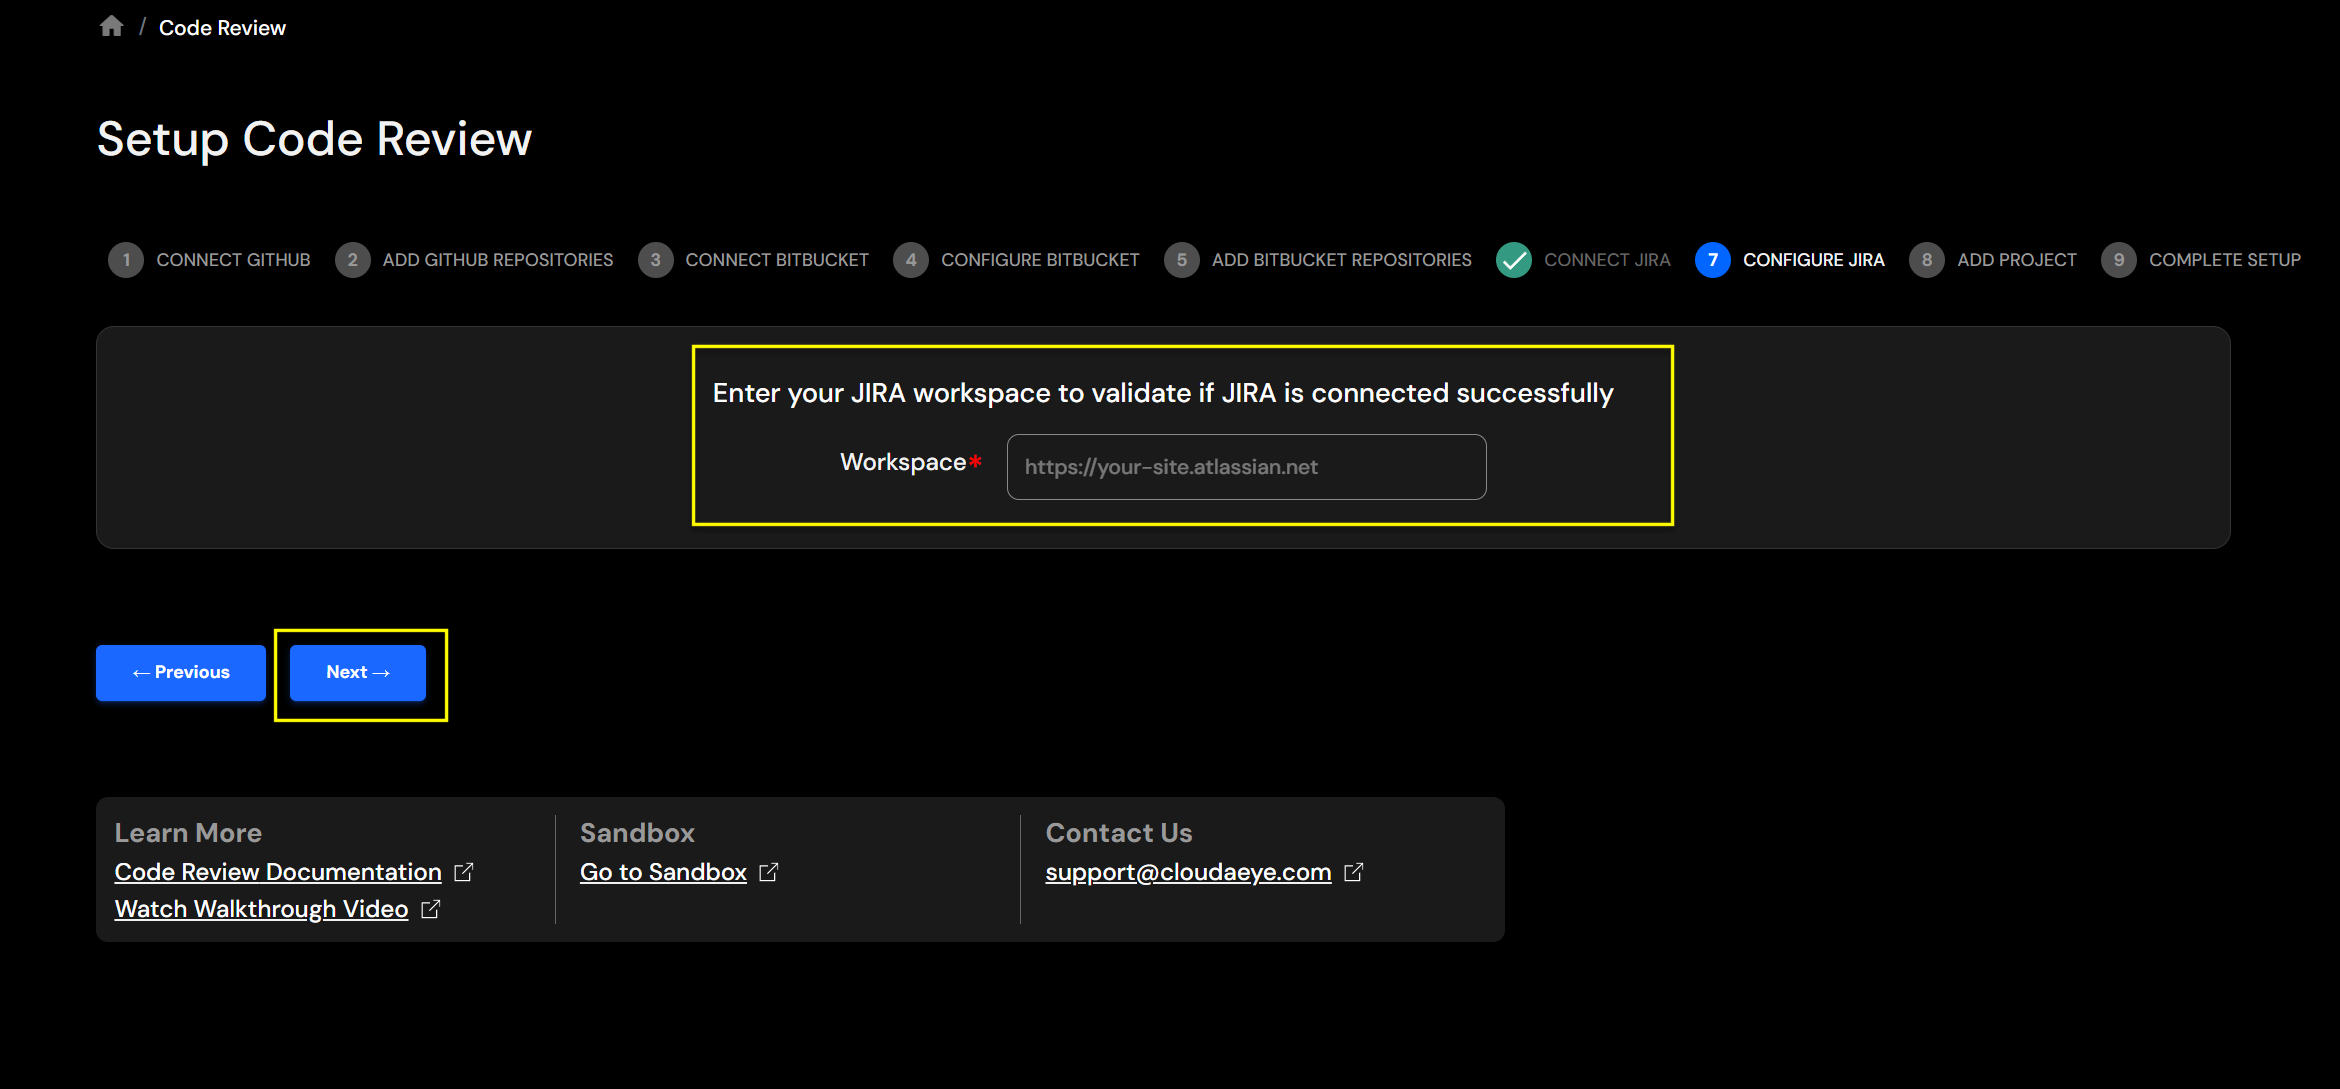
Click Next button. You will see a "successful" message in the top right corner and Jira project list will appear.
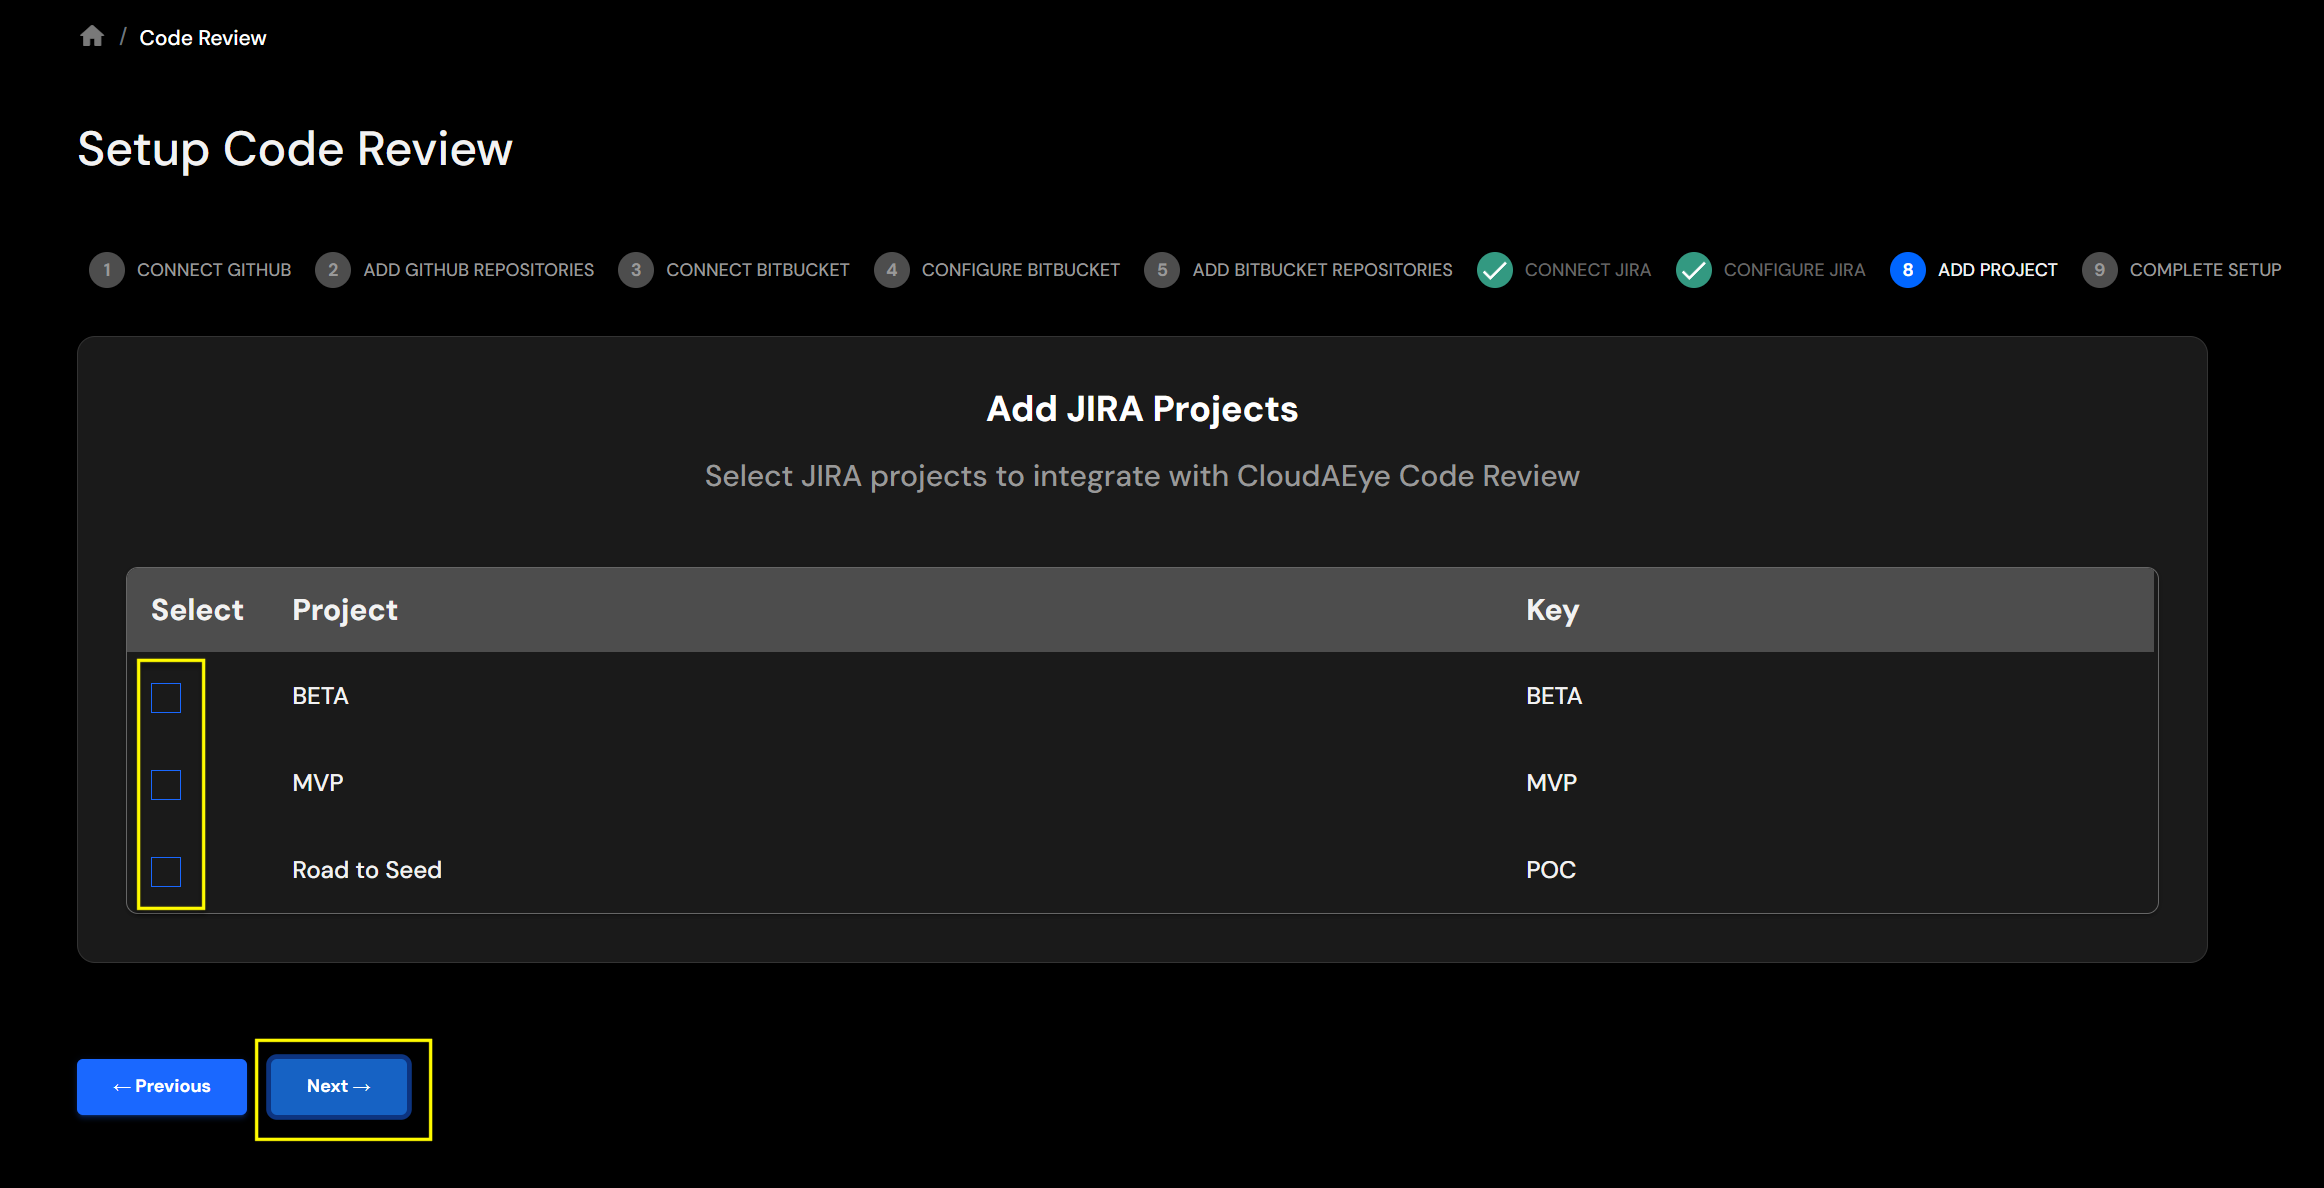
Step 3: Connect your Jira Projects
Add Jira Projects
Select the Jira projects you would like to monitor for Code Review.
Congratulations! You have successfully configured Jira for `Code Review'.
Edit Jira Integration
From the left navigation, open the Integrations page.
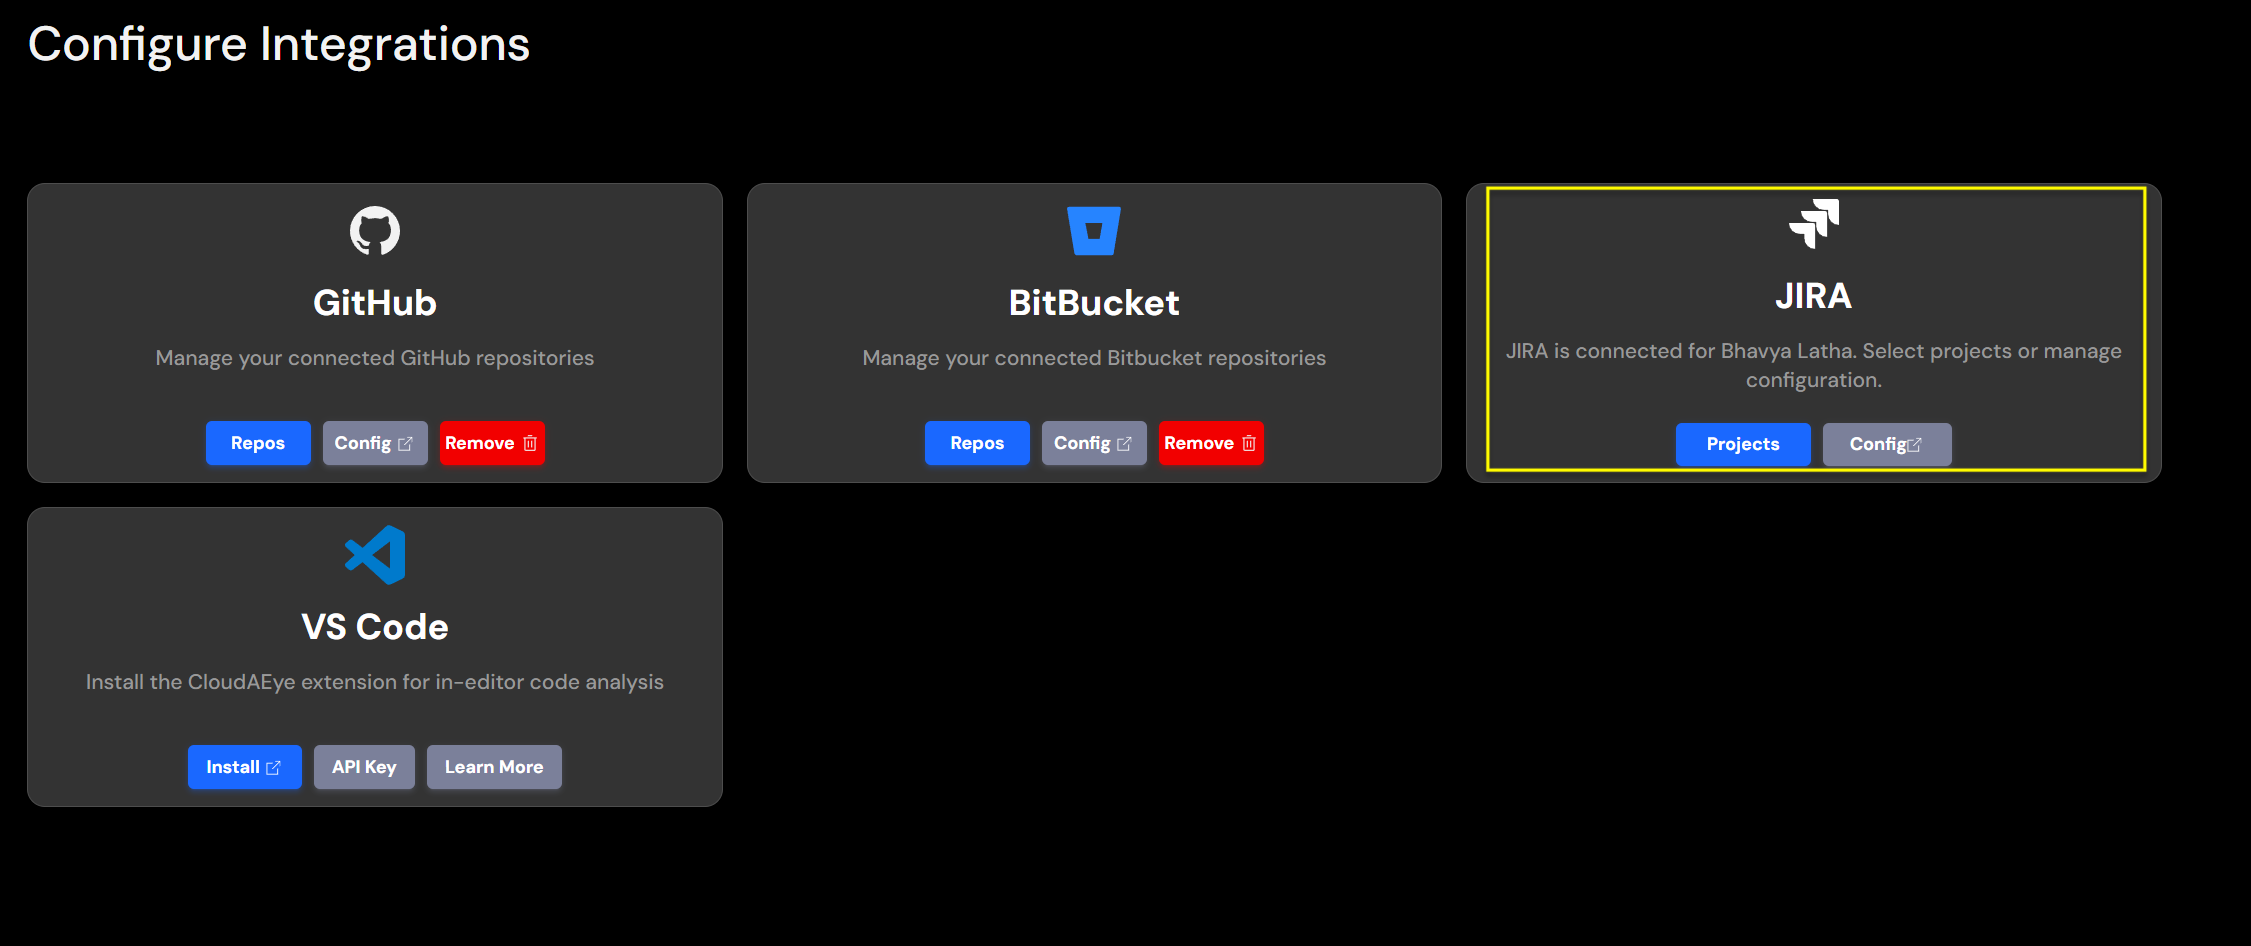
Select Projects button under Jira to view your list of Jira projects.
You may modify the porjects by using the Enable or Disable button.
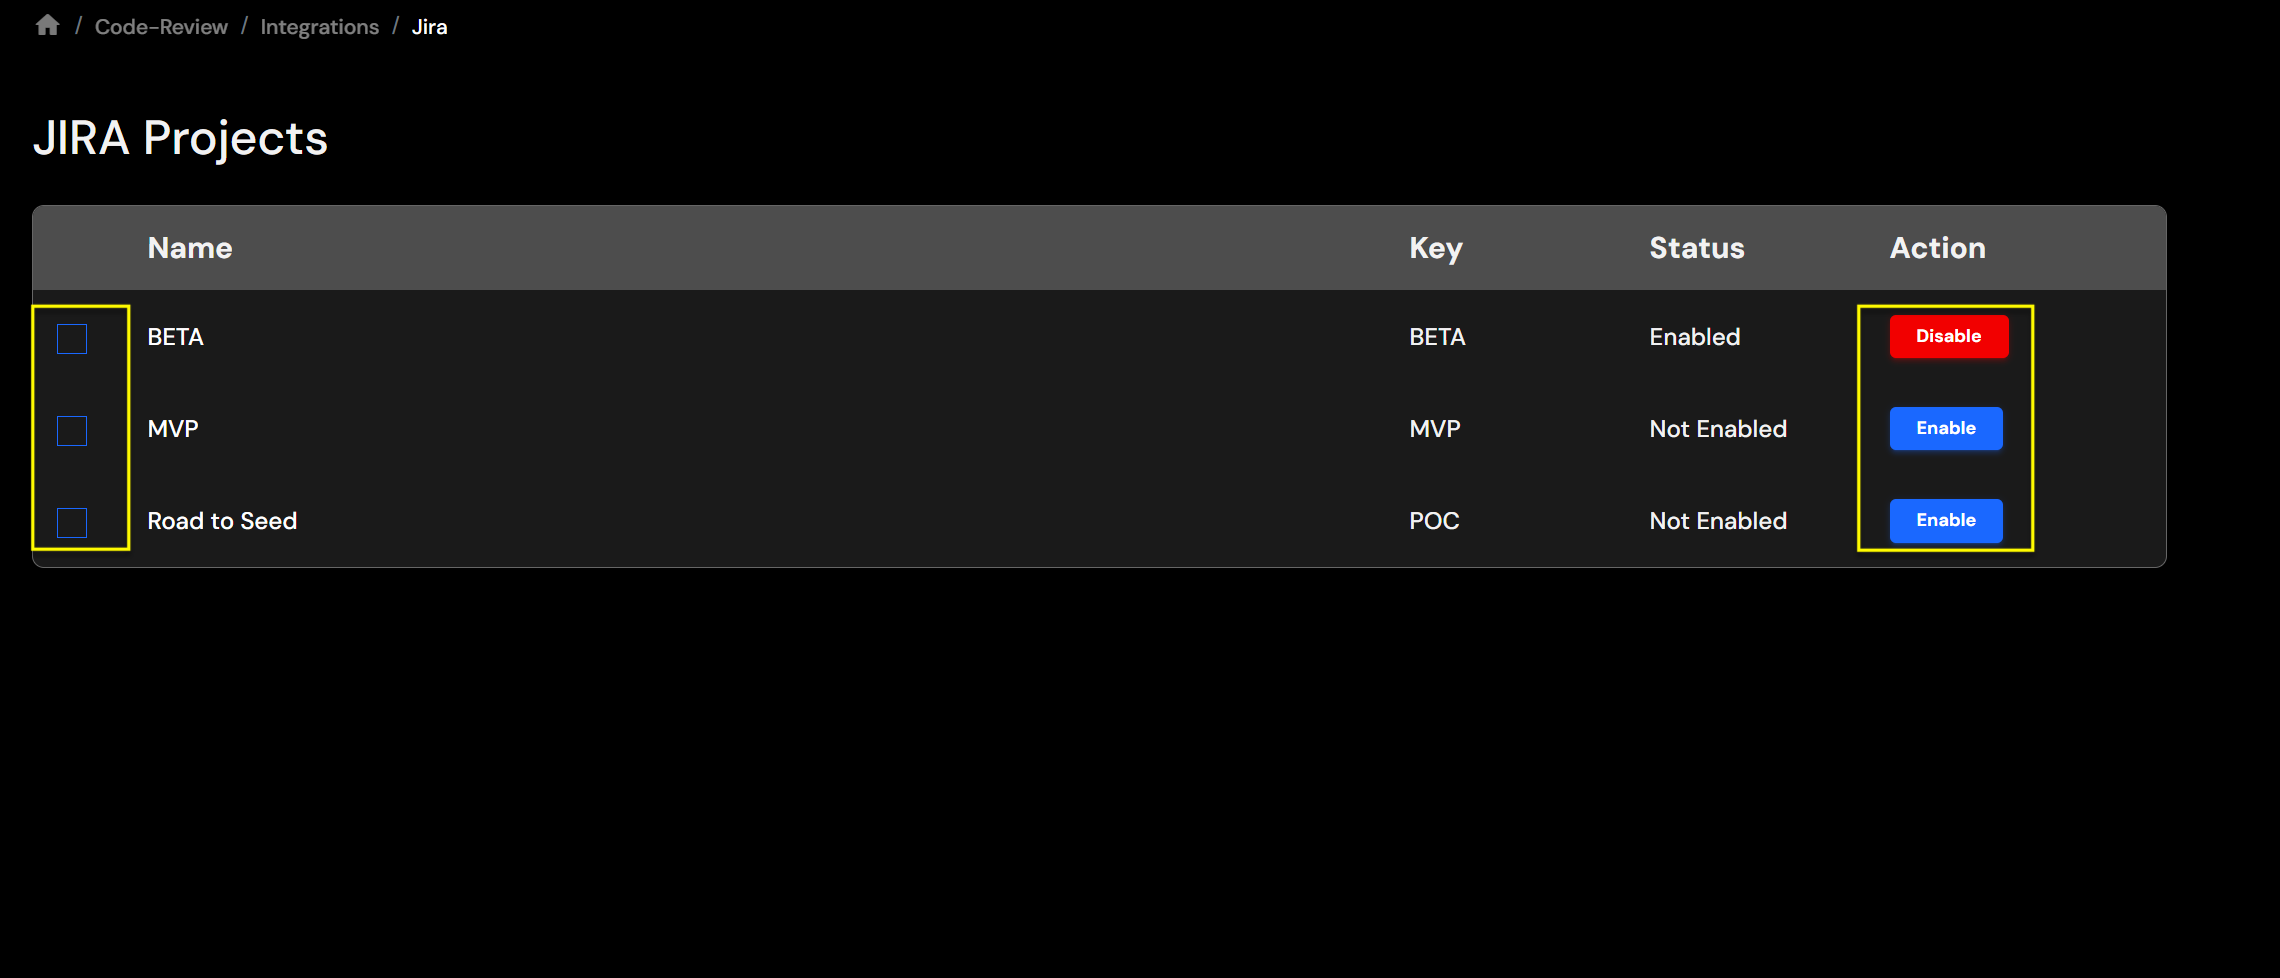
When you're finished, click Save to apply your changes.