markdownlint
This guide explains how to run markdownlint with CloudAEye.
Overview
markdownlint is a static analysis tool for Markdown files that enforces consistent style, formatting, and best practices. It helps developers maintain clean, readable, and well-structured documentation by identifying issues such as heading style inconsistencies, line length violations, missing blank lines, and improper list formatting.
Why Use markdownlint?
- Style enforcement: Apply consistent Markdown conventions across projects to improve readability.
- Error detection: Identify common mistakes that can affect rendering in GitHub, documentation sites, or static site generators.
- Customizable rules: Enable, disable, or configure rules via a configuration file to match your team’s style guide.
- Integration-friendly: Works from the command line, in CI/CD pipelines, or within code editors for real-time feedback.
- Automated linting: Helps maintain high-quality documentation automatically, reducing manual reviews.
markdownlint is ideal for teams and projects that rely on Markdown for documentation, README files, or content-driven projects, ensuring consistent, high-quality Markdown across all files.
Prerequisites
Step 1: Register
Sign up with CloudAEye SaaS.
Step 2: Setup Code Review
Setup Code Review by following the Getting Started guide.
Step 3: Configure the Linter
Configure the desired linter.
Configuration
CloudAEye supports a recommended configuration for markdownlint.
If your repository already has markdownlint configured, CloudAEye will automatically use that setup. You may also enter your desired configuration.
Use repo config
CloudAEye automatically reads your repository’s existing markdownlint configuration and uses it as is. No additional setup is needed.
Common markdownlint Configuration File Locations & Formats
markdownlint configuration is typically defined in a configuration file named .markdownlint.json or .markdownlint.yaml, which is placed in the project root.
** 1. Configuration file (.markdownlint.json or .markdownlint.yaml) **
Enables you to enable or disable rules and set rule-specific options.
Example .markdownlint.json:
{
  "default": true,
  "MD013": { "line_length": 100 },
  "MD041": false
}
** 2. Command-line options **
Override rules or point to a specific config file:
markdownlint -c .markdownlint.json README.md
Manual
You may enter the markdownlint configuration you would like to use.
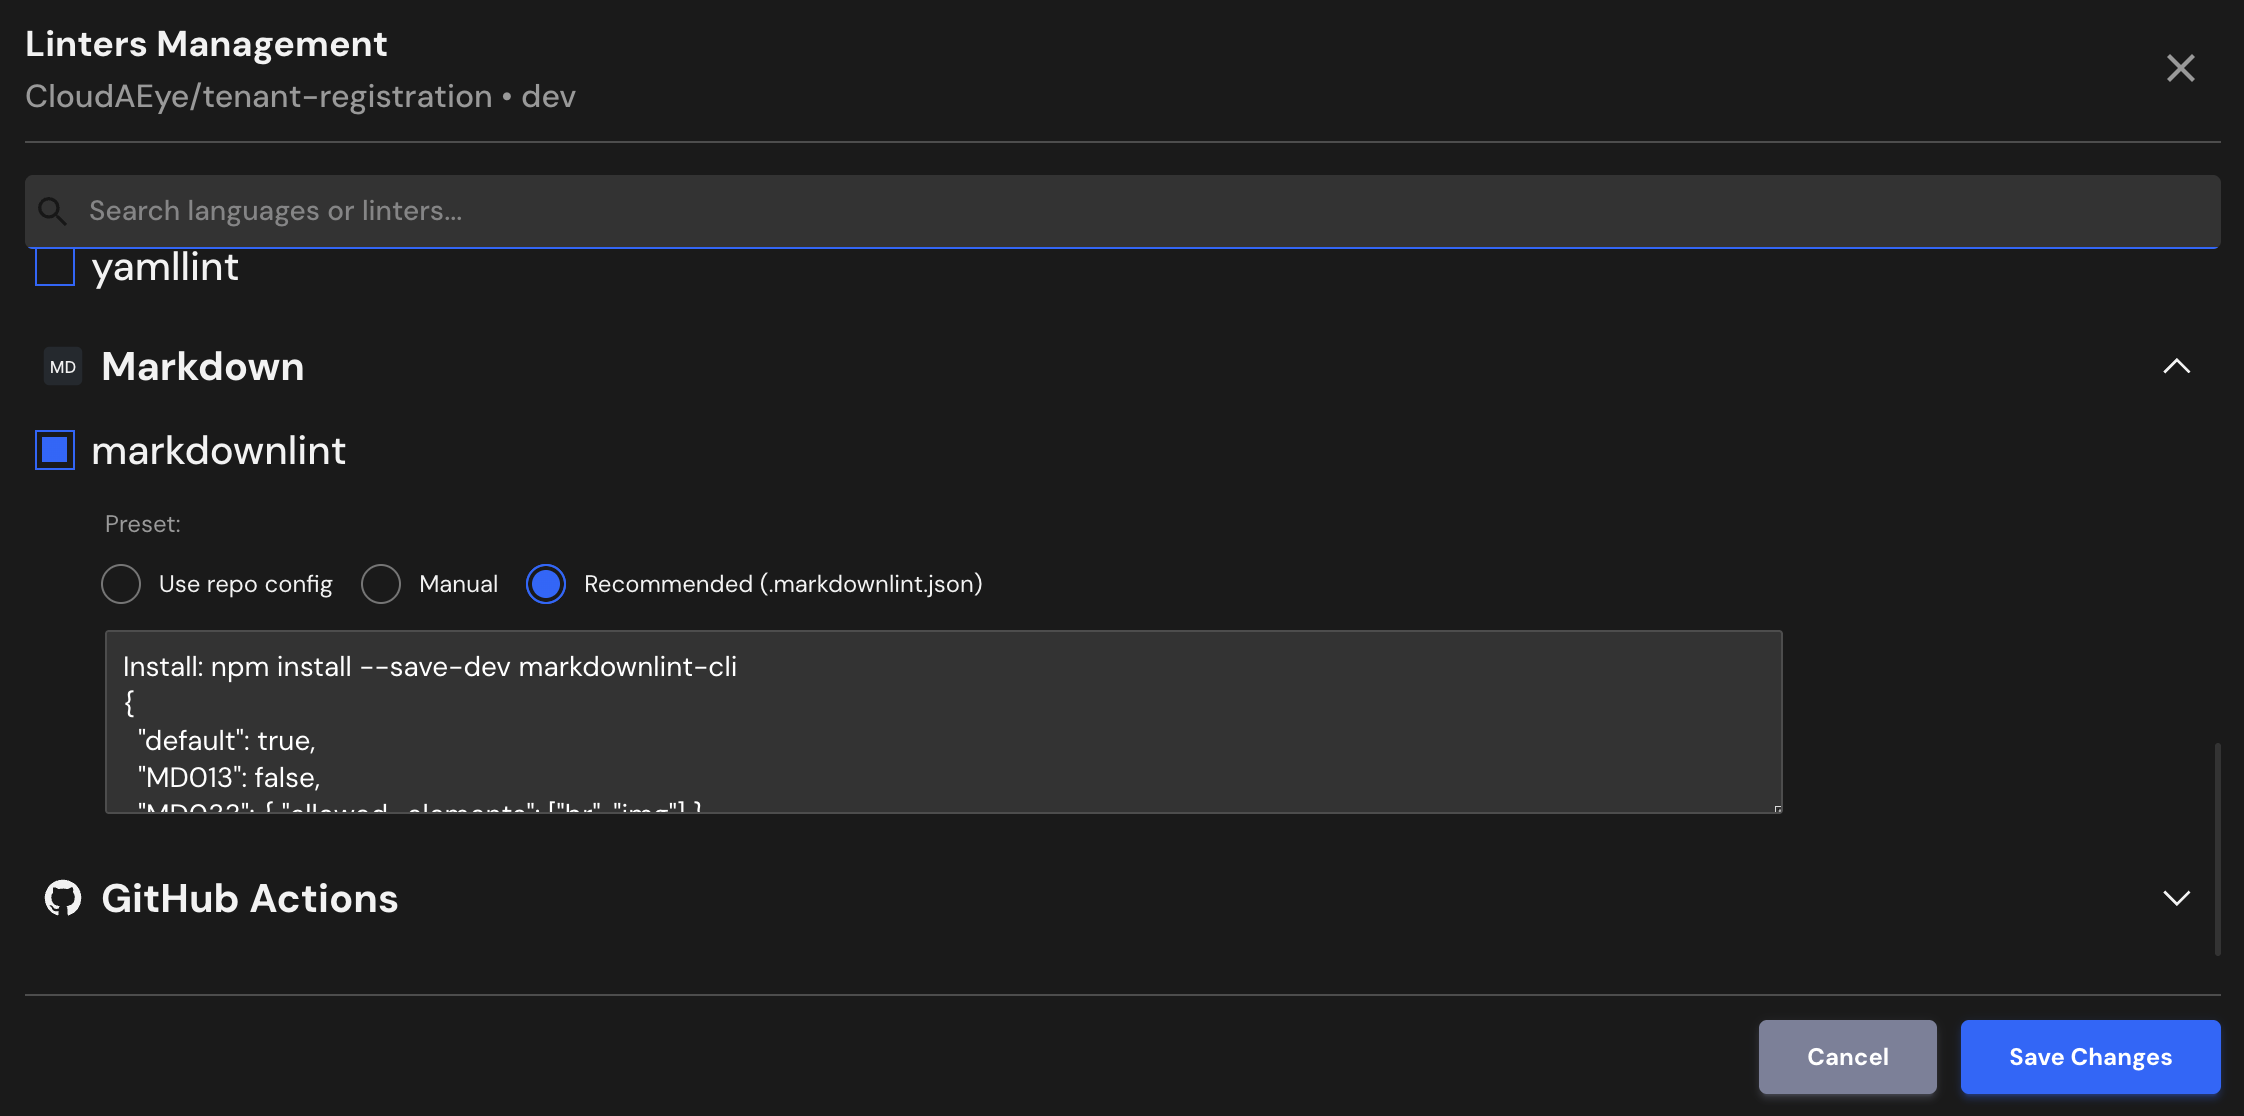
Recommended (.markdownlint.json)
Install: npm install --save-dev markdownlint-cli
{
  "default": true,
  "MD013": false,
  "MD033": { "allowed_elements": ["br", "img"] },
  "MD041": false
}
File Extensions
markdownlint will run on files that use any of the following extensions:
.md, .markdown
References
- markdownlint project
- markdownlint documentation