User Management
Overview
This topic describes how you may manage users and grant them different level of access to CloudAEye services.
Tenant administrators control who can be authenticated (signed in) and authorized (have permissions) to use CloudAEye SaaS services.
Video
- Tutorial: User Management
Groups
| Group Name | Priviledges |
|---|---|
| TenantAdminGroup | Administrators of your CloudAEye SaS account. At least 1 Administrator required |
| TenantUserGroup | Provisoned user who has not been granted any acceess yet |
| BillingAccountAdminGroup | Users who are granted administrative access to Billing |
| BillingAccountUserGroup | Users who are granted view access to Billing |
- Admininistrative Access - Can Create / Delete resources (please view individual services for more details on provisionable resources).
- View Access - Can view services / metrics / logs / other details of provisioned resources
Operations
The operations are organized into two buckets:
users- For managing users in the systemgroups- For managing group memberships of the users who are in the system
Manage Users
If you want to register, update, get the details, remove or find out the current group membership of a user, you may use Users from left navigation in console.
List All Users
Select Users from the left navigation. A list of existing users in the system will be shown.

Example: Register a New User
Here is an example of how to register a new user.
Select Users from the left navigation. A list of existing users in your account will be shown.
To add a new user to the system, click Add on the top right corner. A new form will be shown.
Fill out the following information for the person being added:
Personal Details
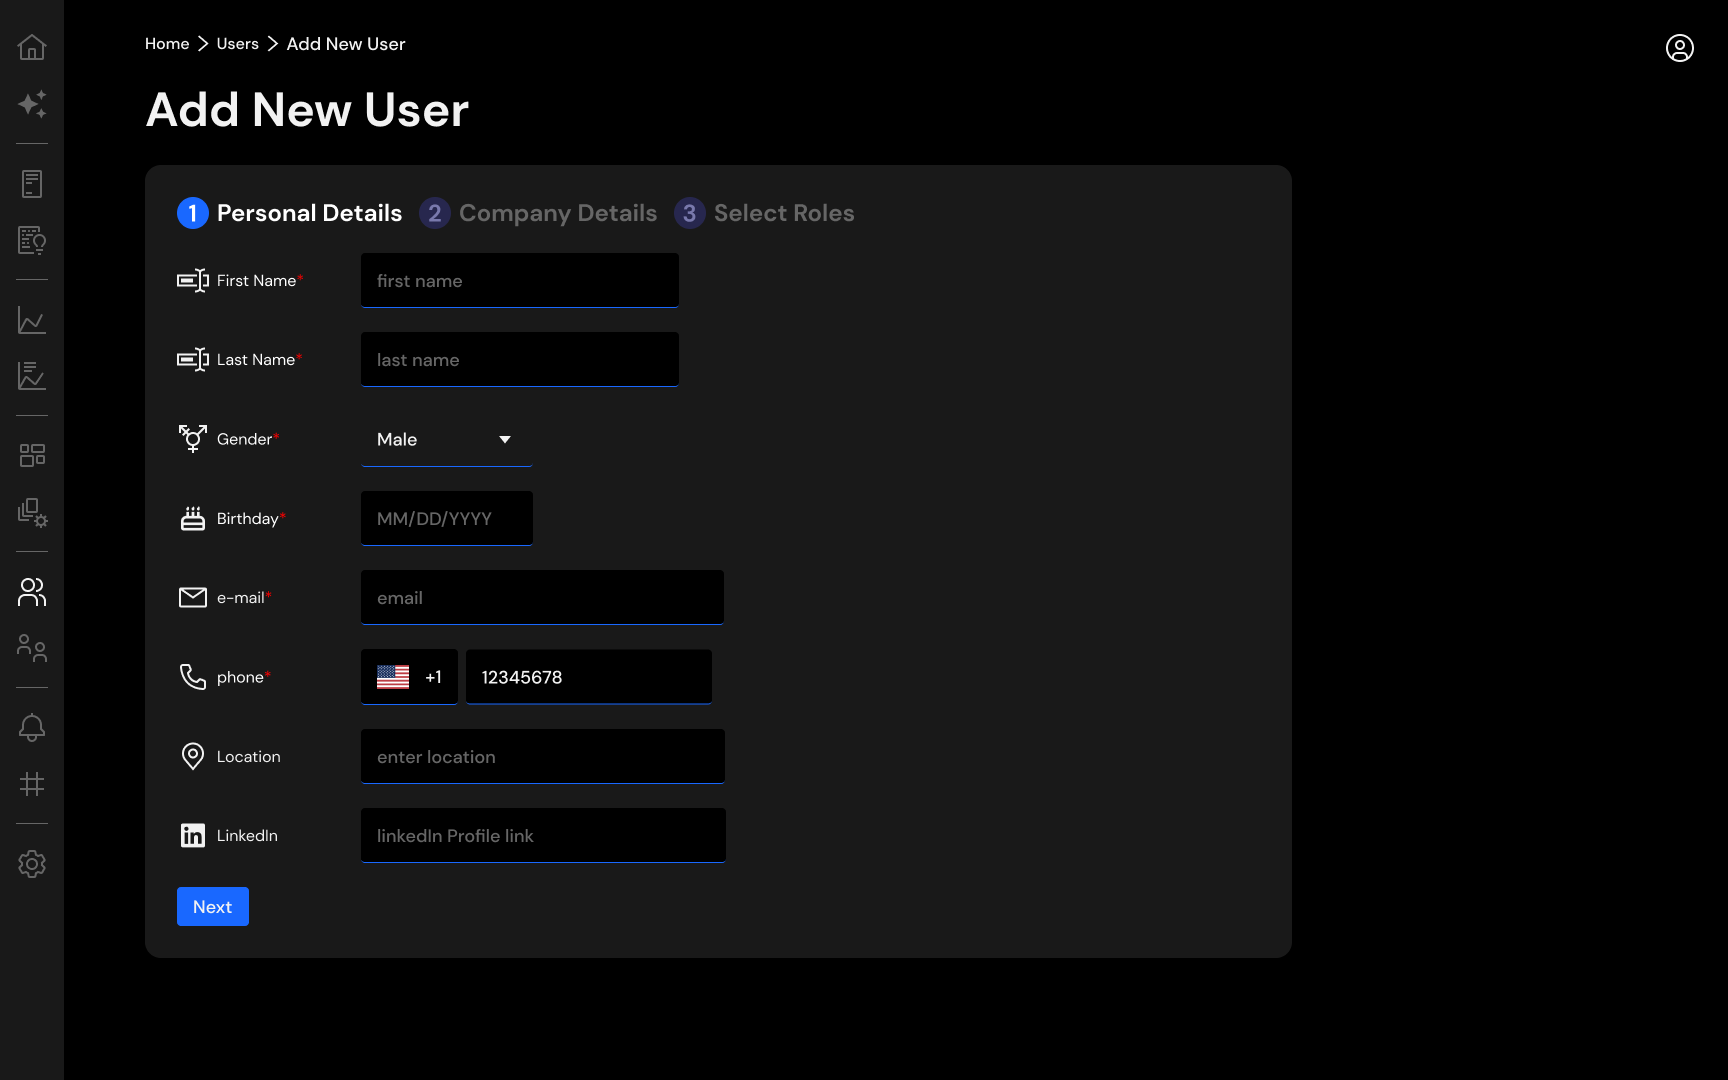
- First Name - First name of the person.
- Last Name - Last name of the person.
- Gender - Select the gender of the person from the drop-down menu.
- Birthdte - Date of birth of the person in MM/DD/YYYY format.
- Email - Work email address of the person.
- Phone - Phone number of the person.
- Location - Location of the person.
- LinkedIn - LinkedIn profile url of the person.
Click on Next to go to the next screen.
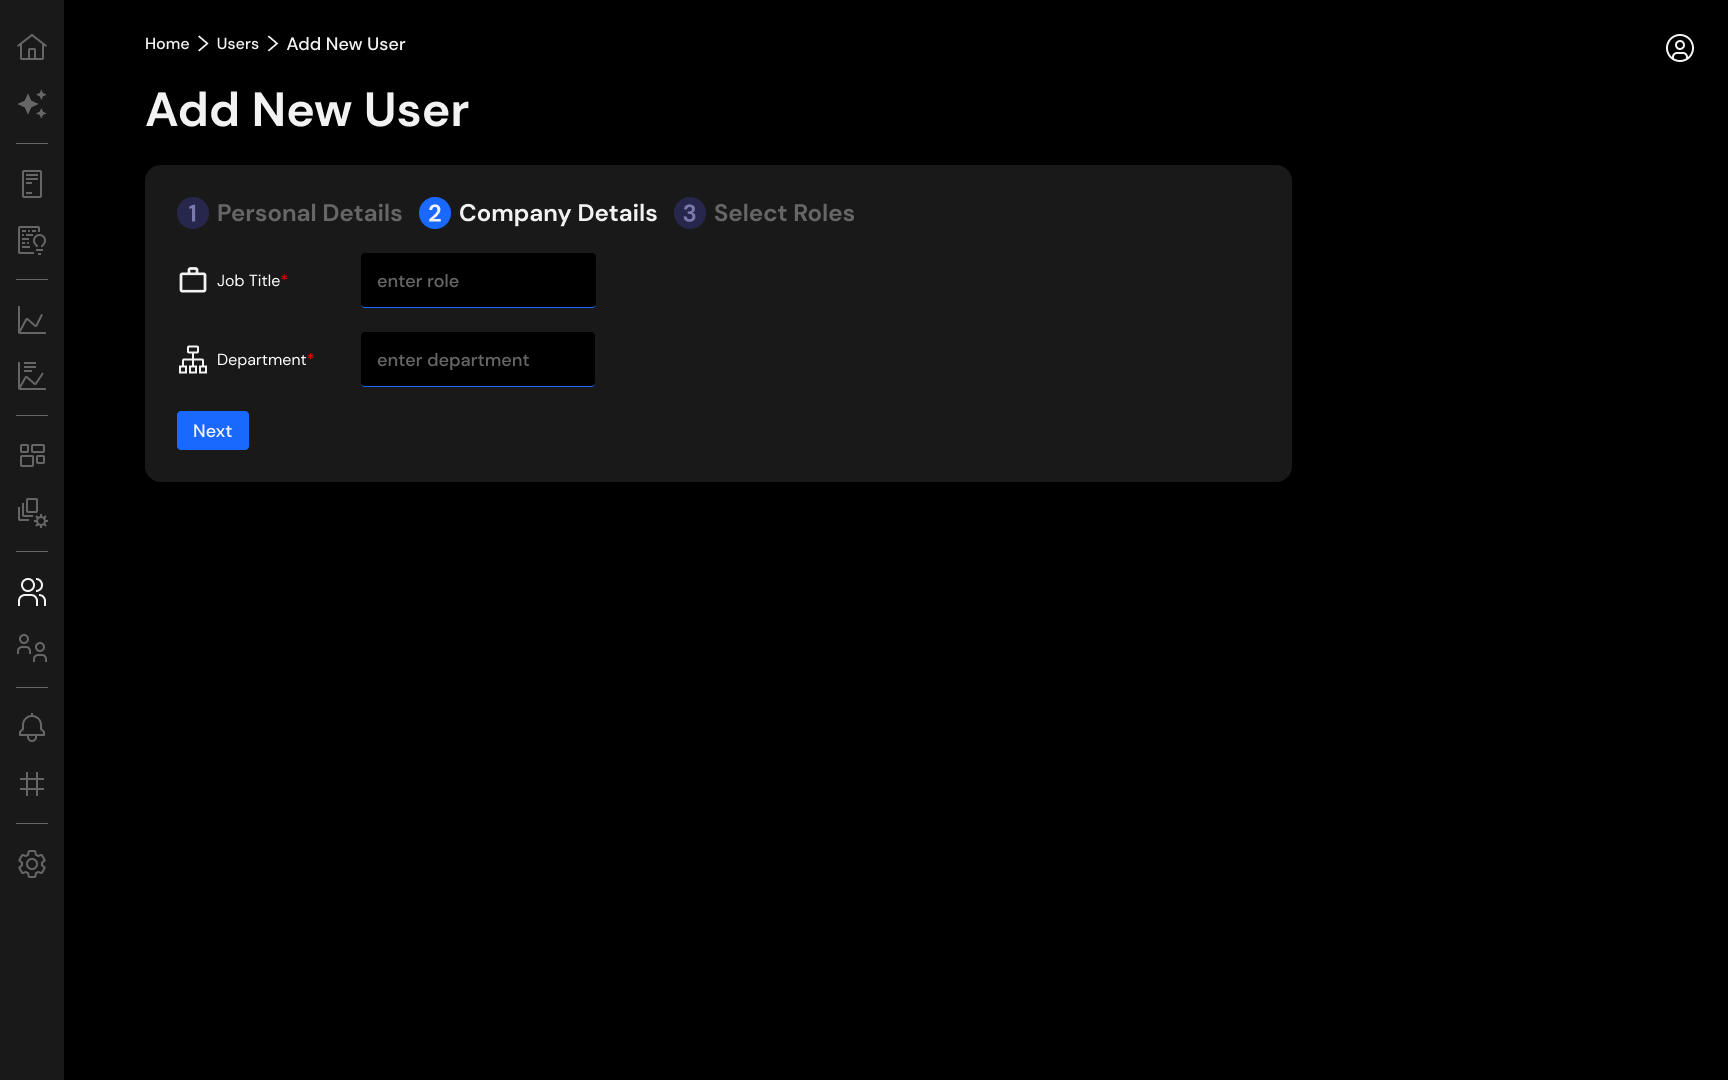
Enter the following information.
- Job Title - Job title of the person at work.
- Department - Name of the department or organization of the person.
Click on Next to go to the next screen.
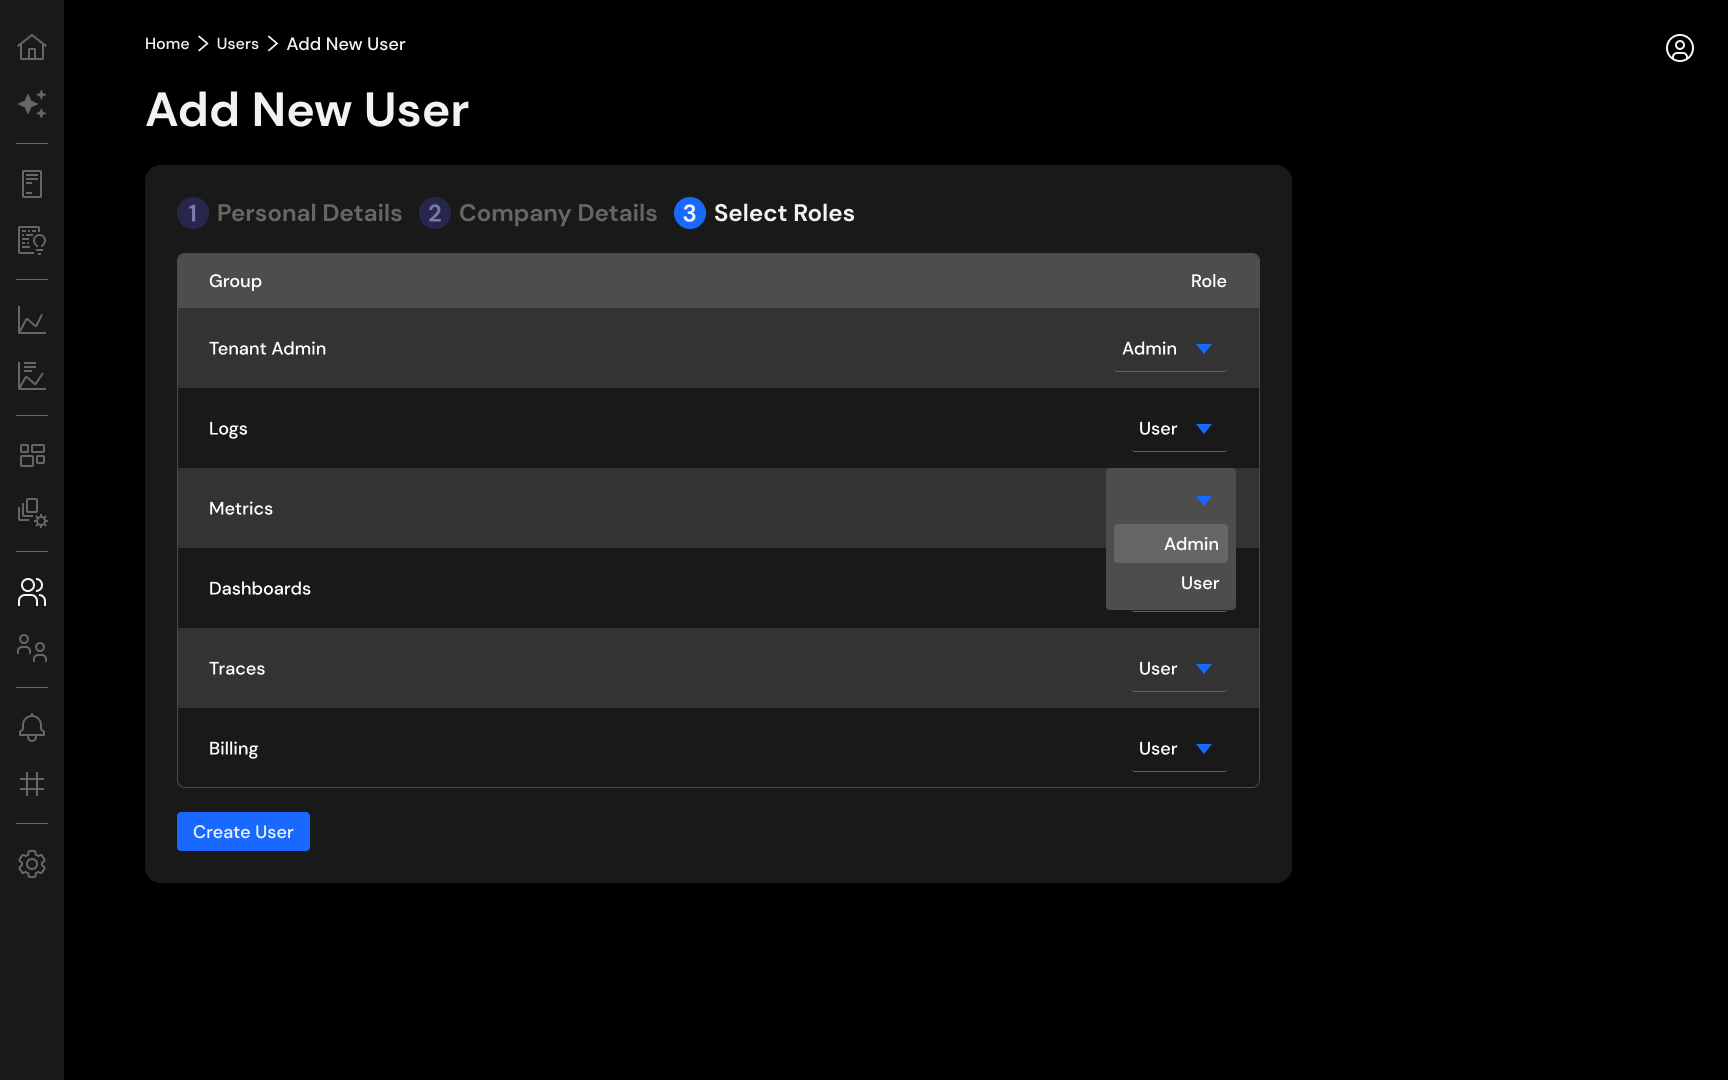
Please add the new user to the groups for access. All Admin users have "read/write" access for the area while User has "read" access. Tenant Admin has "root" access to the account. Assign None to skip a Group.
Click Create User button to add the person to the system. An email will be sent to the email address with a temporary password.
Manage Access
To manage user's group membership, you may use Groups from left navigation.

On this page, you can see all the Groups and the members in each group.
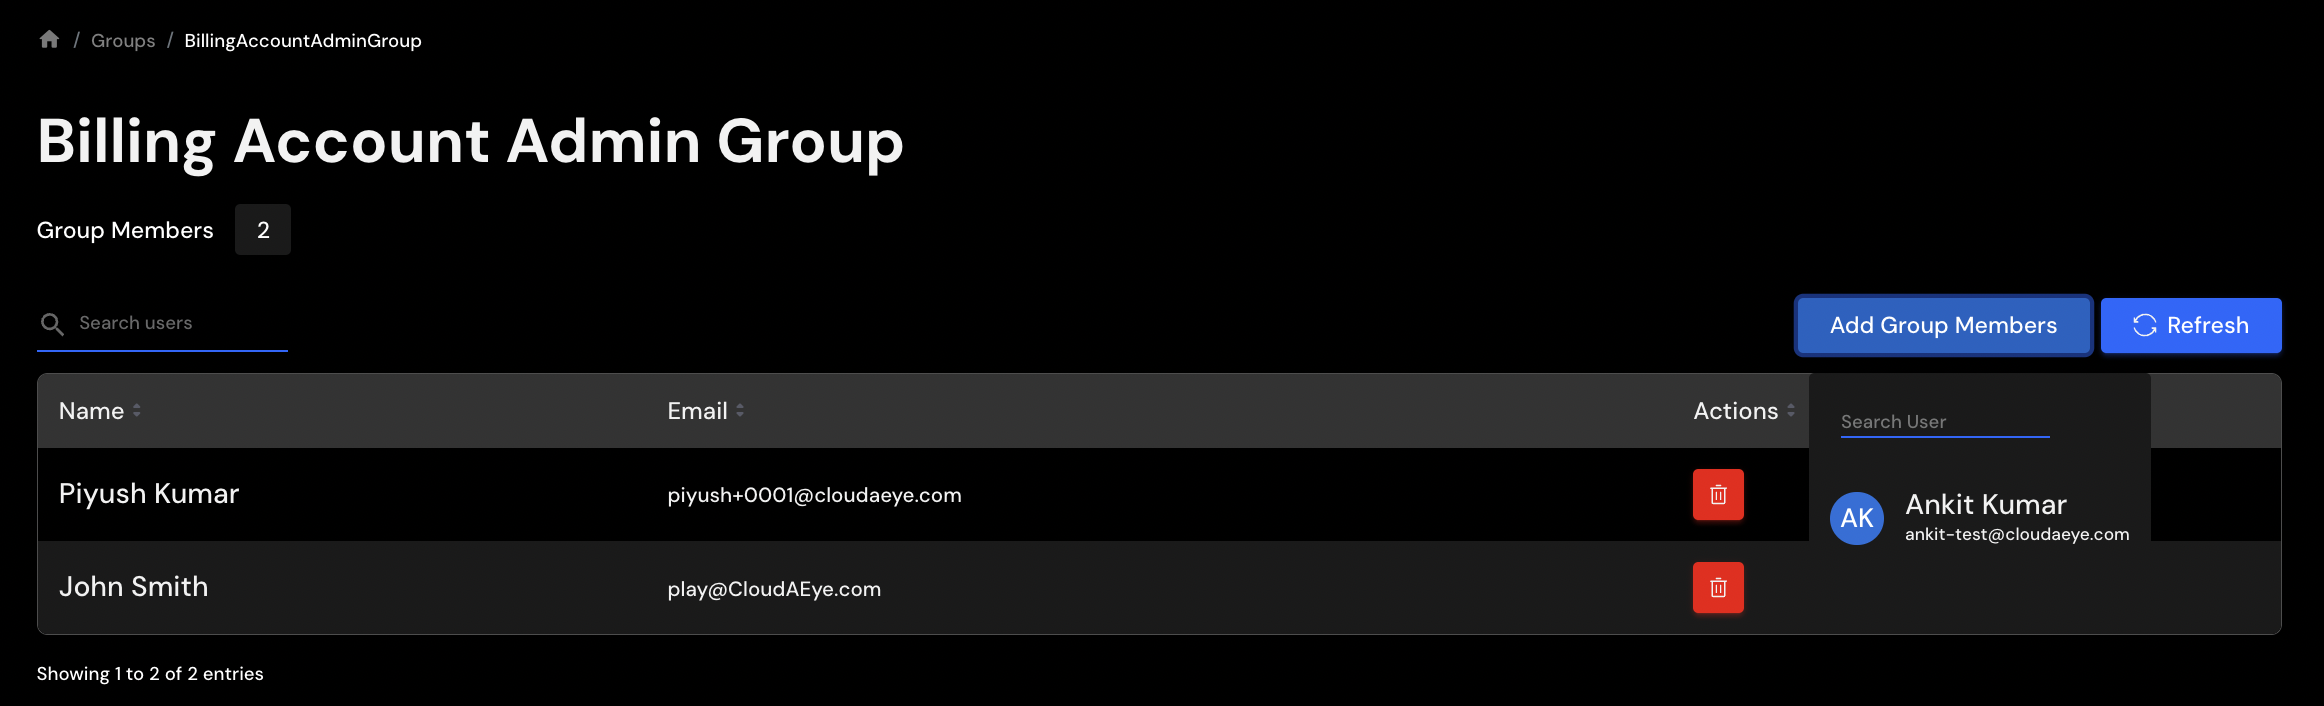
Example: List Users of a Group
Select Groups from a left navigation. You will see a list of groups. Click on View on the right most column to see details of a group. You will see a page with all the users in the group.
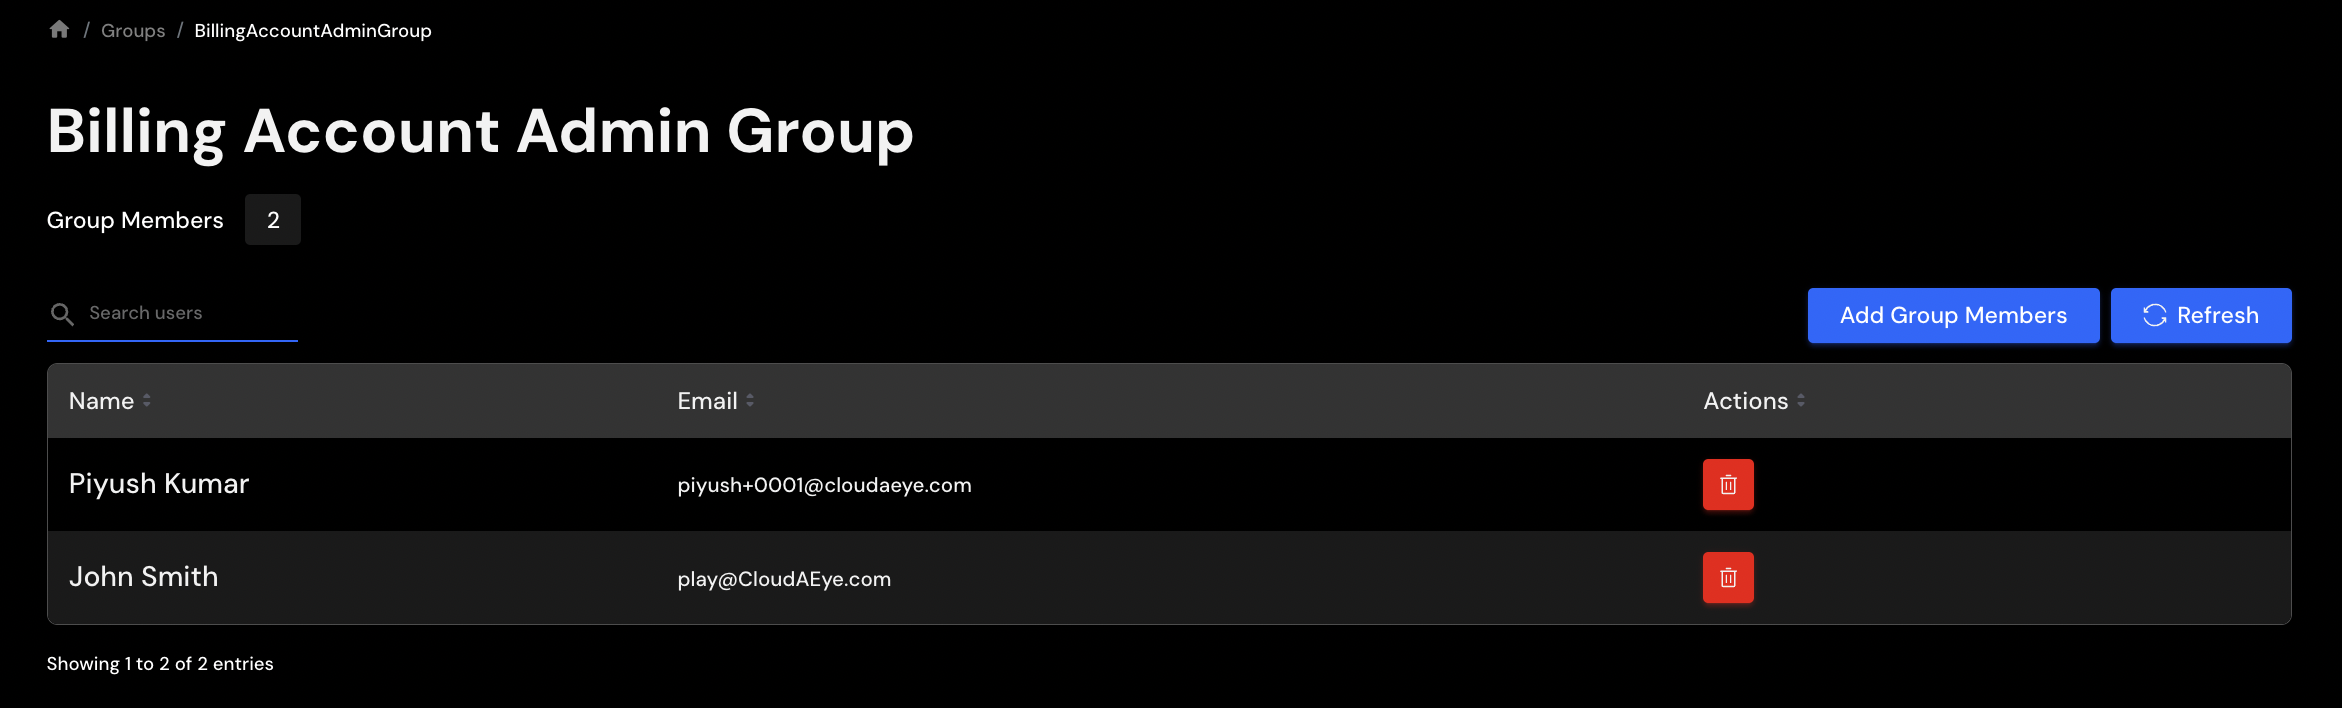
Example: Add User to a Group
From the Group details page, click on Add Group Members to add a new member to the group.