CloudAEye Jira Plugin Integration Guide
Welcome! Enhance your project management workflow by integrating the CloudAEye Jira Plugin. This guide provides a straightforward path to connect CloudAEye with Jira, allowing for a seamless integration that brings CloudAEye's powerful features directly into your Jira workflow.
Setting up CloudAEye Jira Plugin
Step 1: Start the Integration
- Go to the "Integrations" section and select the "Connect Atlassian" option.
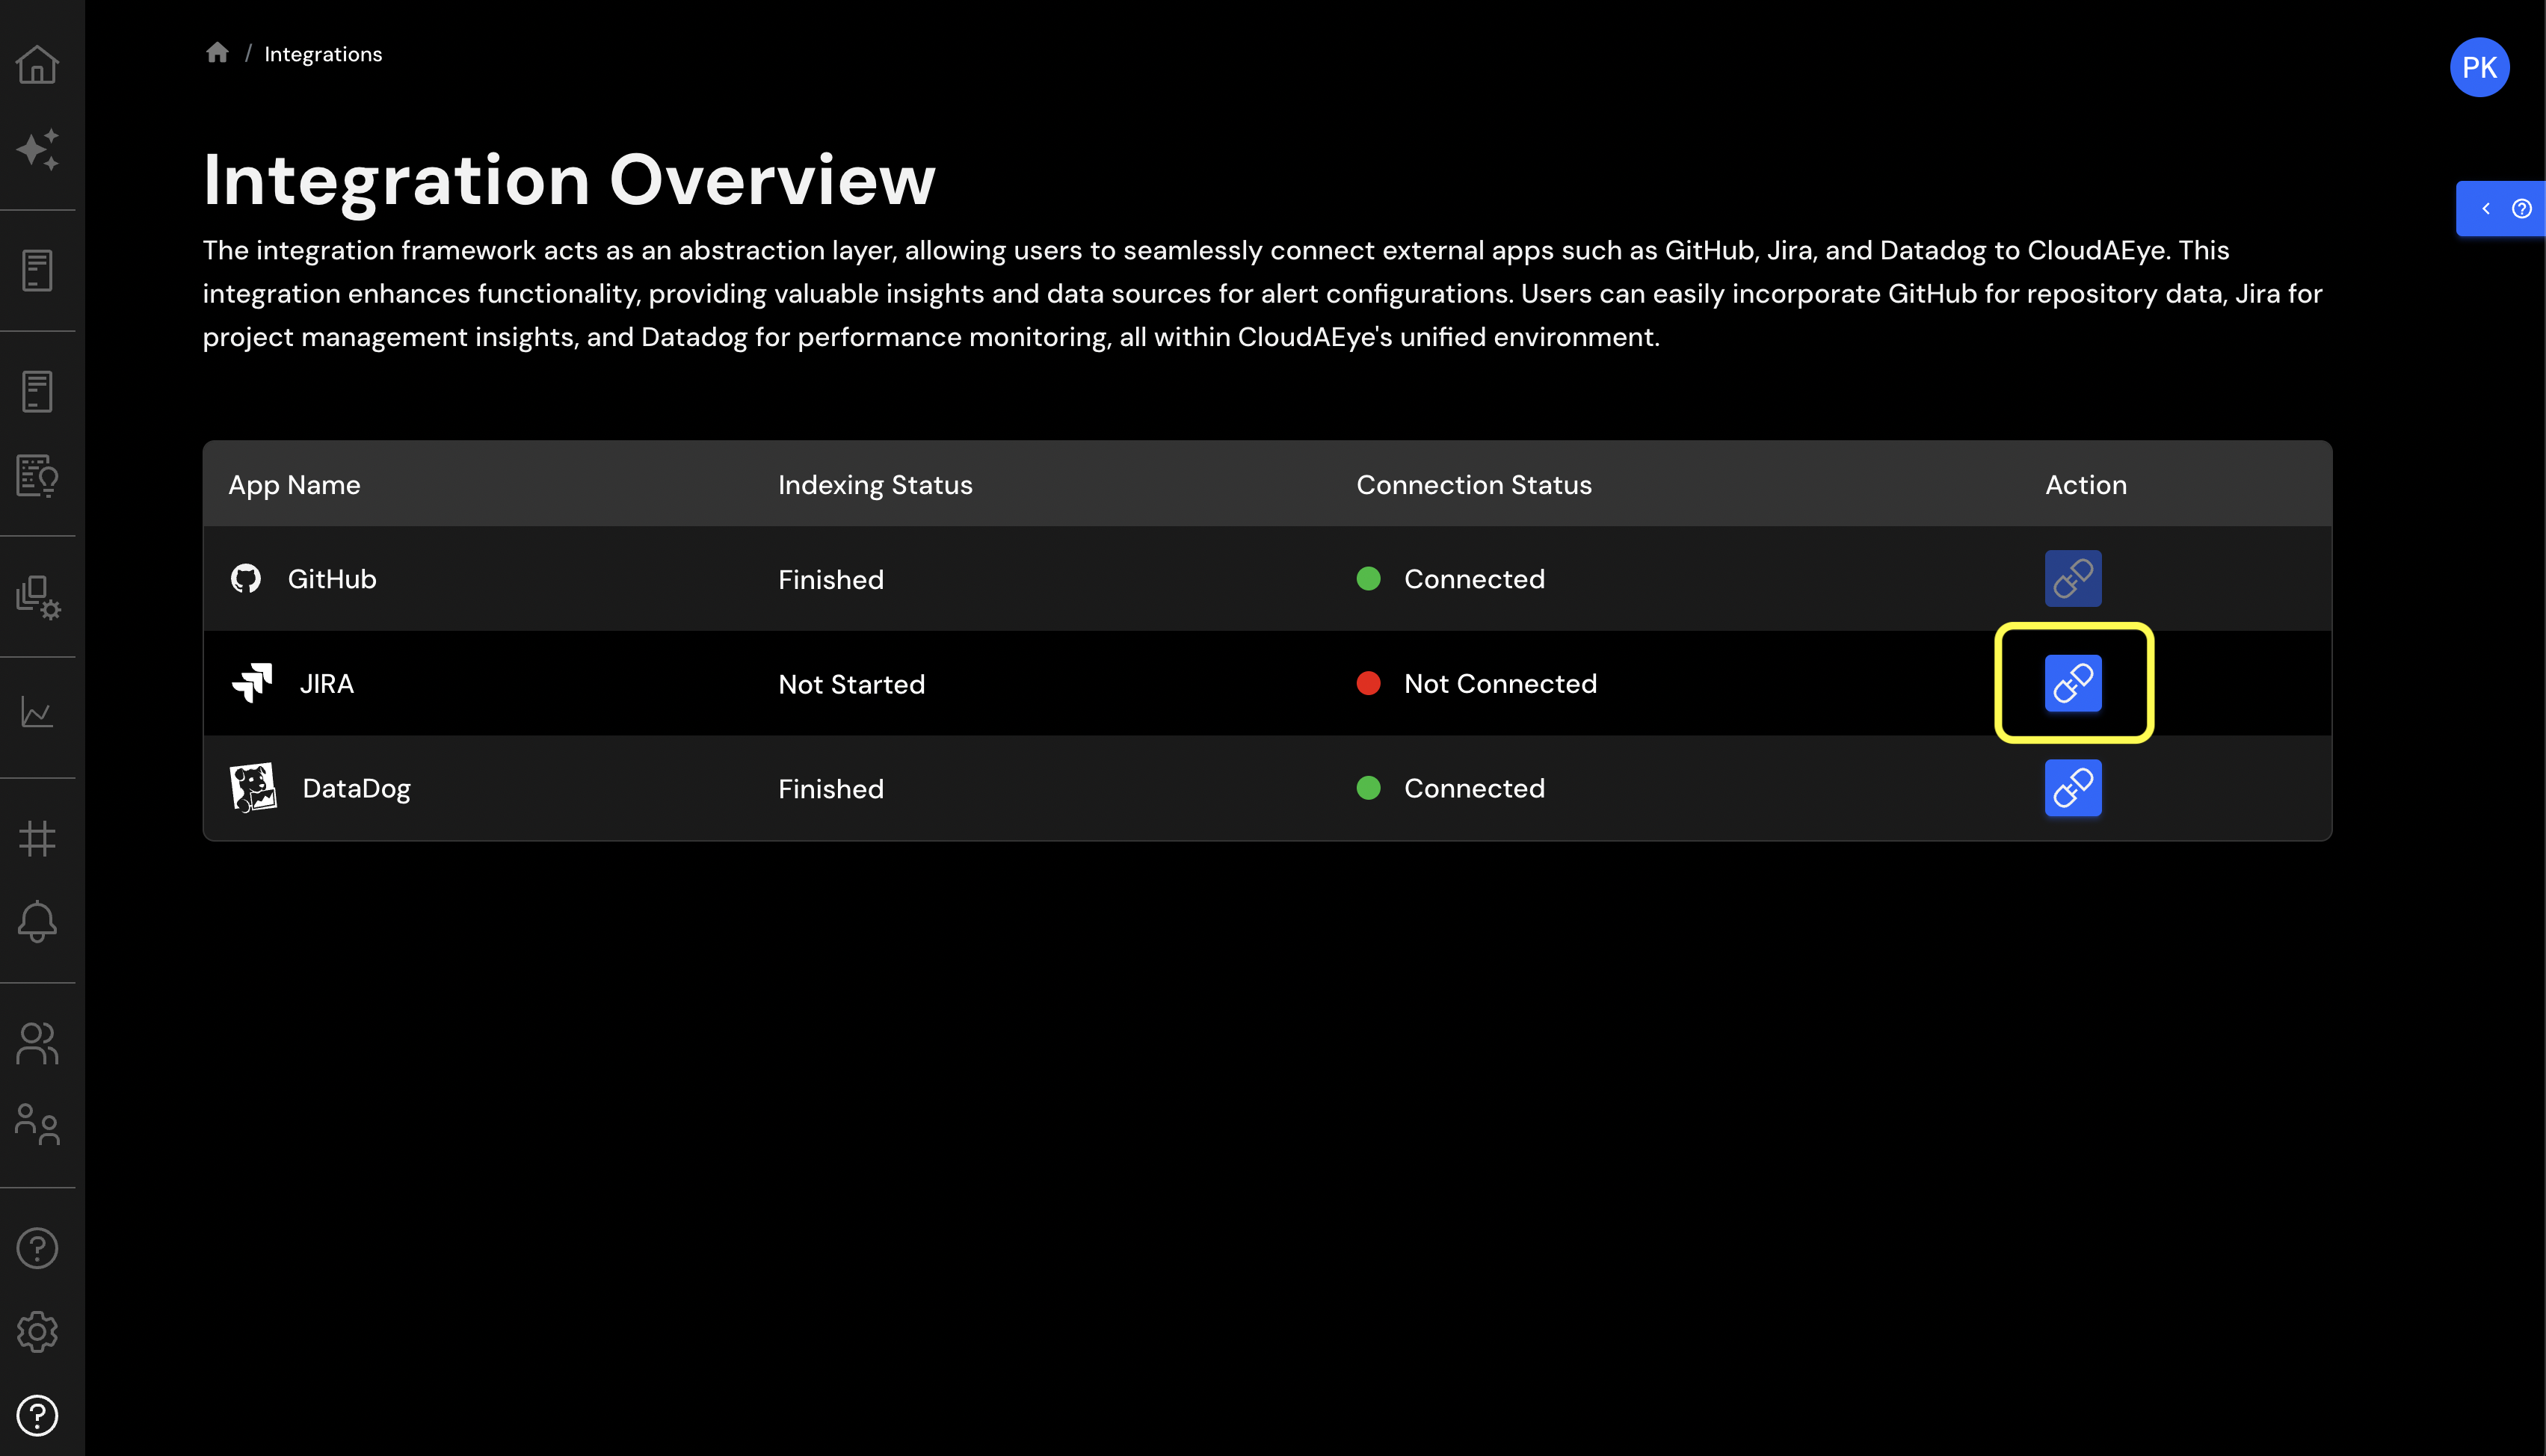
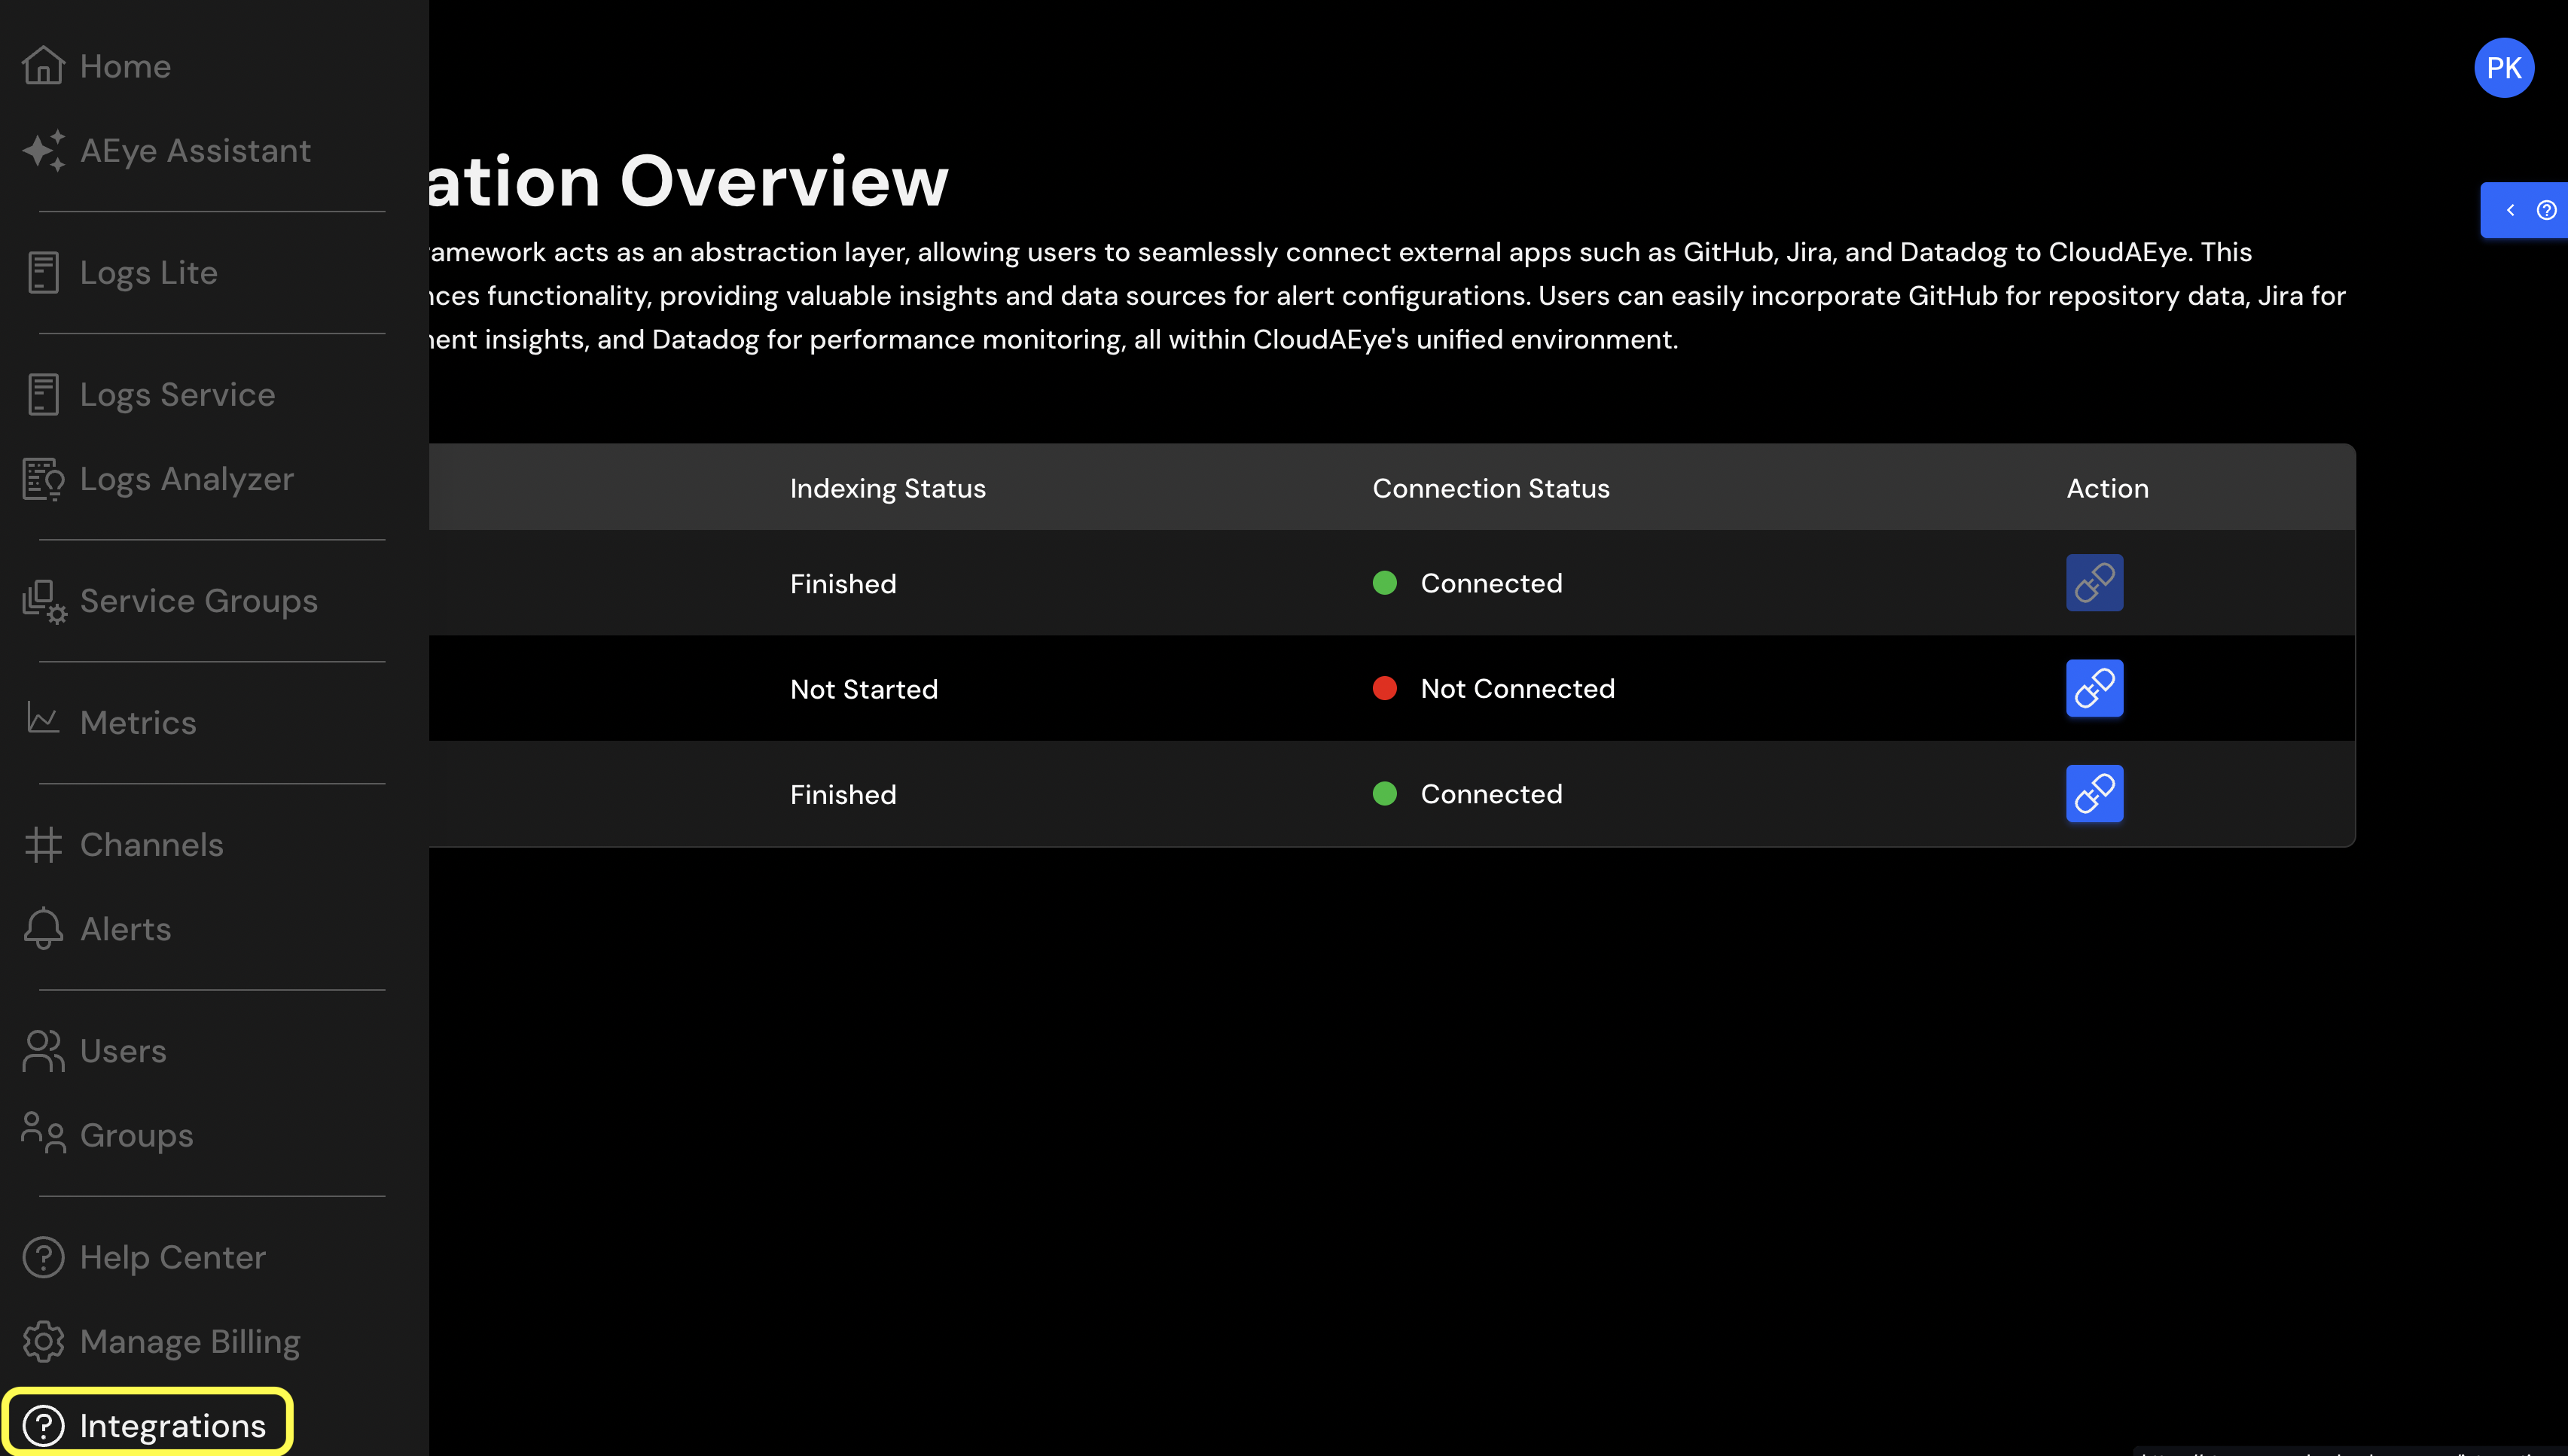 Then, click on the "Link Jira" button as shown below:
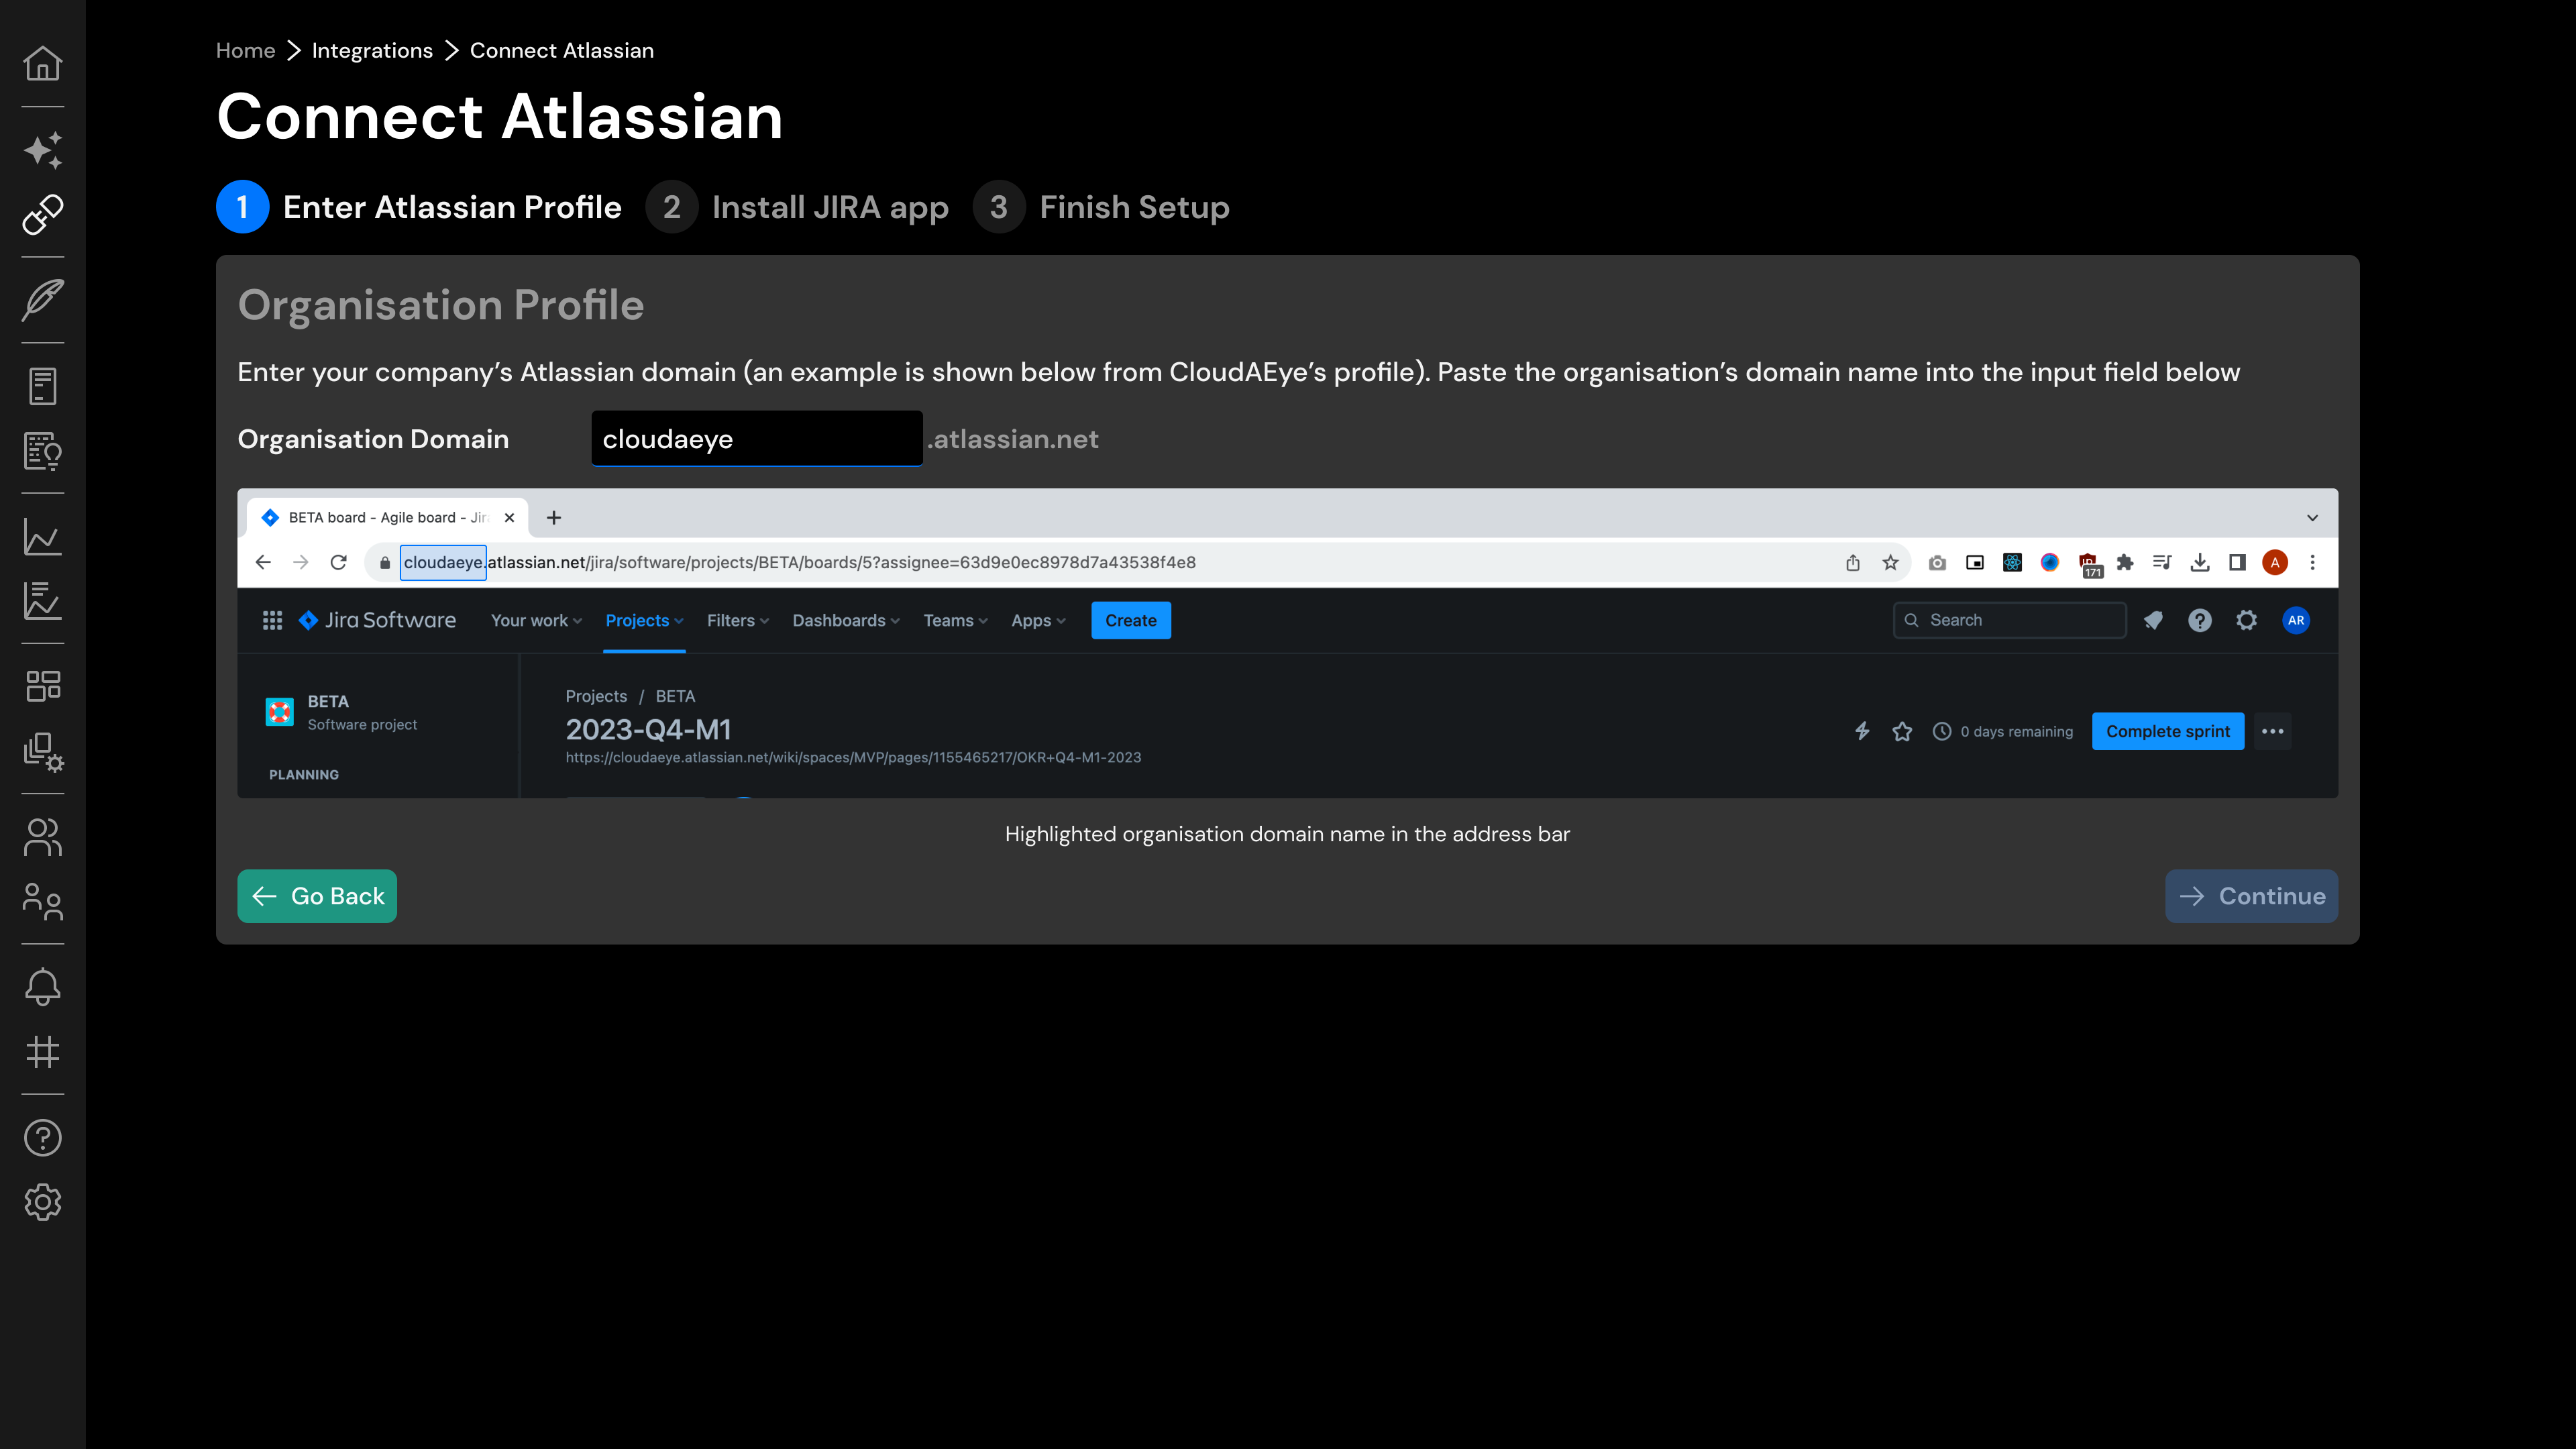
- Enter your organization's Domain in the field provided as illustrated here:
Step 2: Install from Atlassian Marketplace
- Click "Continue" to be redirected to the Atlassian Marketplace for app installation, as depicted here:
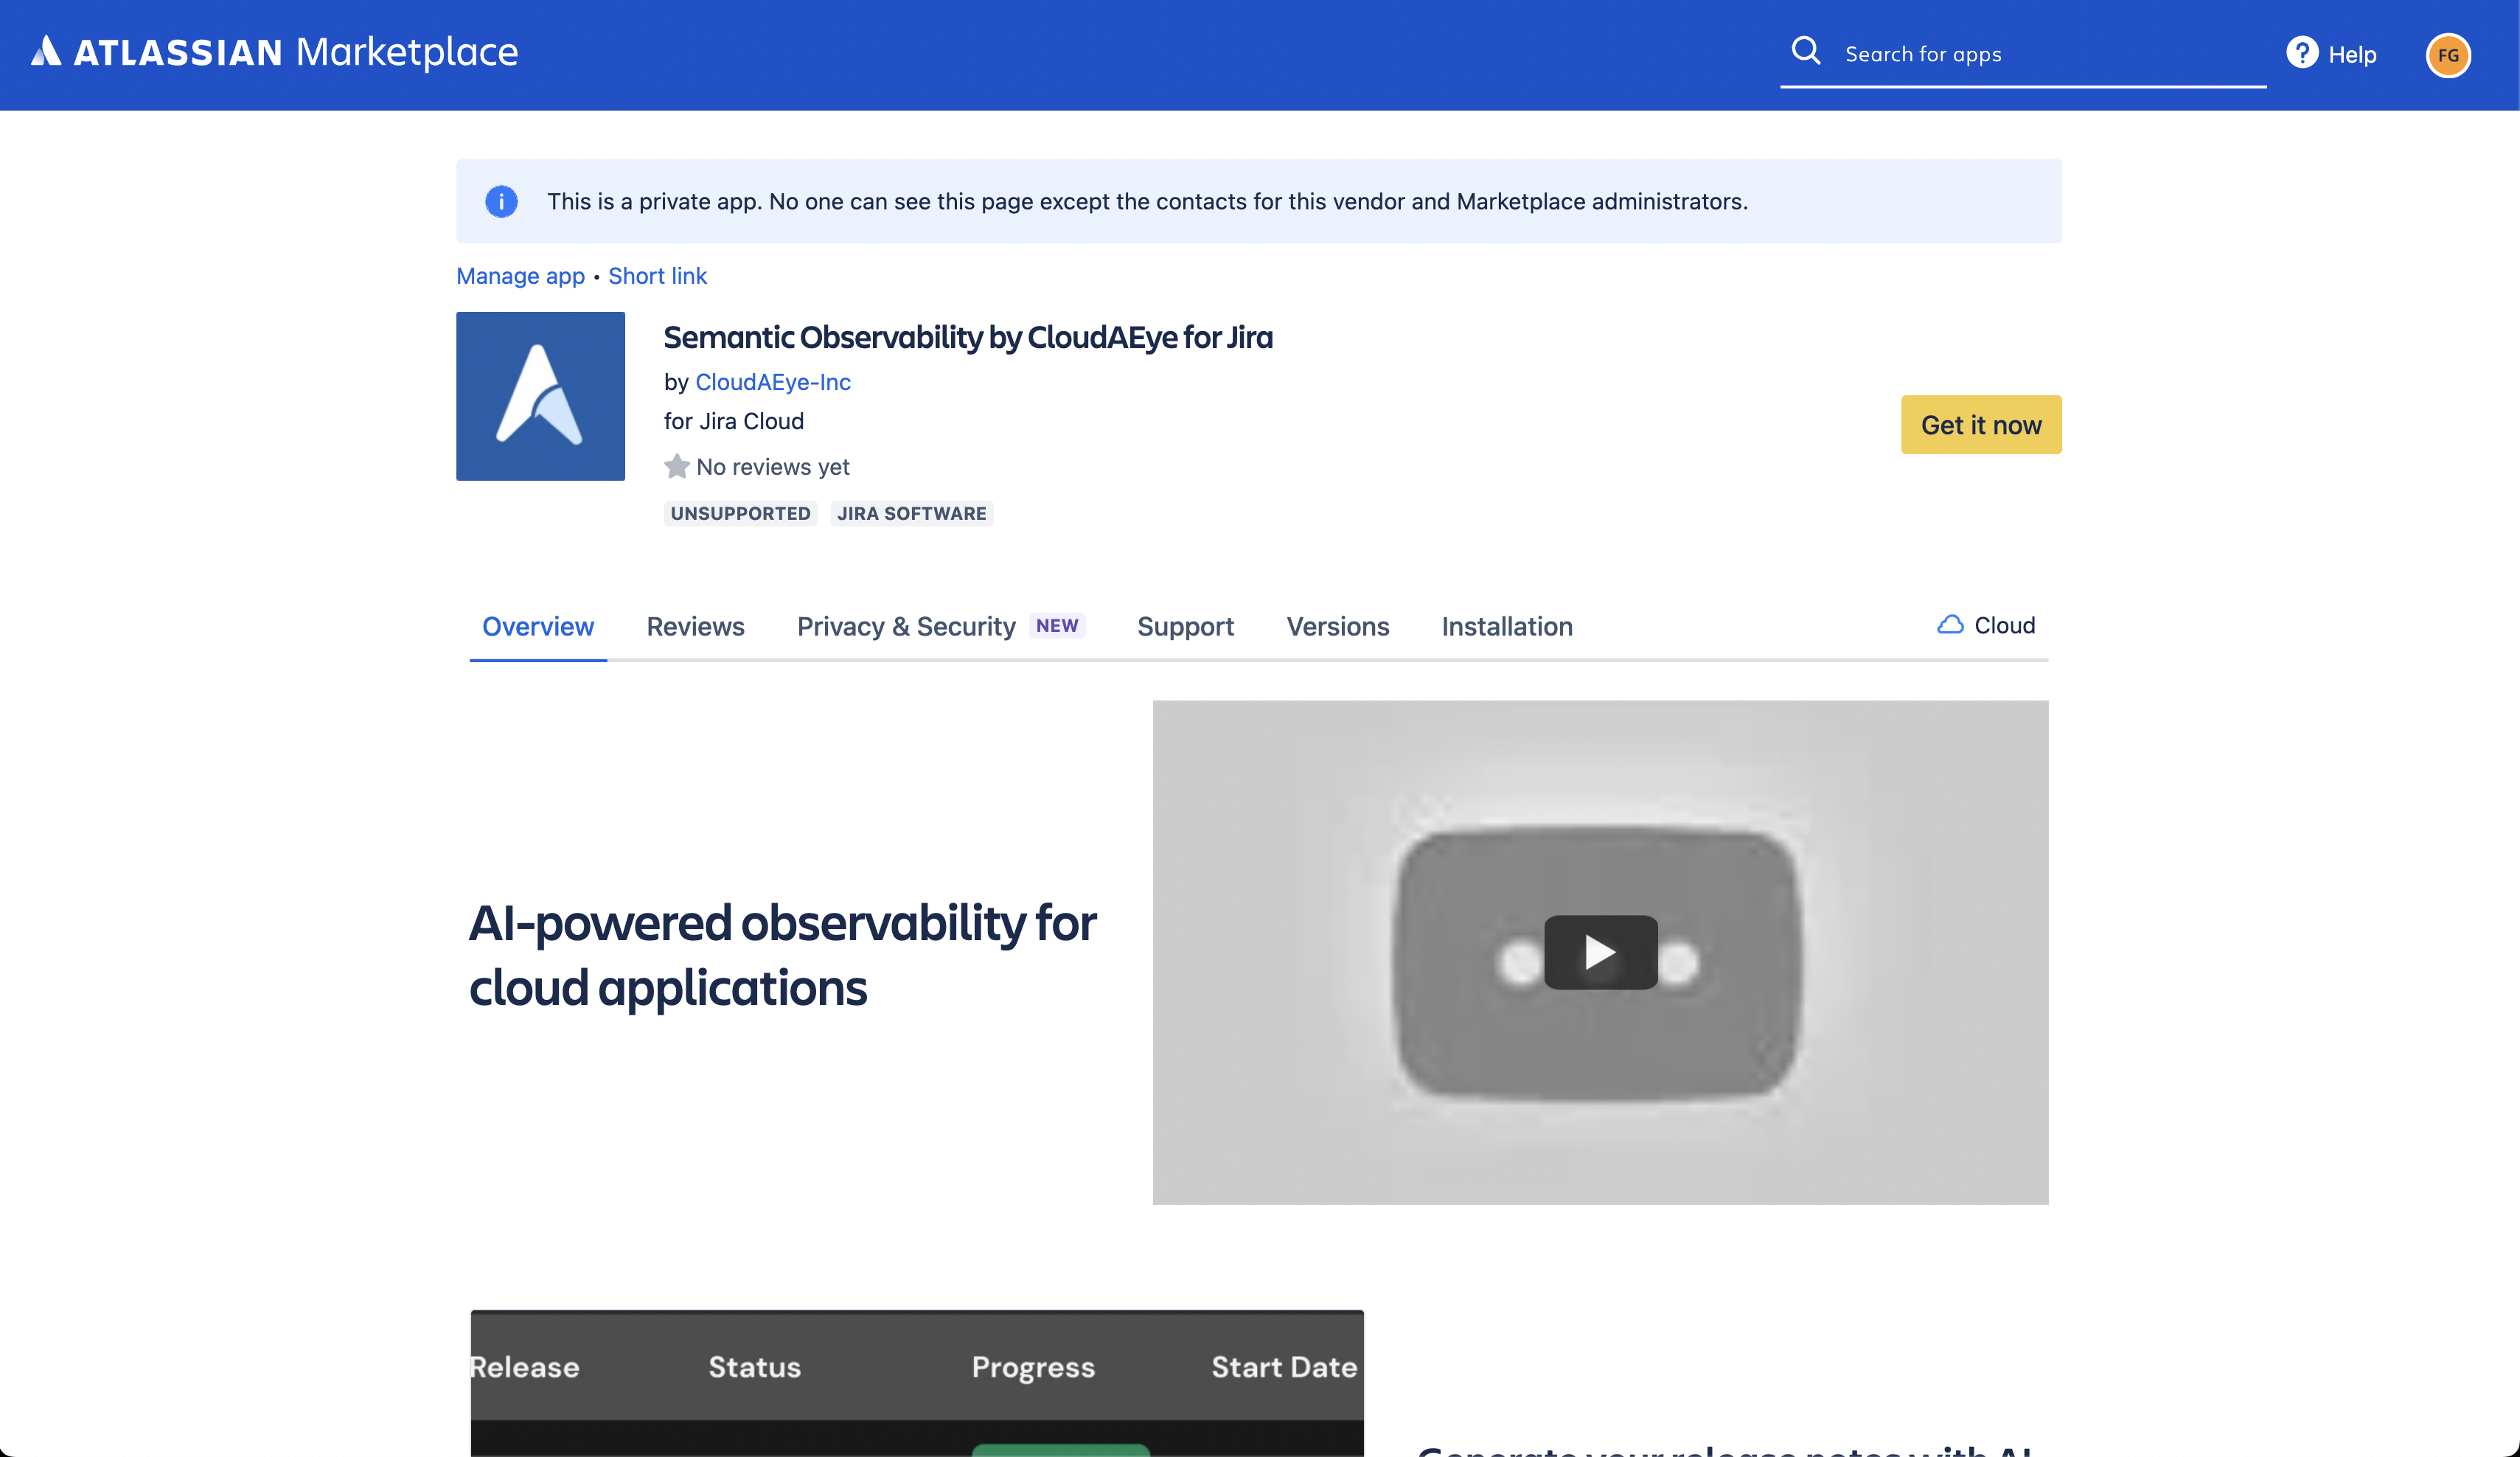
- Choose "Get it now" to proceed with the installation.
OR use the approach below if the Jira App is not found in the Atlassian Marketplace:
- Click on "Settings" under the "Manage apps" section of your Jira Atlassian account.
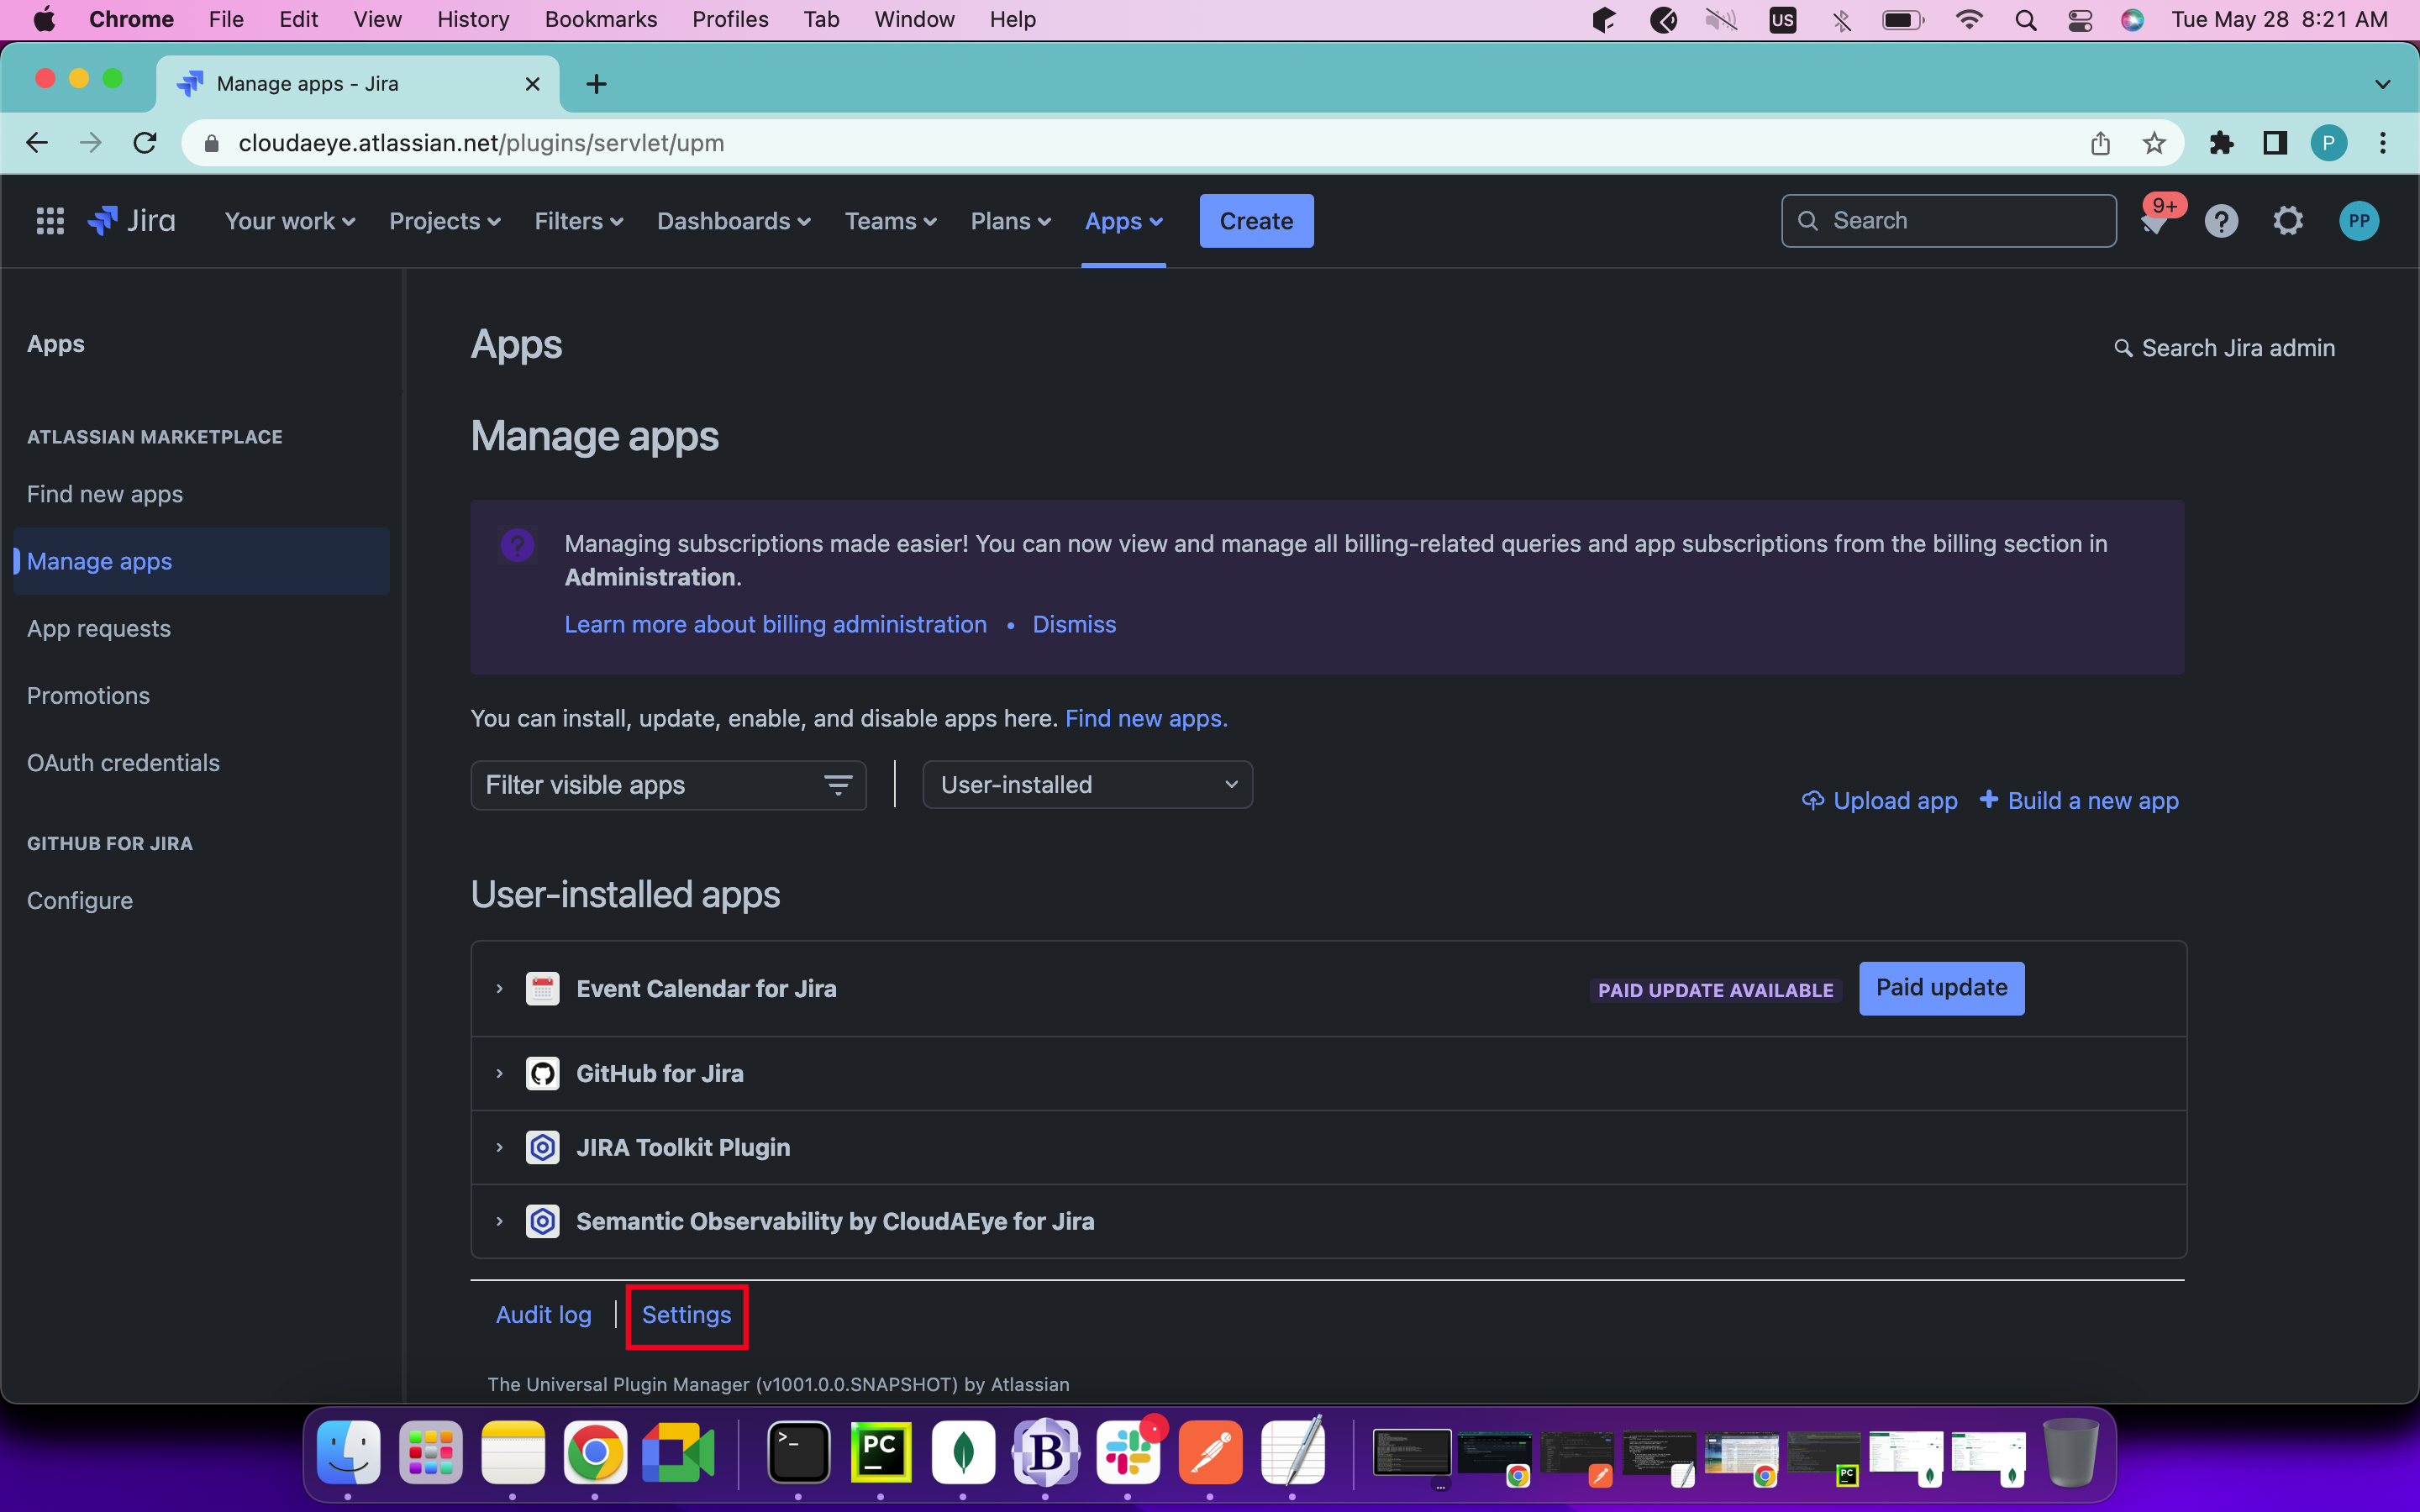
- Enable "development mode" and hit the "Apply" button.

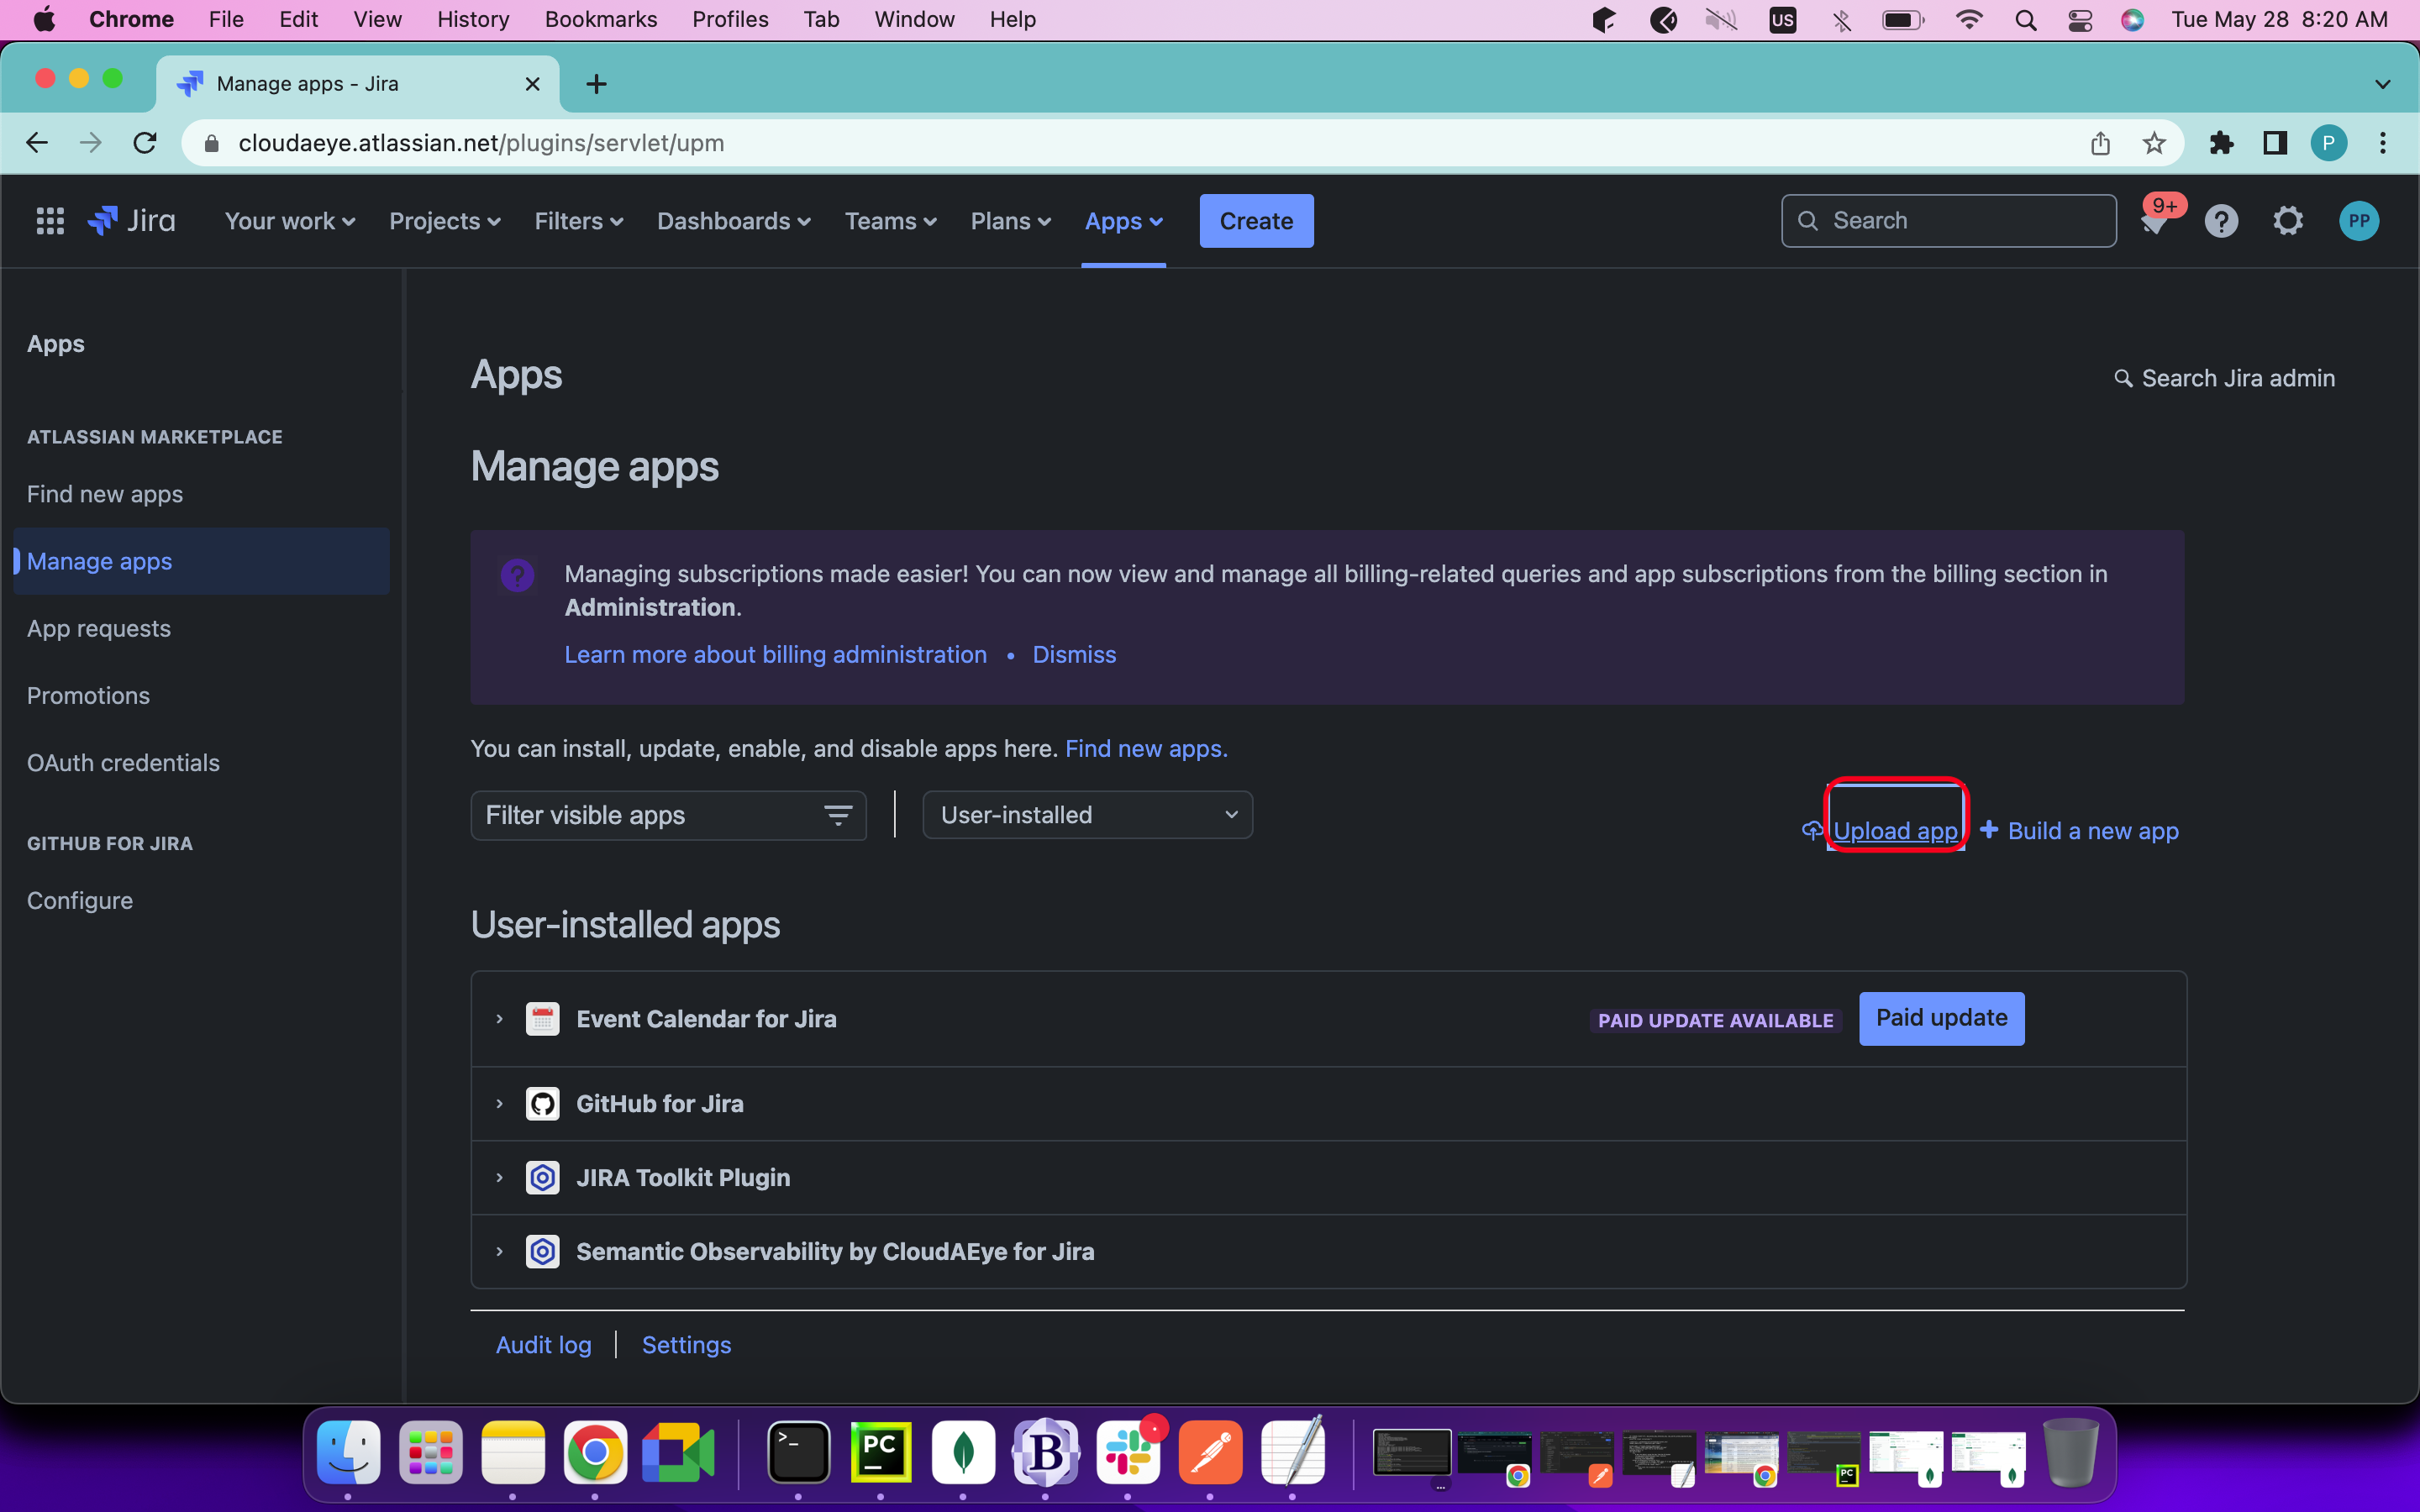
- Click on "Upload app."
- Paste the URL:
https://api.cloudaeye.com/code-change-rca/v1/jira-app/and hit the "Upload" button. This will install the Jira App in your Atlassian account.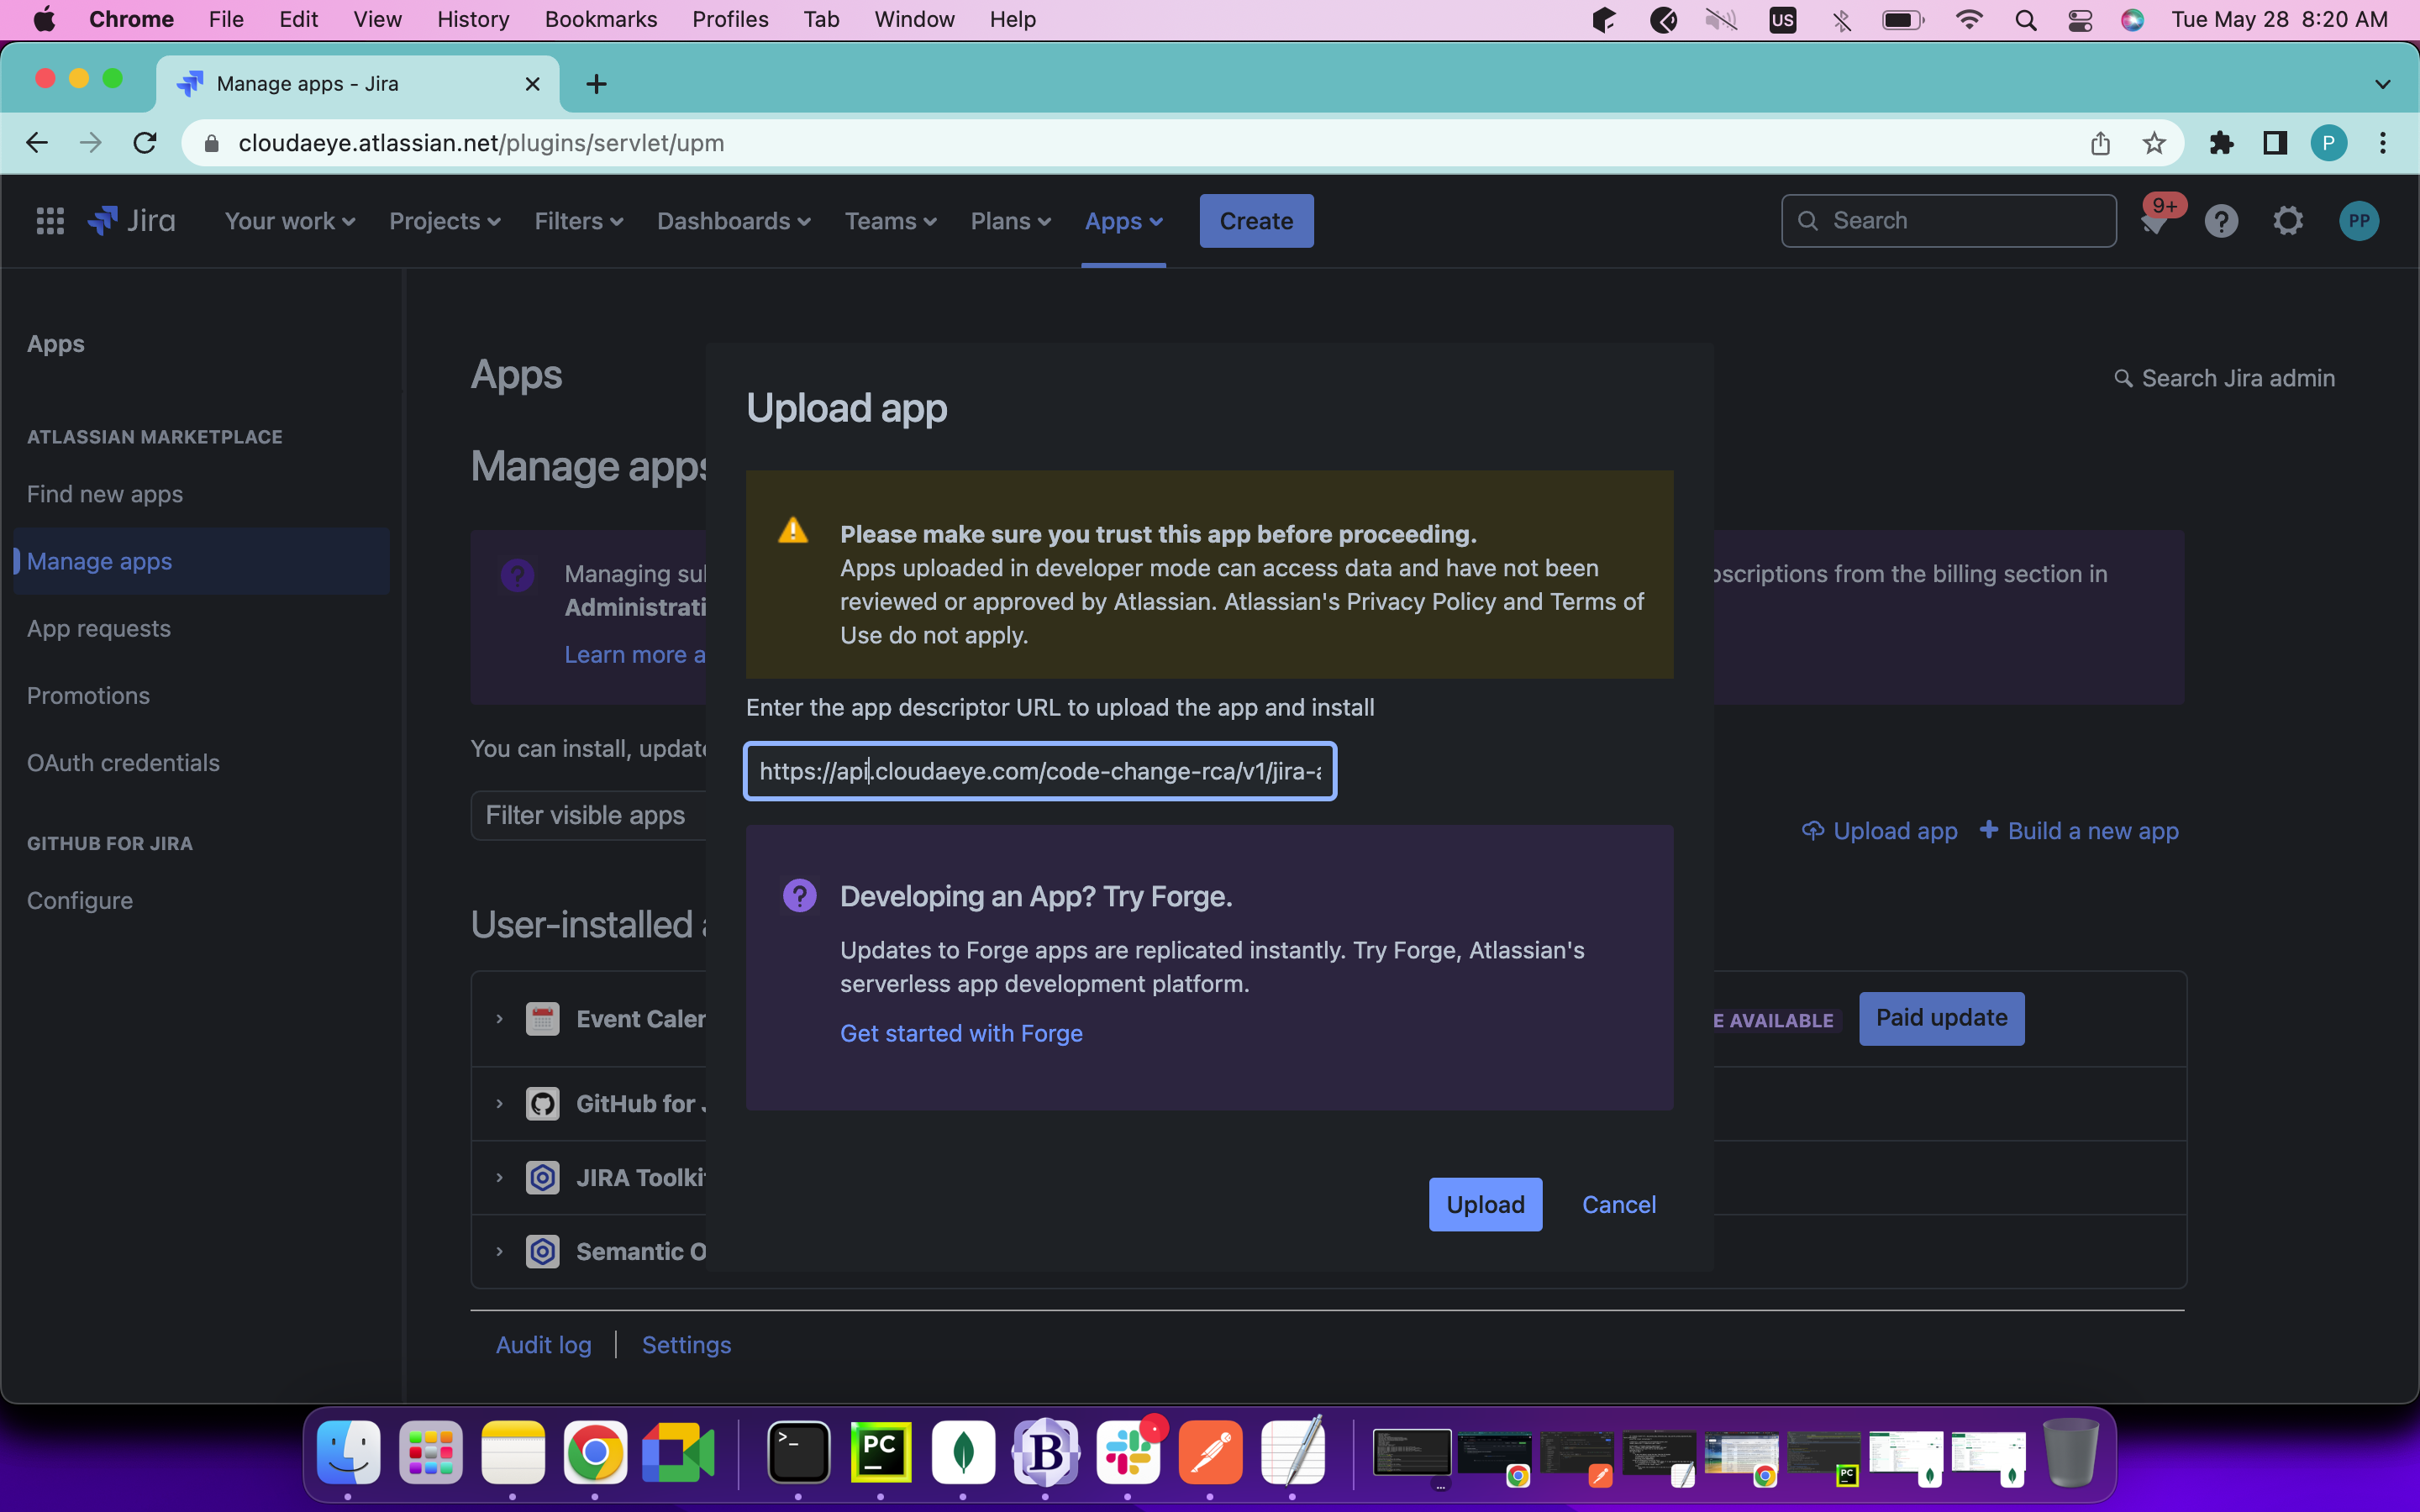
Step 3: Finalize Setup
- After installation, click "Continue" to navigate to the status page, confirming the app's successful connection:
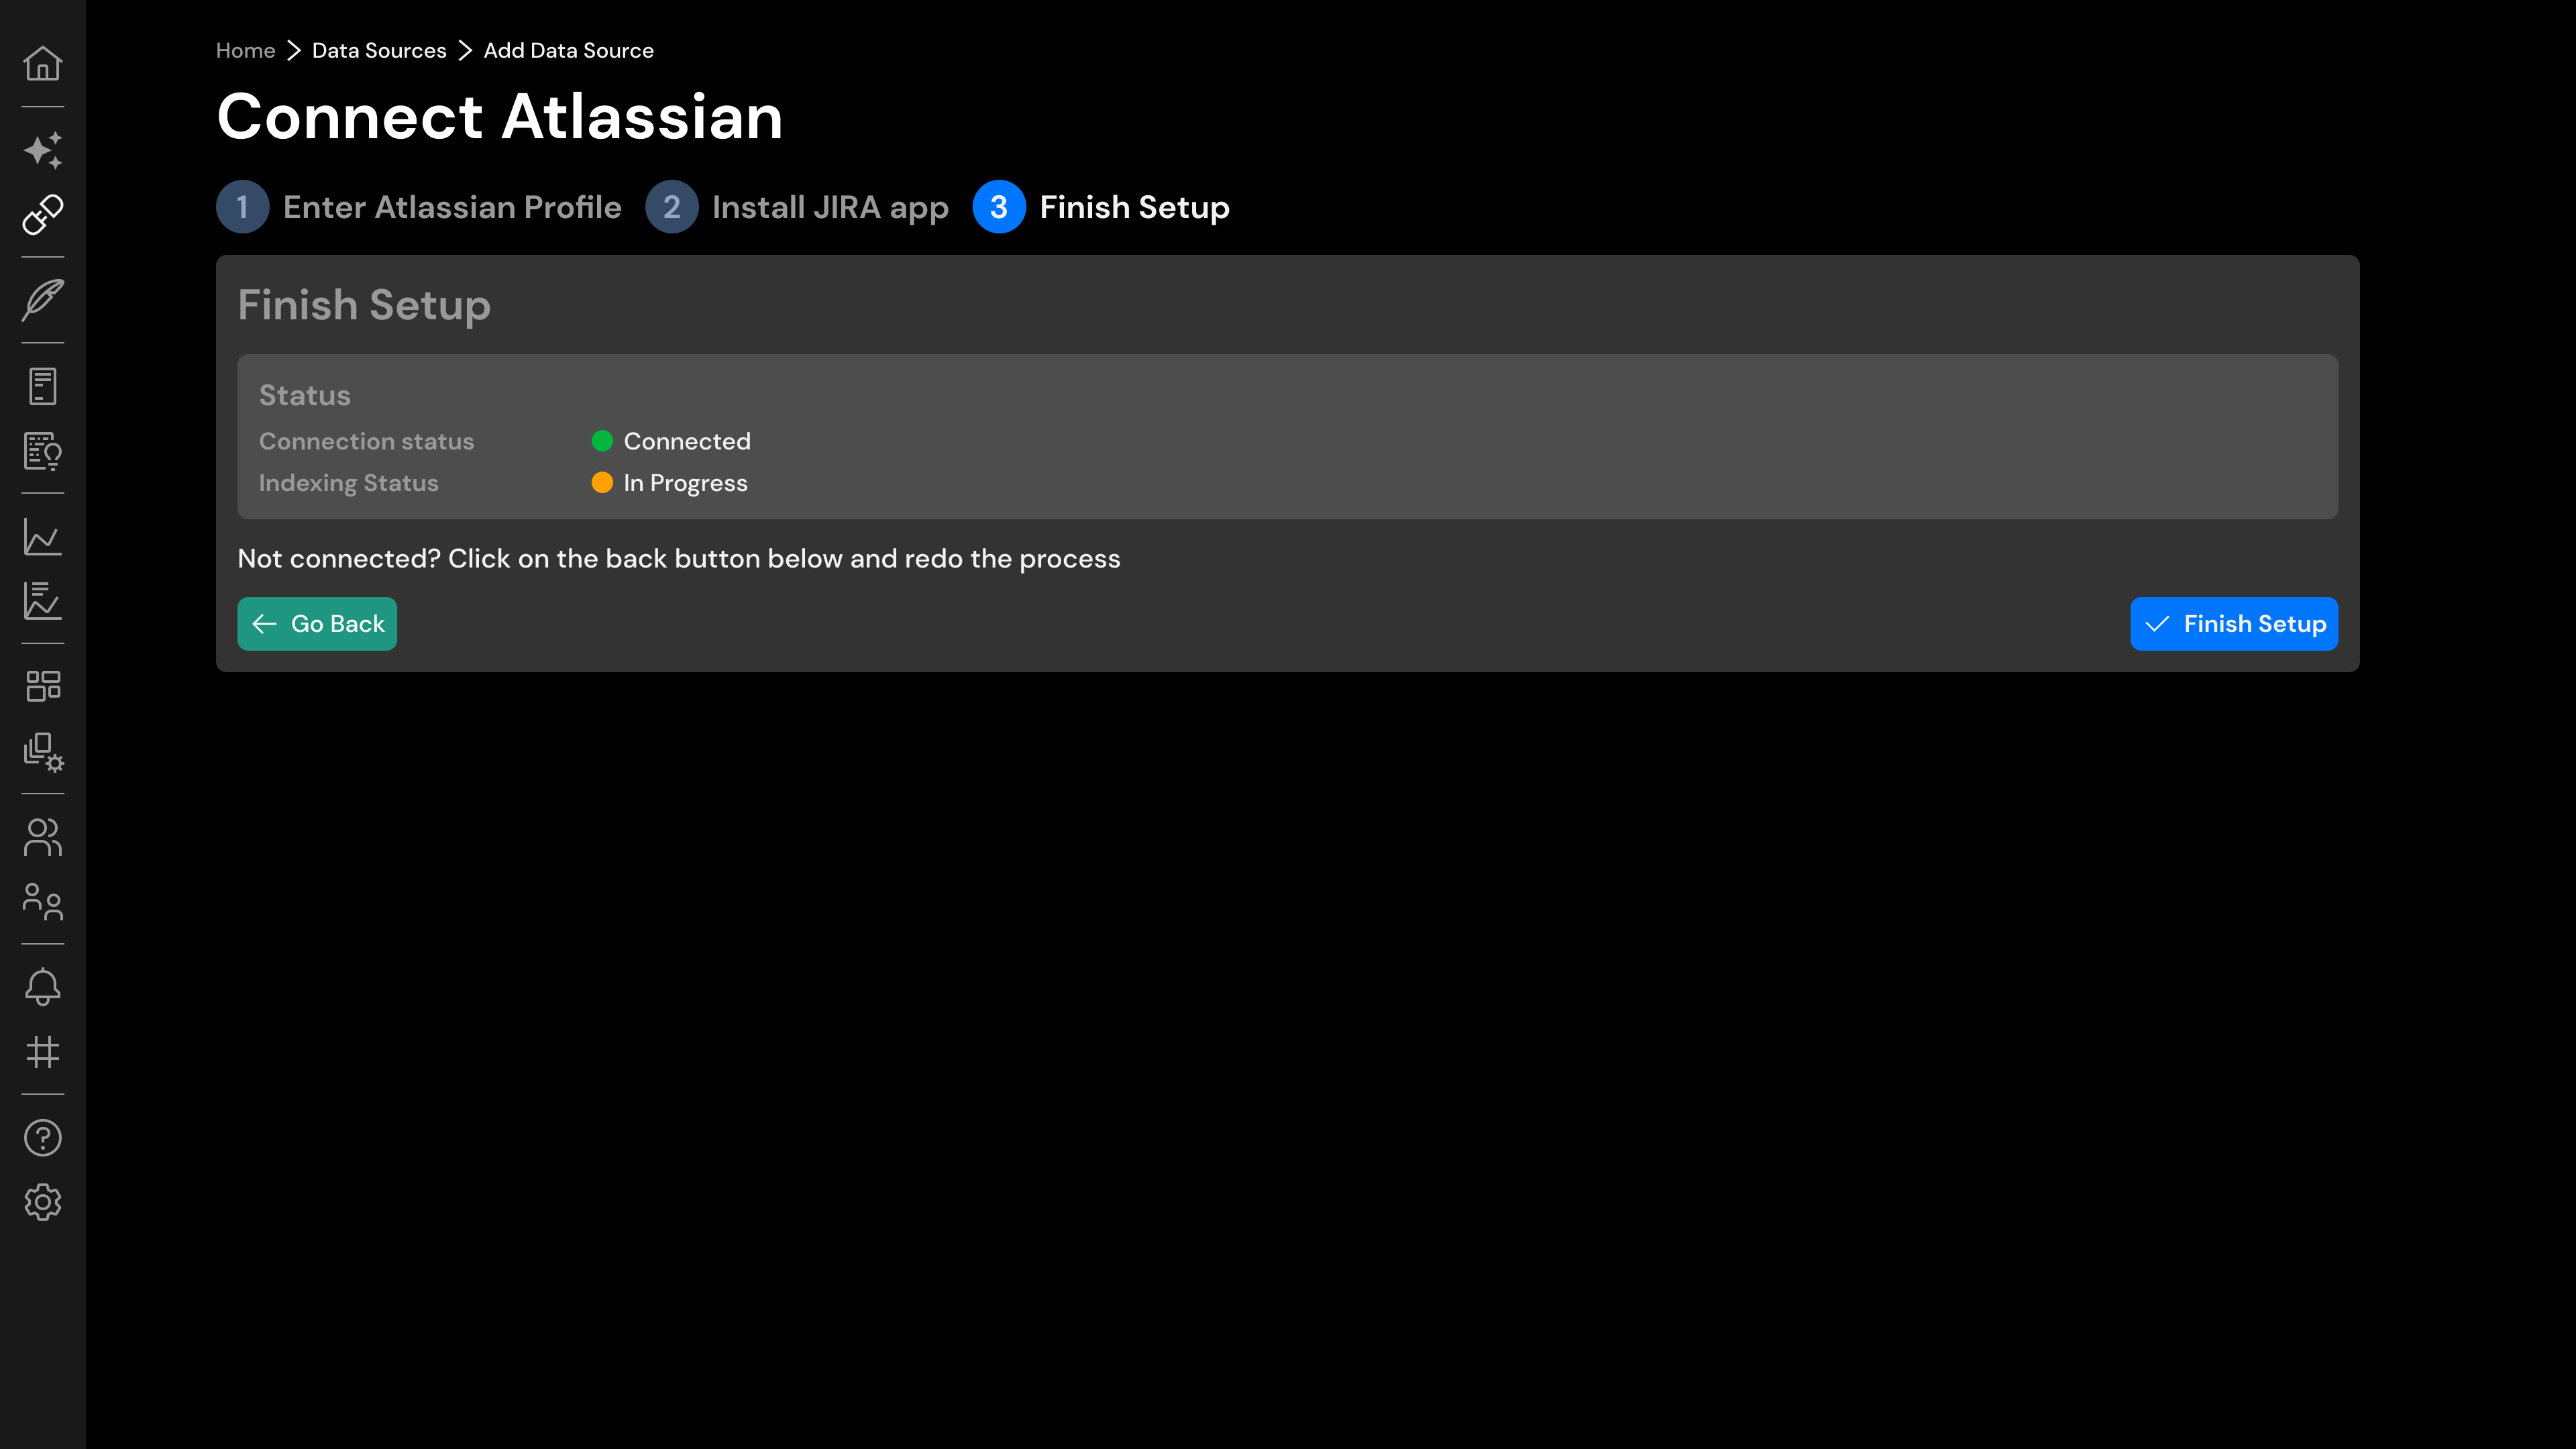
- Complete the integration by selecting "Finish Setup."
Congratulations! CloudAEye is now integrated with your Jira environment, ready to optimize your project management tasks.
Setting up CloudAEye Jira Plugin using App Descriptor
Step 1: Start the Integration
- Go to the "Integrations" section and select the "Connect Atlassian" option.
Then, click on the "Link Jira" button as shown below:
2. Enter your organization's Domain in the field provided as illustrated here:
Additional Resources
For further assistance or to explore more about CloudAEye and Jira integration, visit the following resources:
-
Support Page: Your go-to destination for all support-related inquiries.
-
For direct assistance, email our team at support@cloudaeye.com.