Creating an SNS Channel
Overview
Utilizing Amazon Simple Notification Service (SNS) with CloudAEye provides a flexible and robust way to handle notifications. By configuring an SNS channel, you allow CloudAEye to publish notifications to multiple subscribers, such as email, SMS, or even other applications. This guide will walk you through the process of setting up an SNS channel, including creating an SNS topic, adding the access policy, subscribing endpoints, and linking it to CloudAEye.
How to create an SNS Topic
To initiate the configuration, you will need to create an SNS topic within your AWS account. Follow the detailed steps outlined in Amazon's official guide: Creating an Amazon SNS Topic.
Adding the Access Policy
The access policy is a crucial part of configuring an SNS notification channel as it governs the permissions for who can publish messages to your topic. In the context of CloudAEye, the policy allows the specified AWS account to send notifications to the SNS topic you have created.
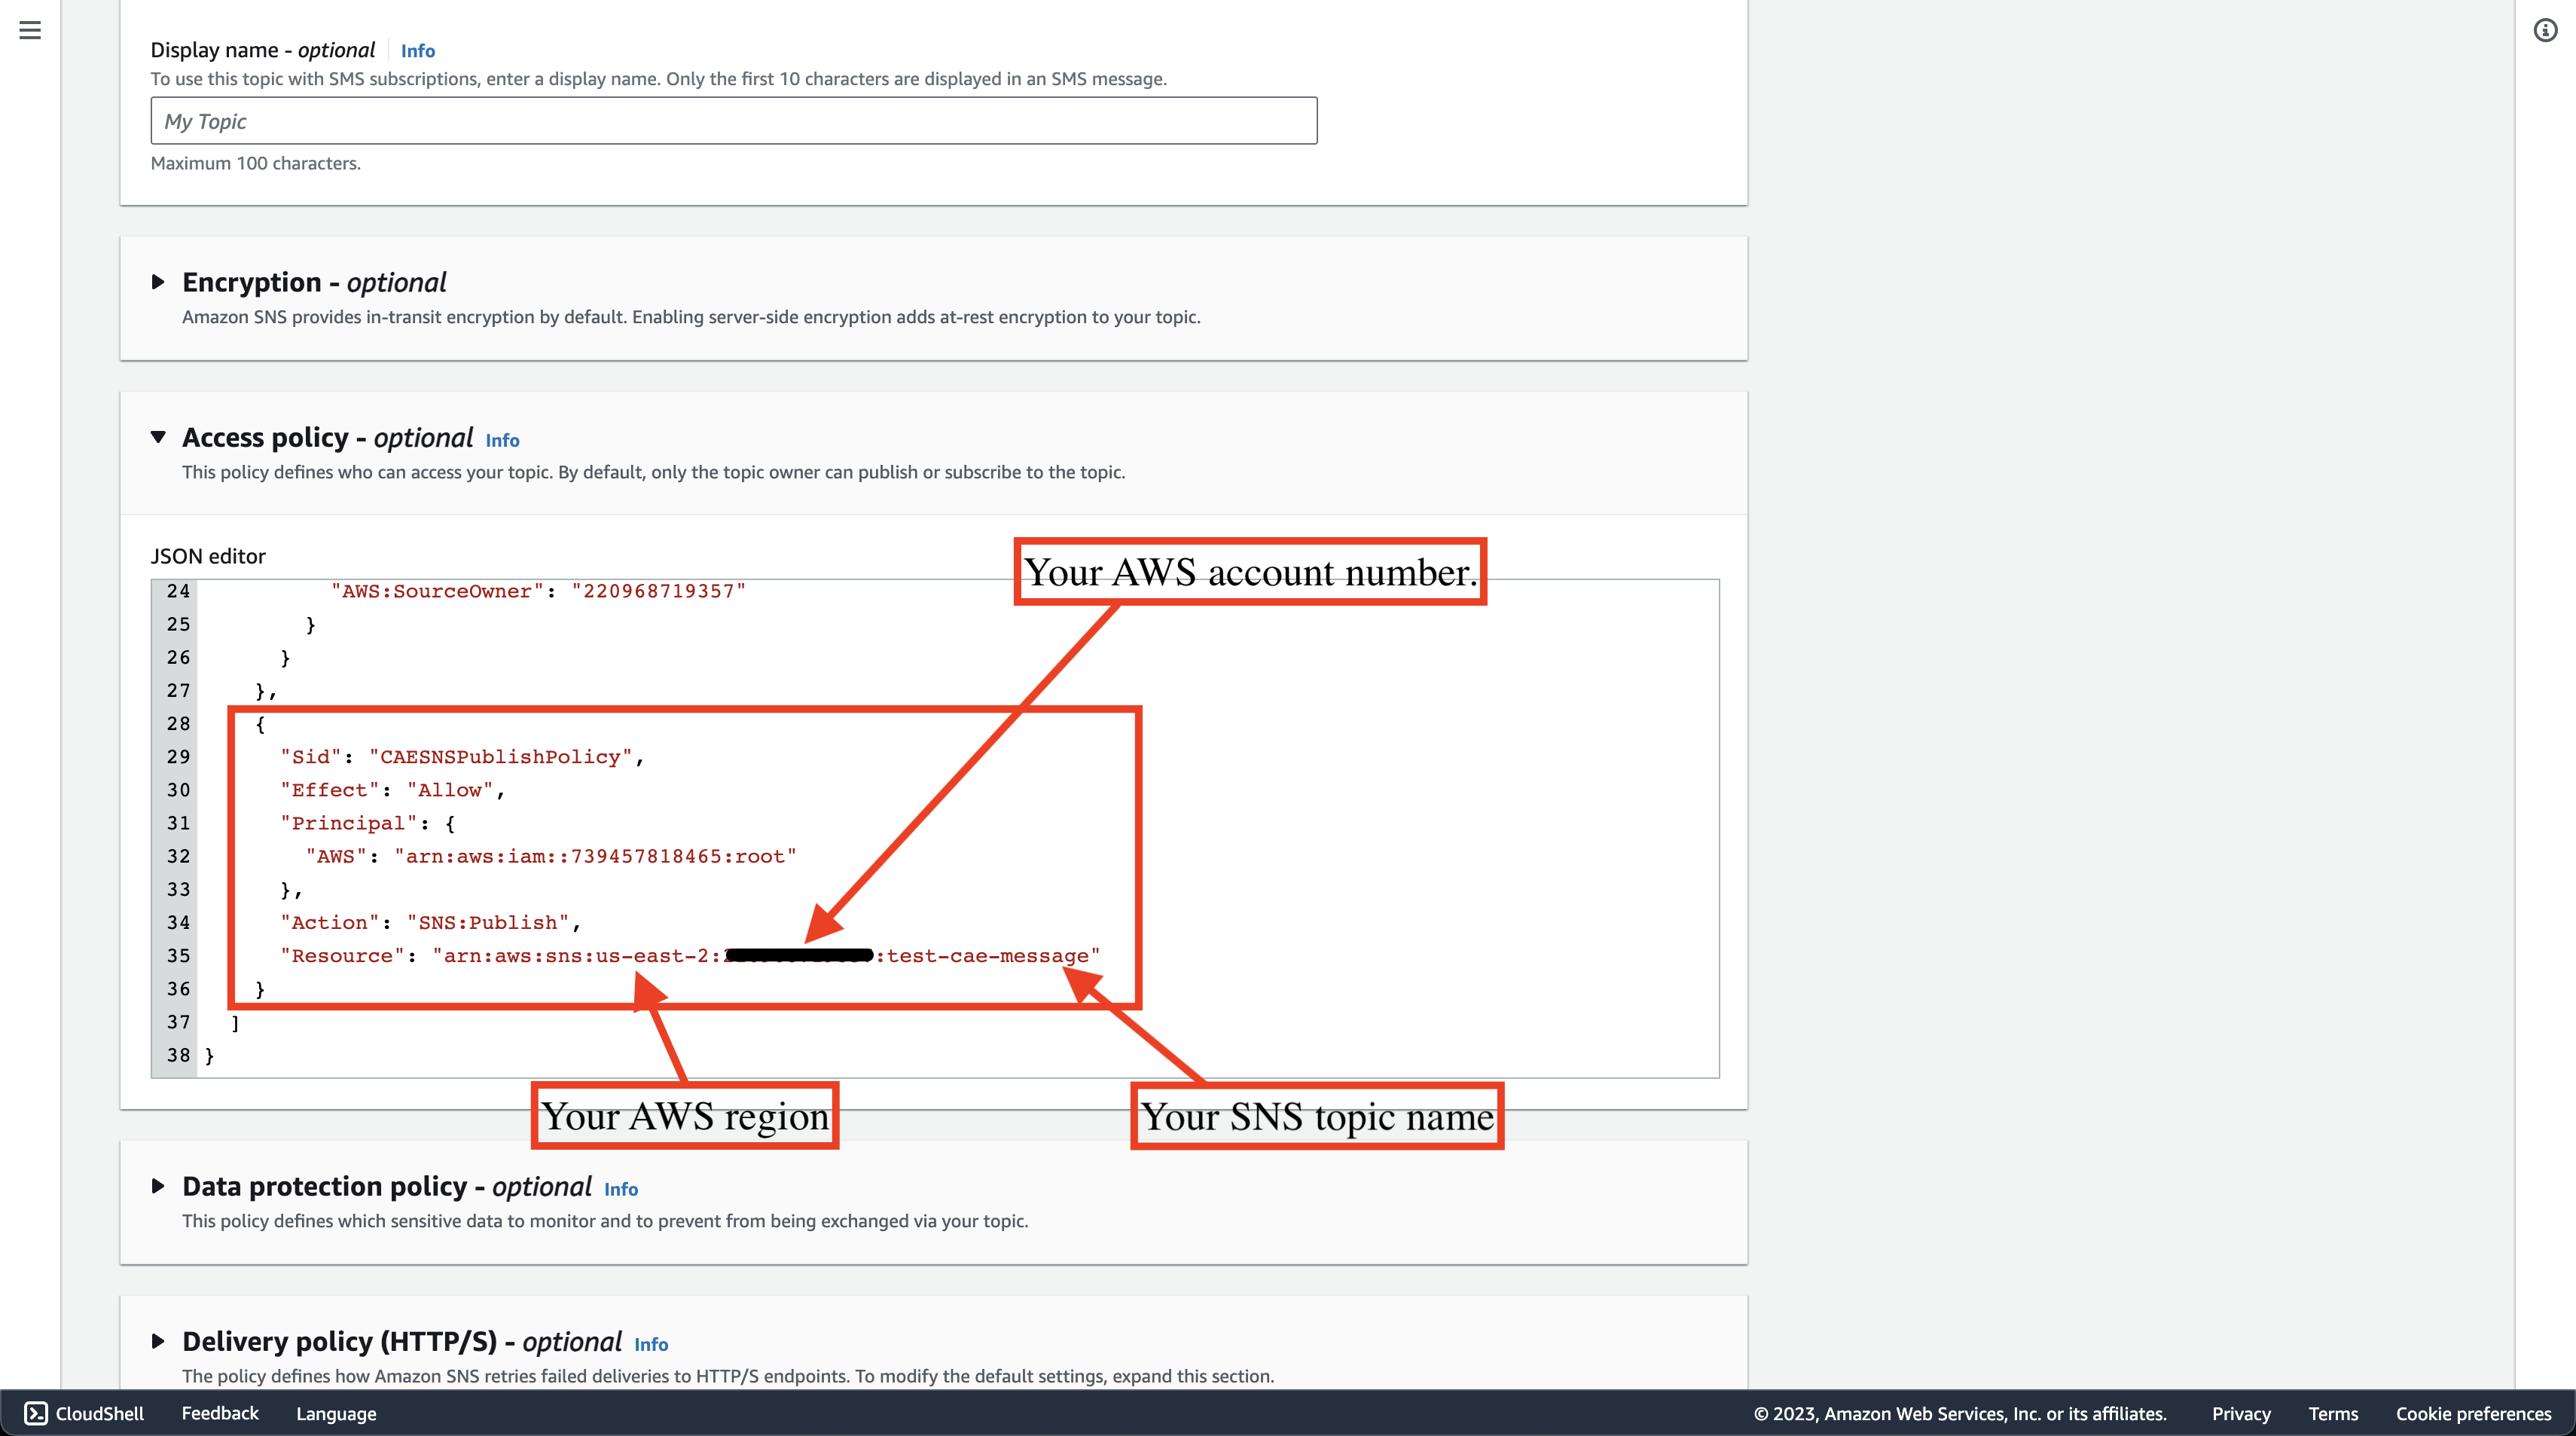
Below is the required policy structure:
{
  "Sid": "CAESNSPublishPolicy",
  "Effect": "Allow",
  "Principal": {
    "AWS": [
      "739457818465"
    ]
  },
  "Action": "SNS:Publish",
  "Resource": "arn:aws:sns:<your-region>:<your-account-id>:<your-topic-name>"
}
Here's a step-by-step guide on how to attach this policy to your SNS topic:
-
Navigate to Your Topic: Visit your AWS SNS dashboard and find the SNS topic you want to edit. Click on the Edit button to open the topic's settings.
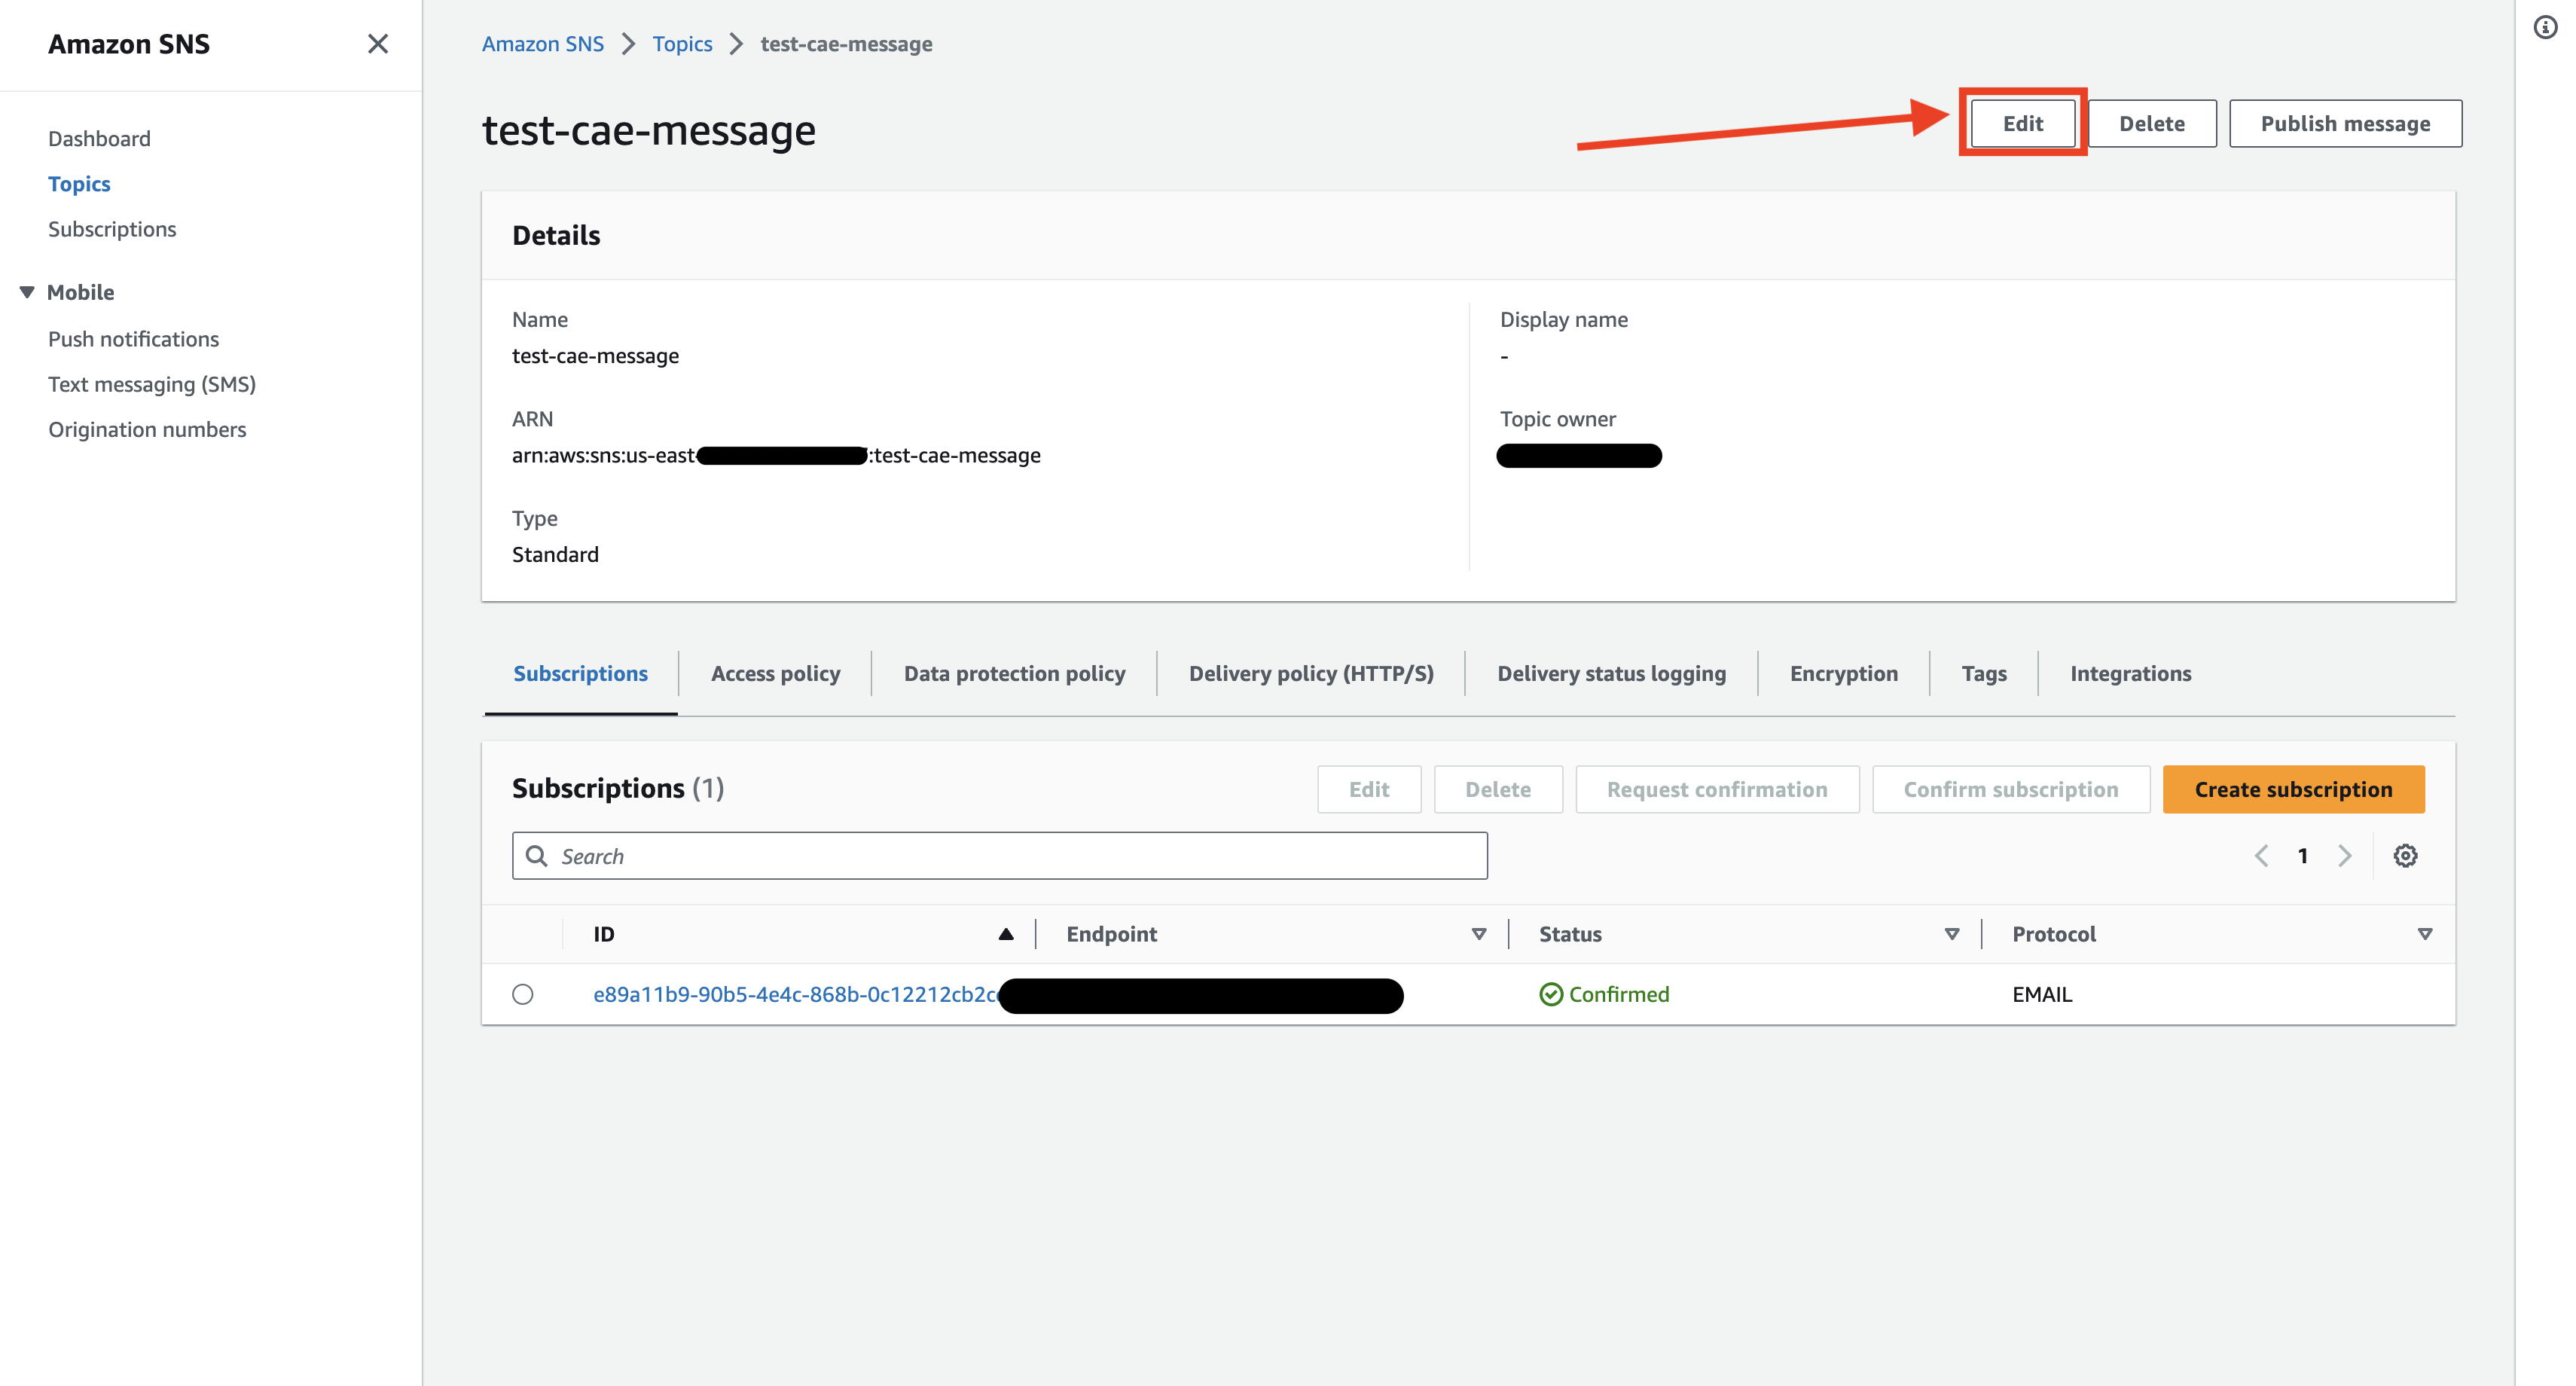
-
Access the Policy Settings: Within the topic's settings, find and click on the Access Policy option. This will open the policy editor for your topic.
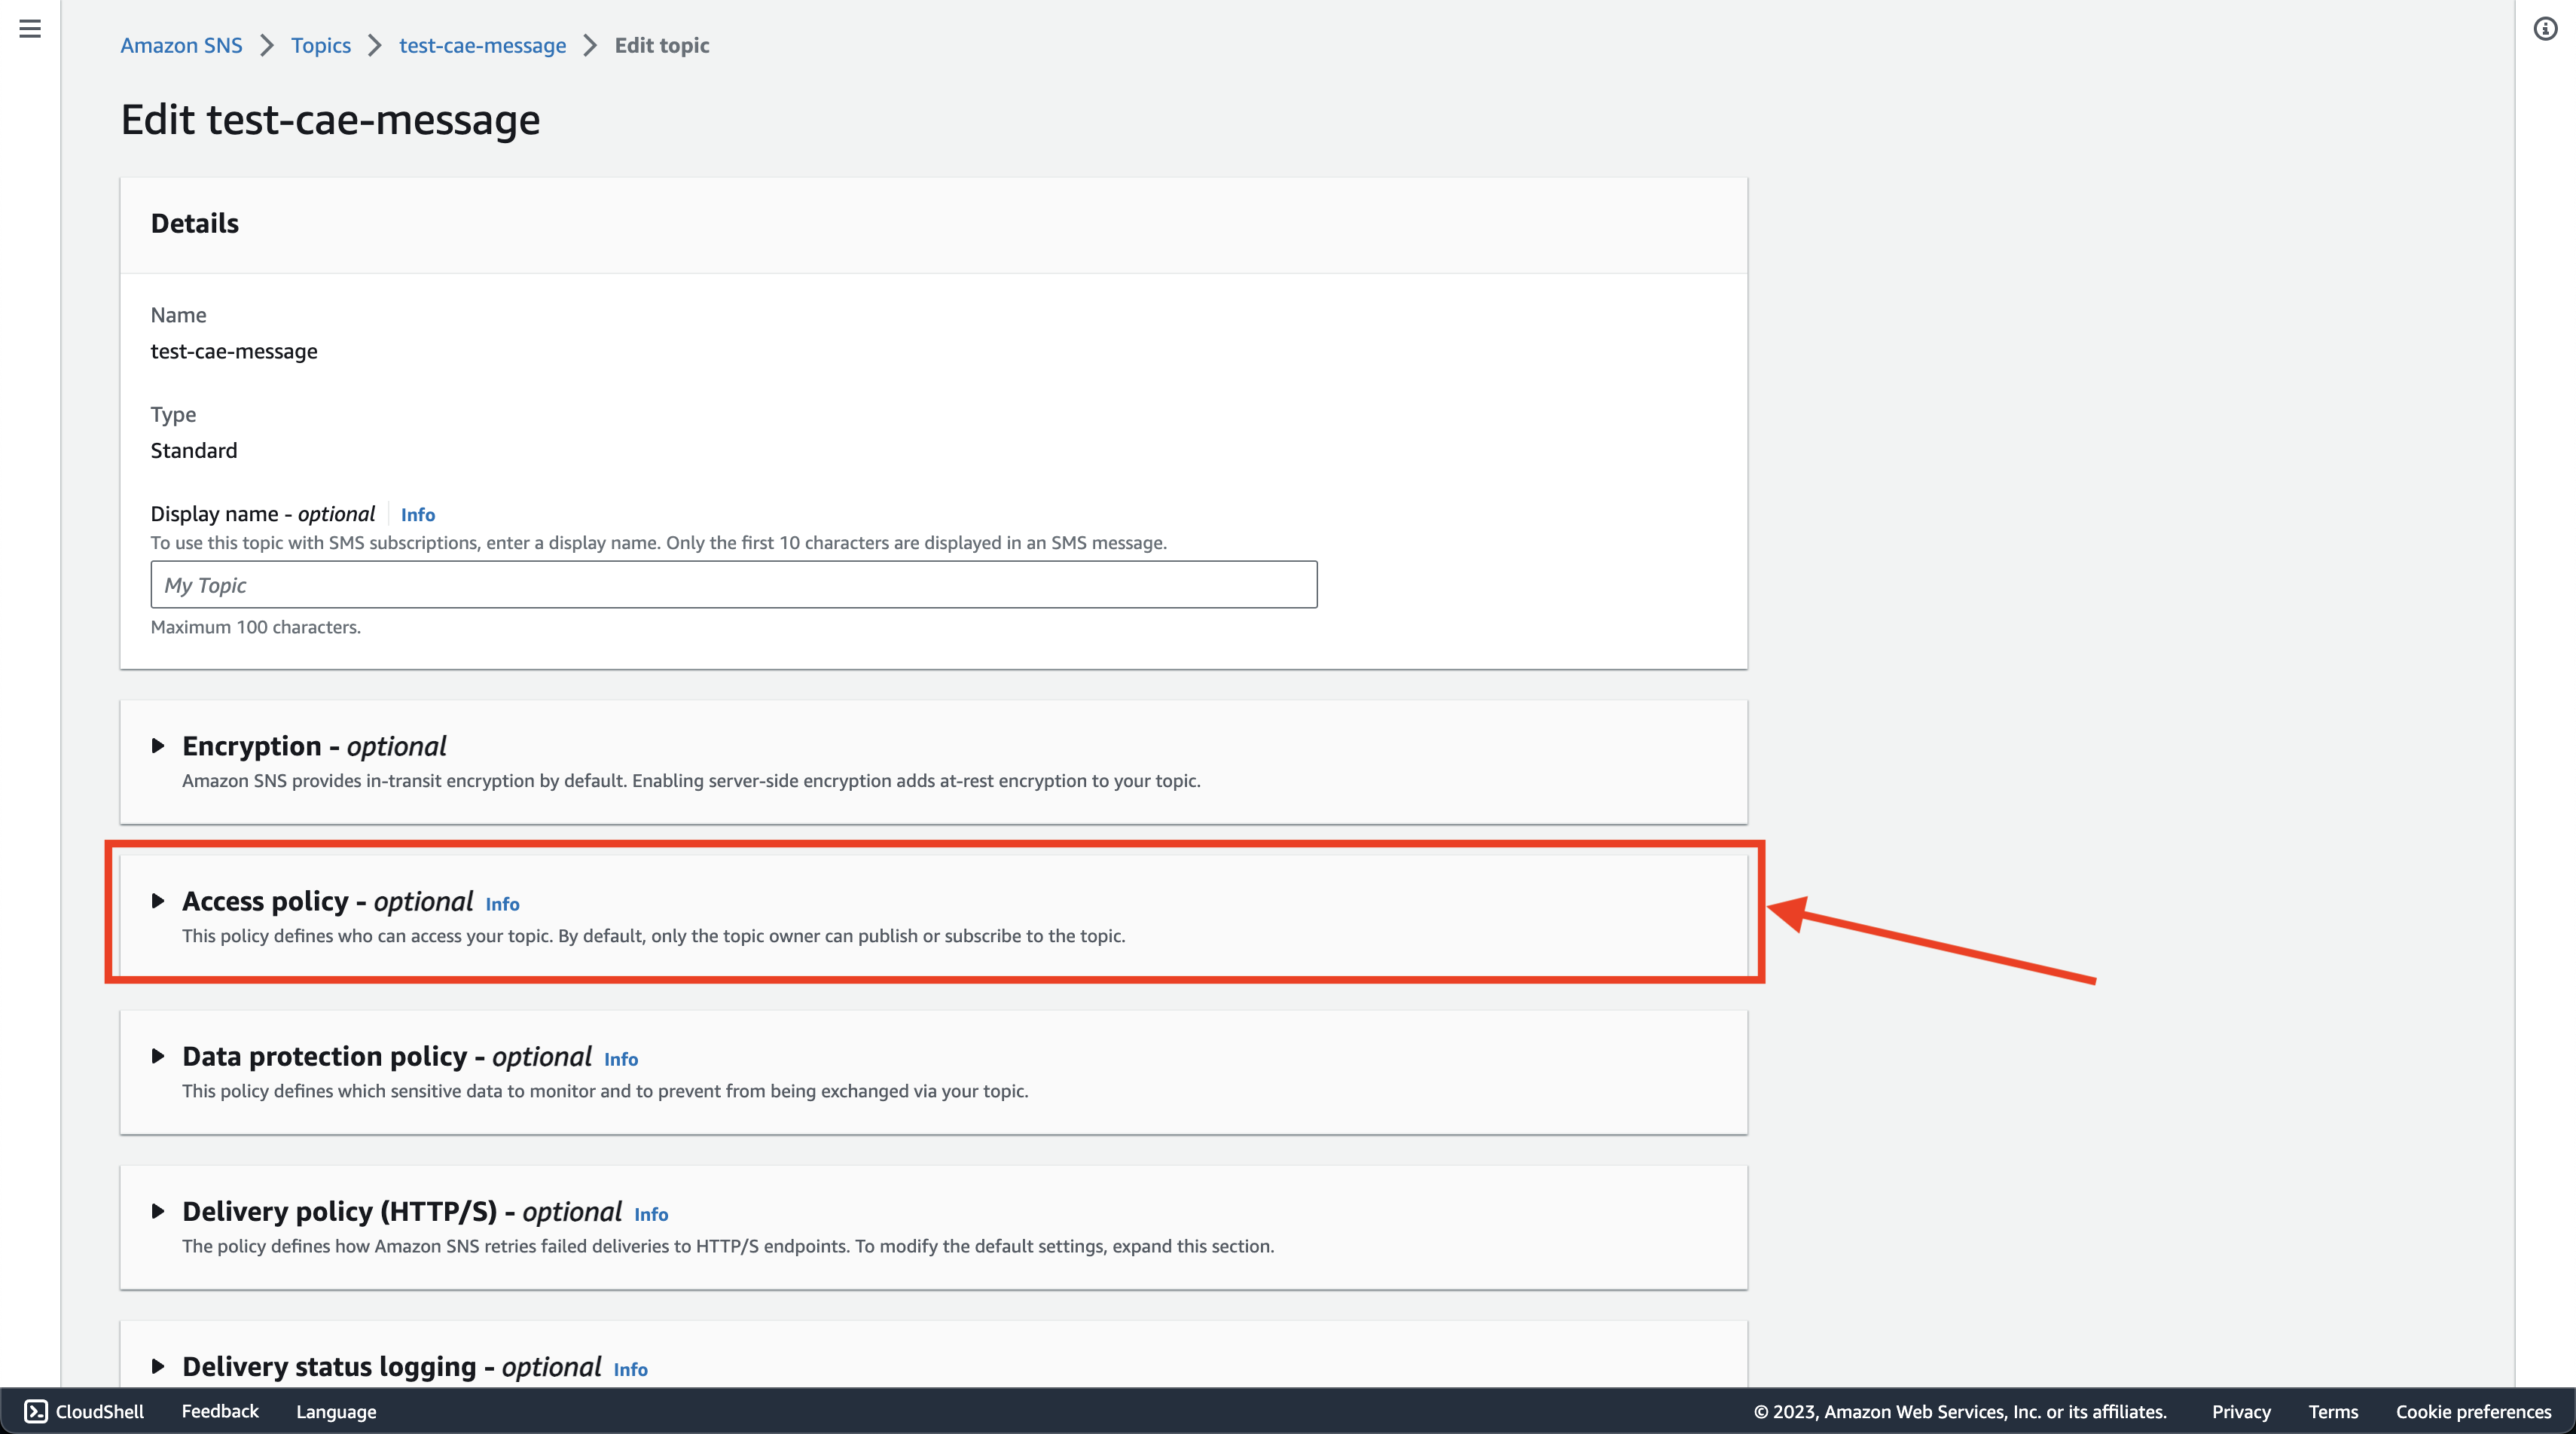
-
Append the Policy: In the JSON editor that appears, locate the Statement field, containing a list of existing policy statements. Append the provided access policy JSON to the end of this list, ensuring that it's formatted correctly.
-
Save Your Changes: After successfully adding the policy, make sure to save your changes. The new policy will now govern who can publish messages to this topic, allowing CloudAEye to send notifications accordingly.
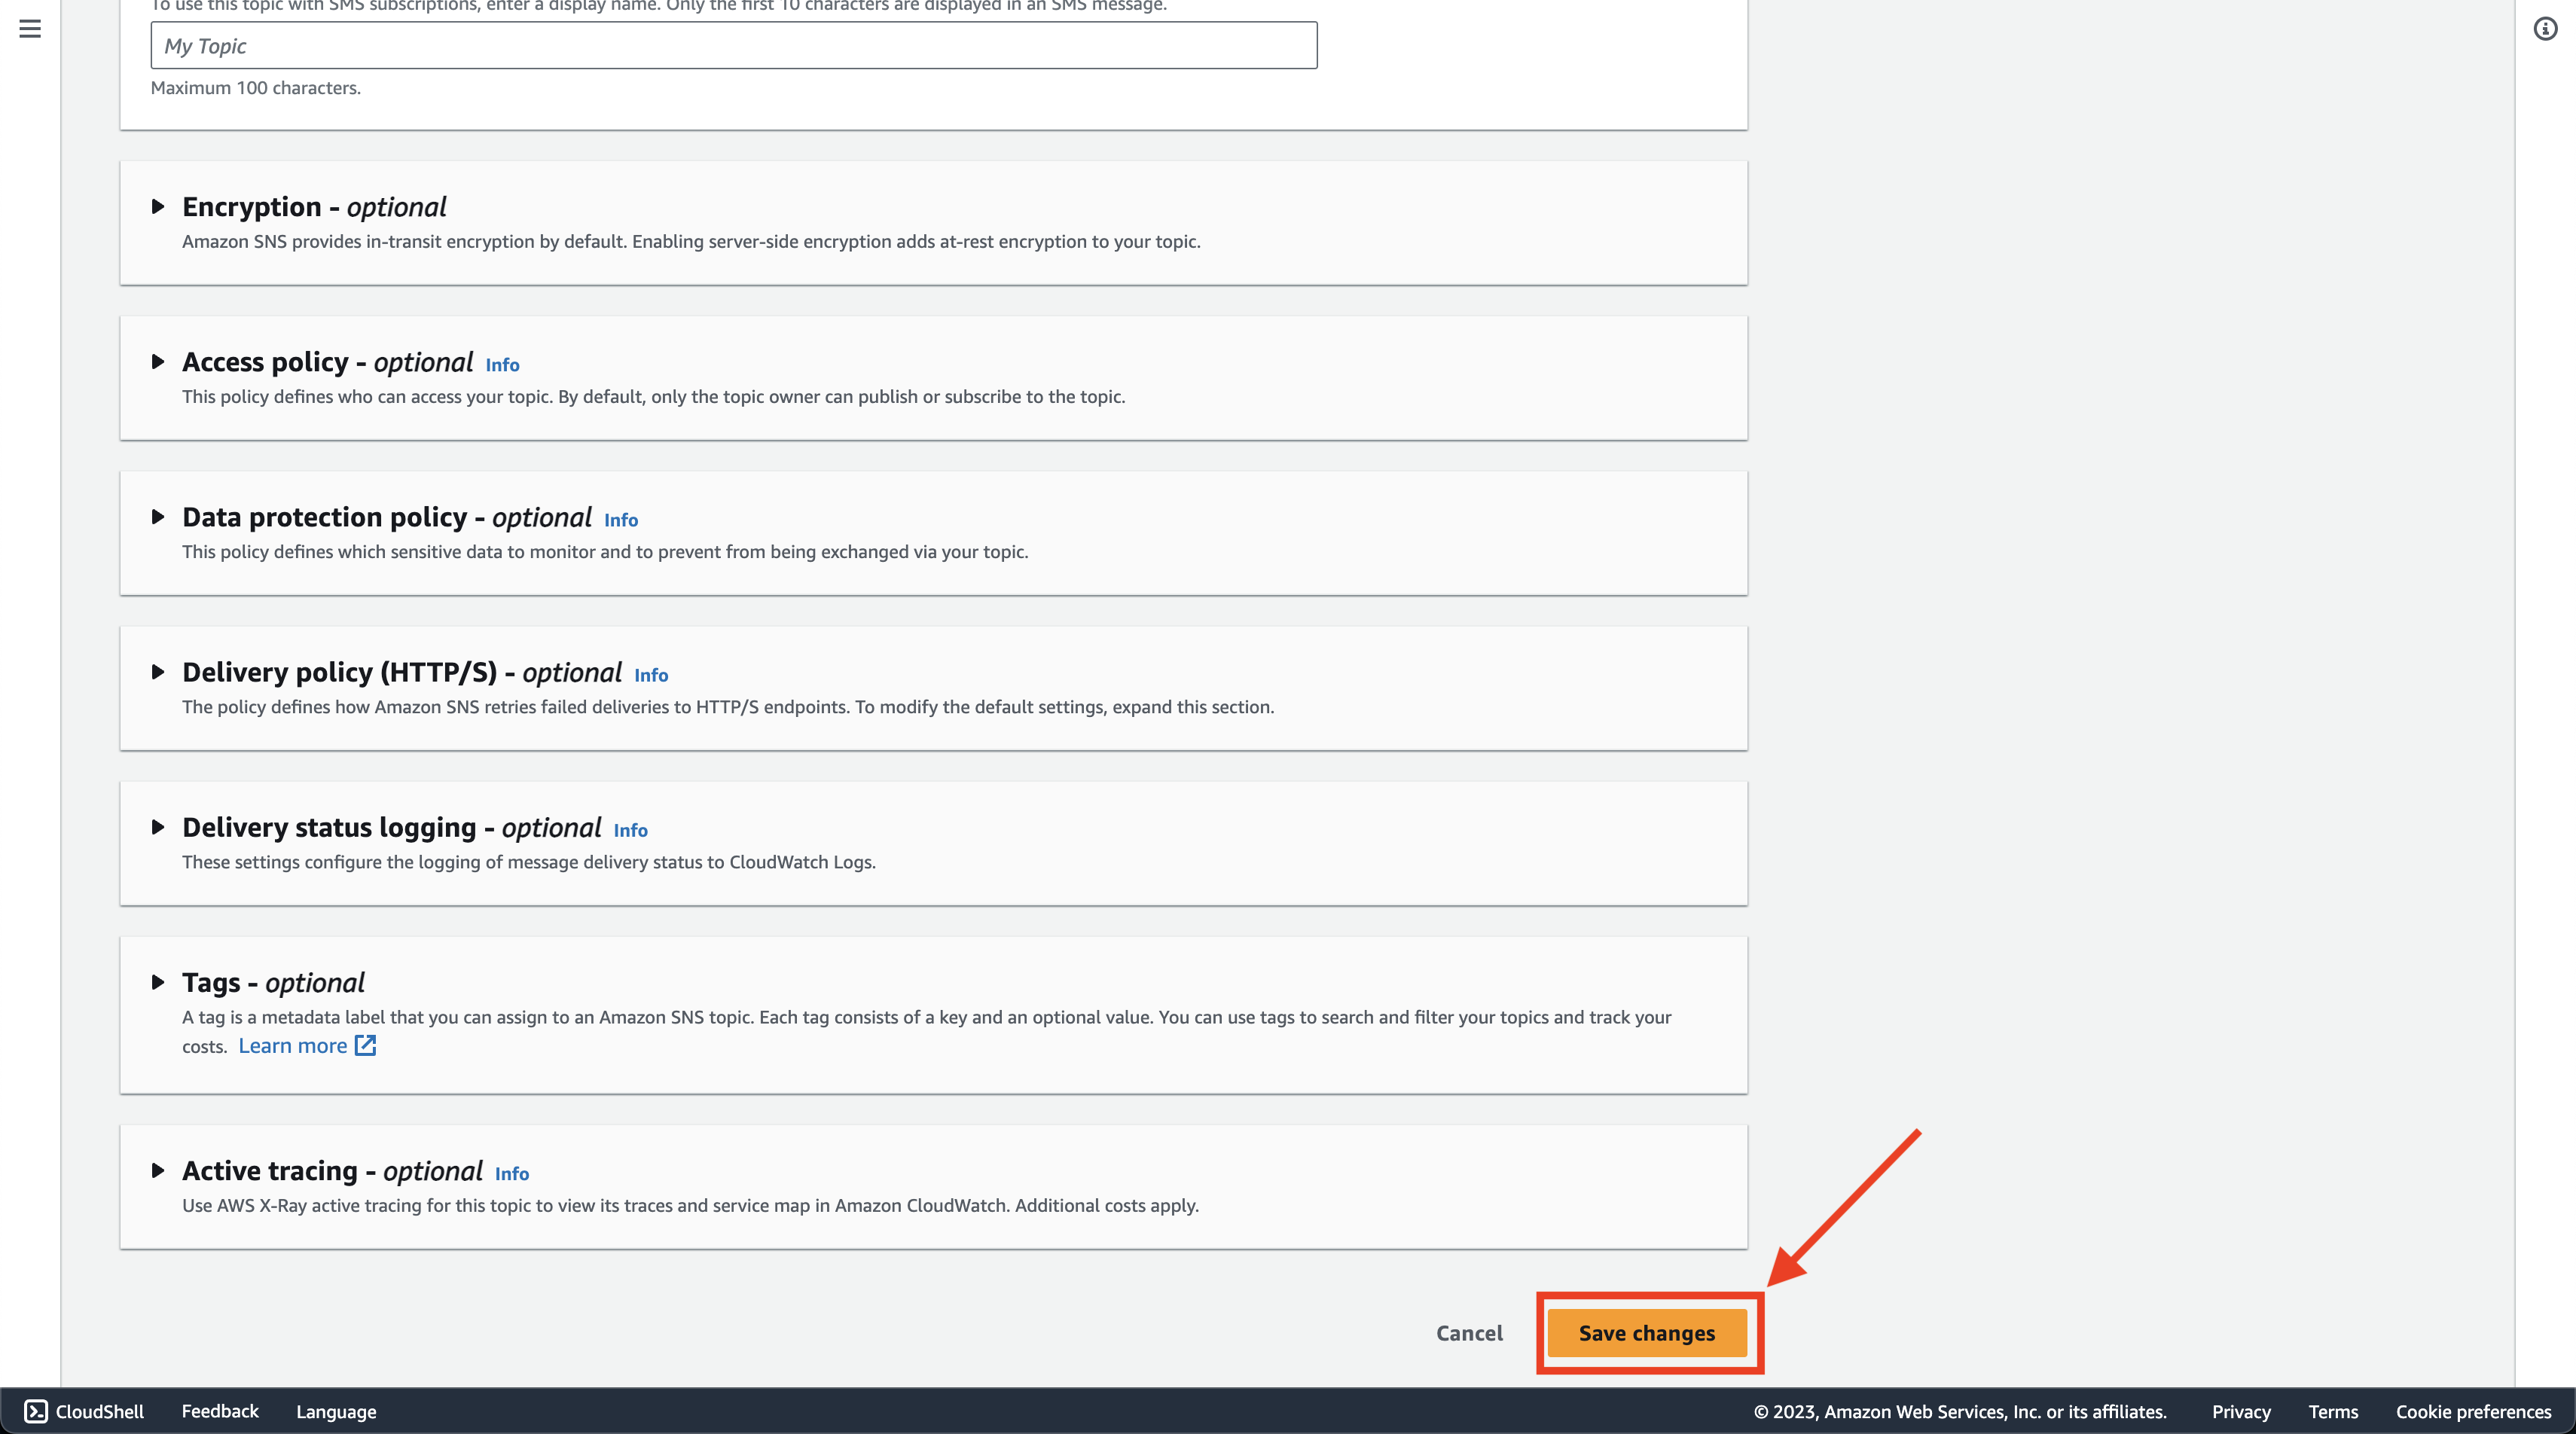
By carefully following these steps, you enable the CloudAEye system to send notifications to the specified SNS topic. This policy grants only the necessary permissions, maintaining the security and integrity of your AWS account.
Subscribing to an SNS Topic
Subscribing to an SNS Topic is vital to ensure that you receive the notifications sent to that topic. Subscribers can be various endpoints like email addresses, phone numbers, or even AWS Lambda functions.
- Selecting a Topic: You must have a specific SNS topic to which you want to subscribe.
- Choosing a Protocol: Determine the method of notification (e.g., SMS, Email, Lambda).
- Entering the Endpoint: Specify where the notification should be sent, such as an email address or phone number.
Please follow the official AWS documentation for detailed guidance on these steps: Subscribing to an SNS topic.
Getting Started
Integrating SNS with CloudAEye allows you to receive timely alerts and notifications about your system's vital statistics. Here are the detailed steps to help you set up an SNS notification channel.
Step 1: Select AWS SNS Option
Go to the Channels page on the CloudAEye dashboard. From the Create Notification dropdown, select AWS SNS. This action will lead you to a dedicated page for configuring the SNS channel, where you'll begin the setup process.

Step 2: Enter Details
If you haven't already set up an SNS topic for receiving notifications, you'll need to create one and apply the appropriate access policy as detailed in the Adding the Access Policy section. Once done, copy the ARN (Amazon Resource Name) of the topic and paste it into the ARN input field on the CloudAEye page. Also, add a descriptive name for this channel to easily identify it later.
Warning: Please make sure that no empty spaces are present in the ARN field. Extra spaces can lead to errors in configuring the SNS channel, so it is vital to ensure the ARN is copied and pasted correctly.
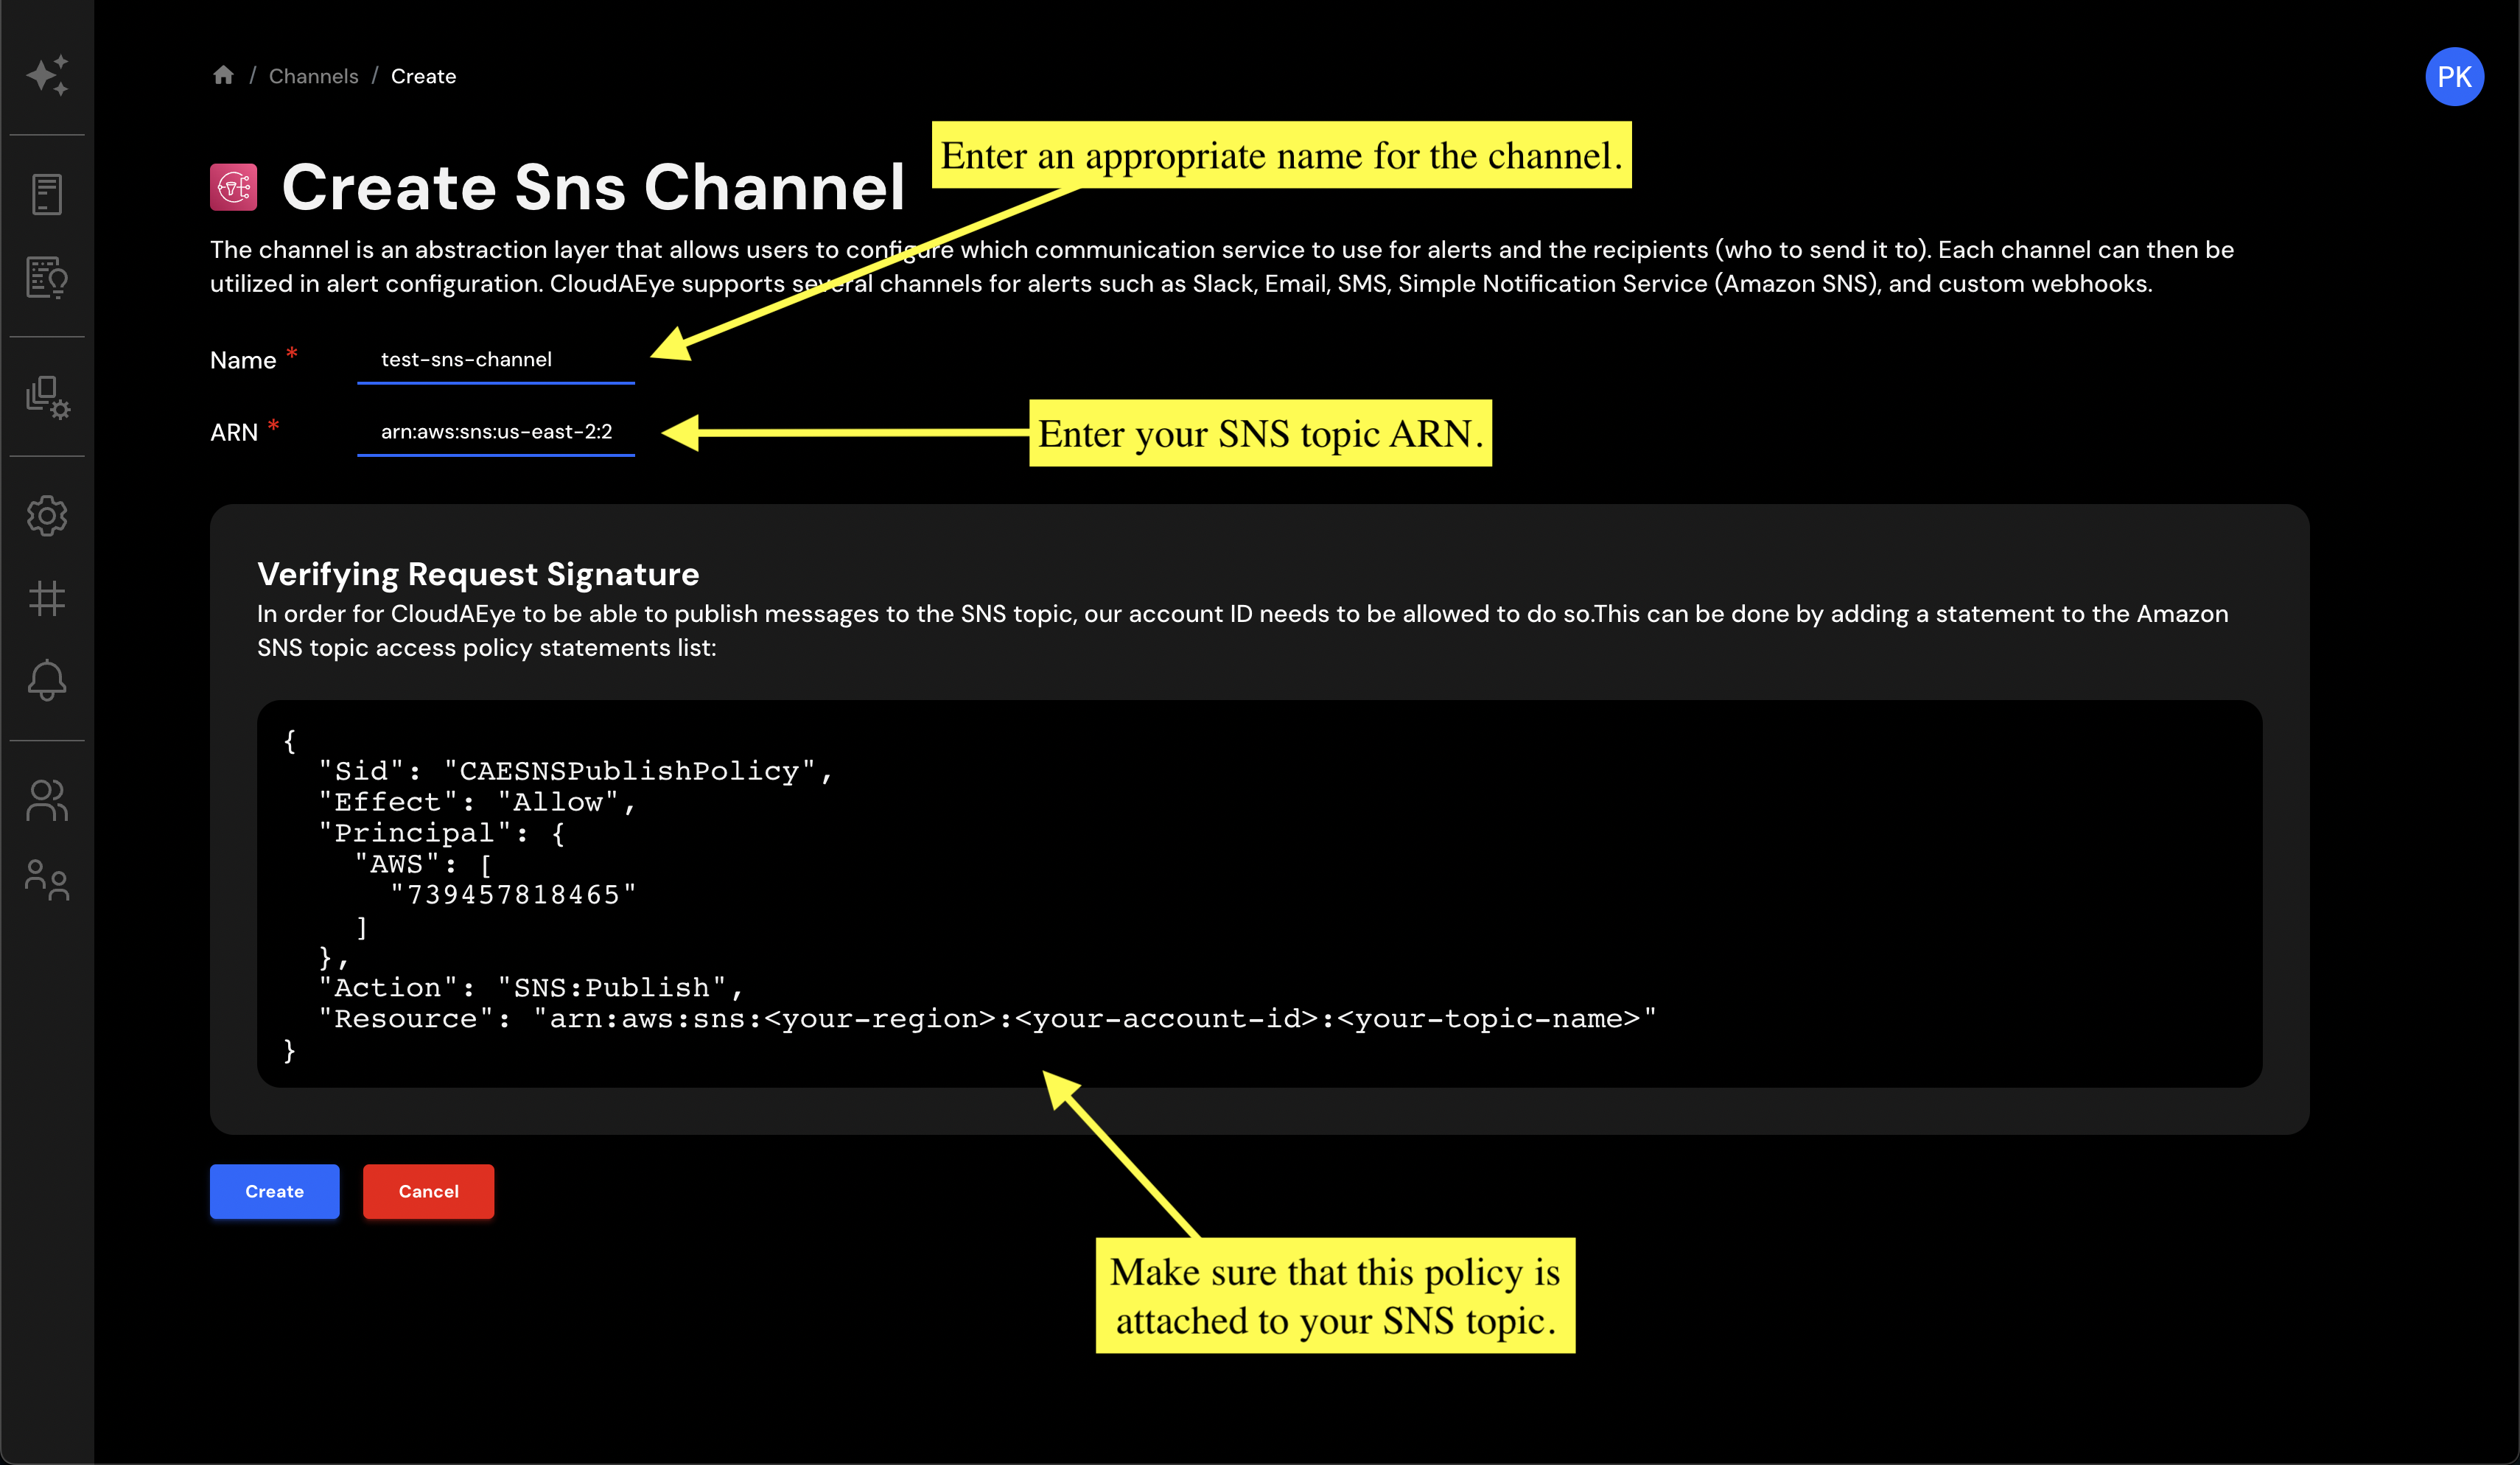
Step 3: Create the Channel
Verify that all the details you have entered are correct. Pay special attention to the ARN, as it must be accurate for the integration to work. Once you're satisfied that everything is in order, click the Create button to establish the SNS channel.

Success: SNS Channel Configured
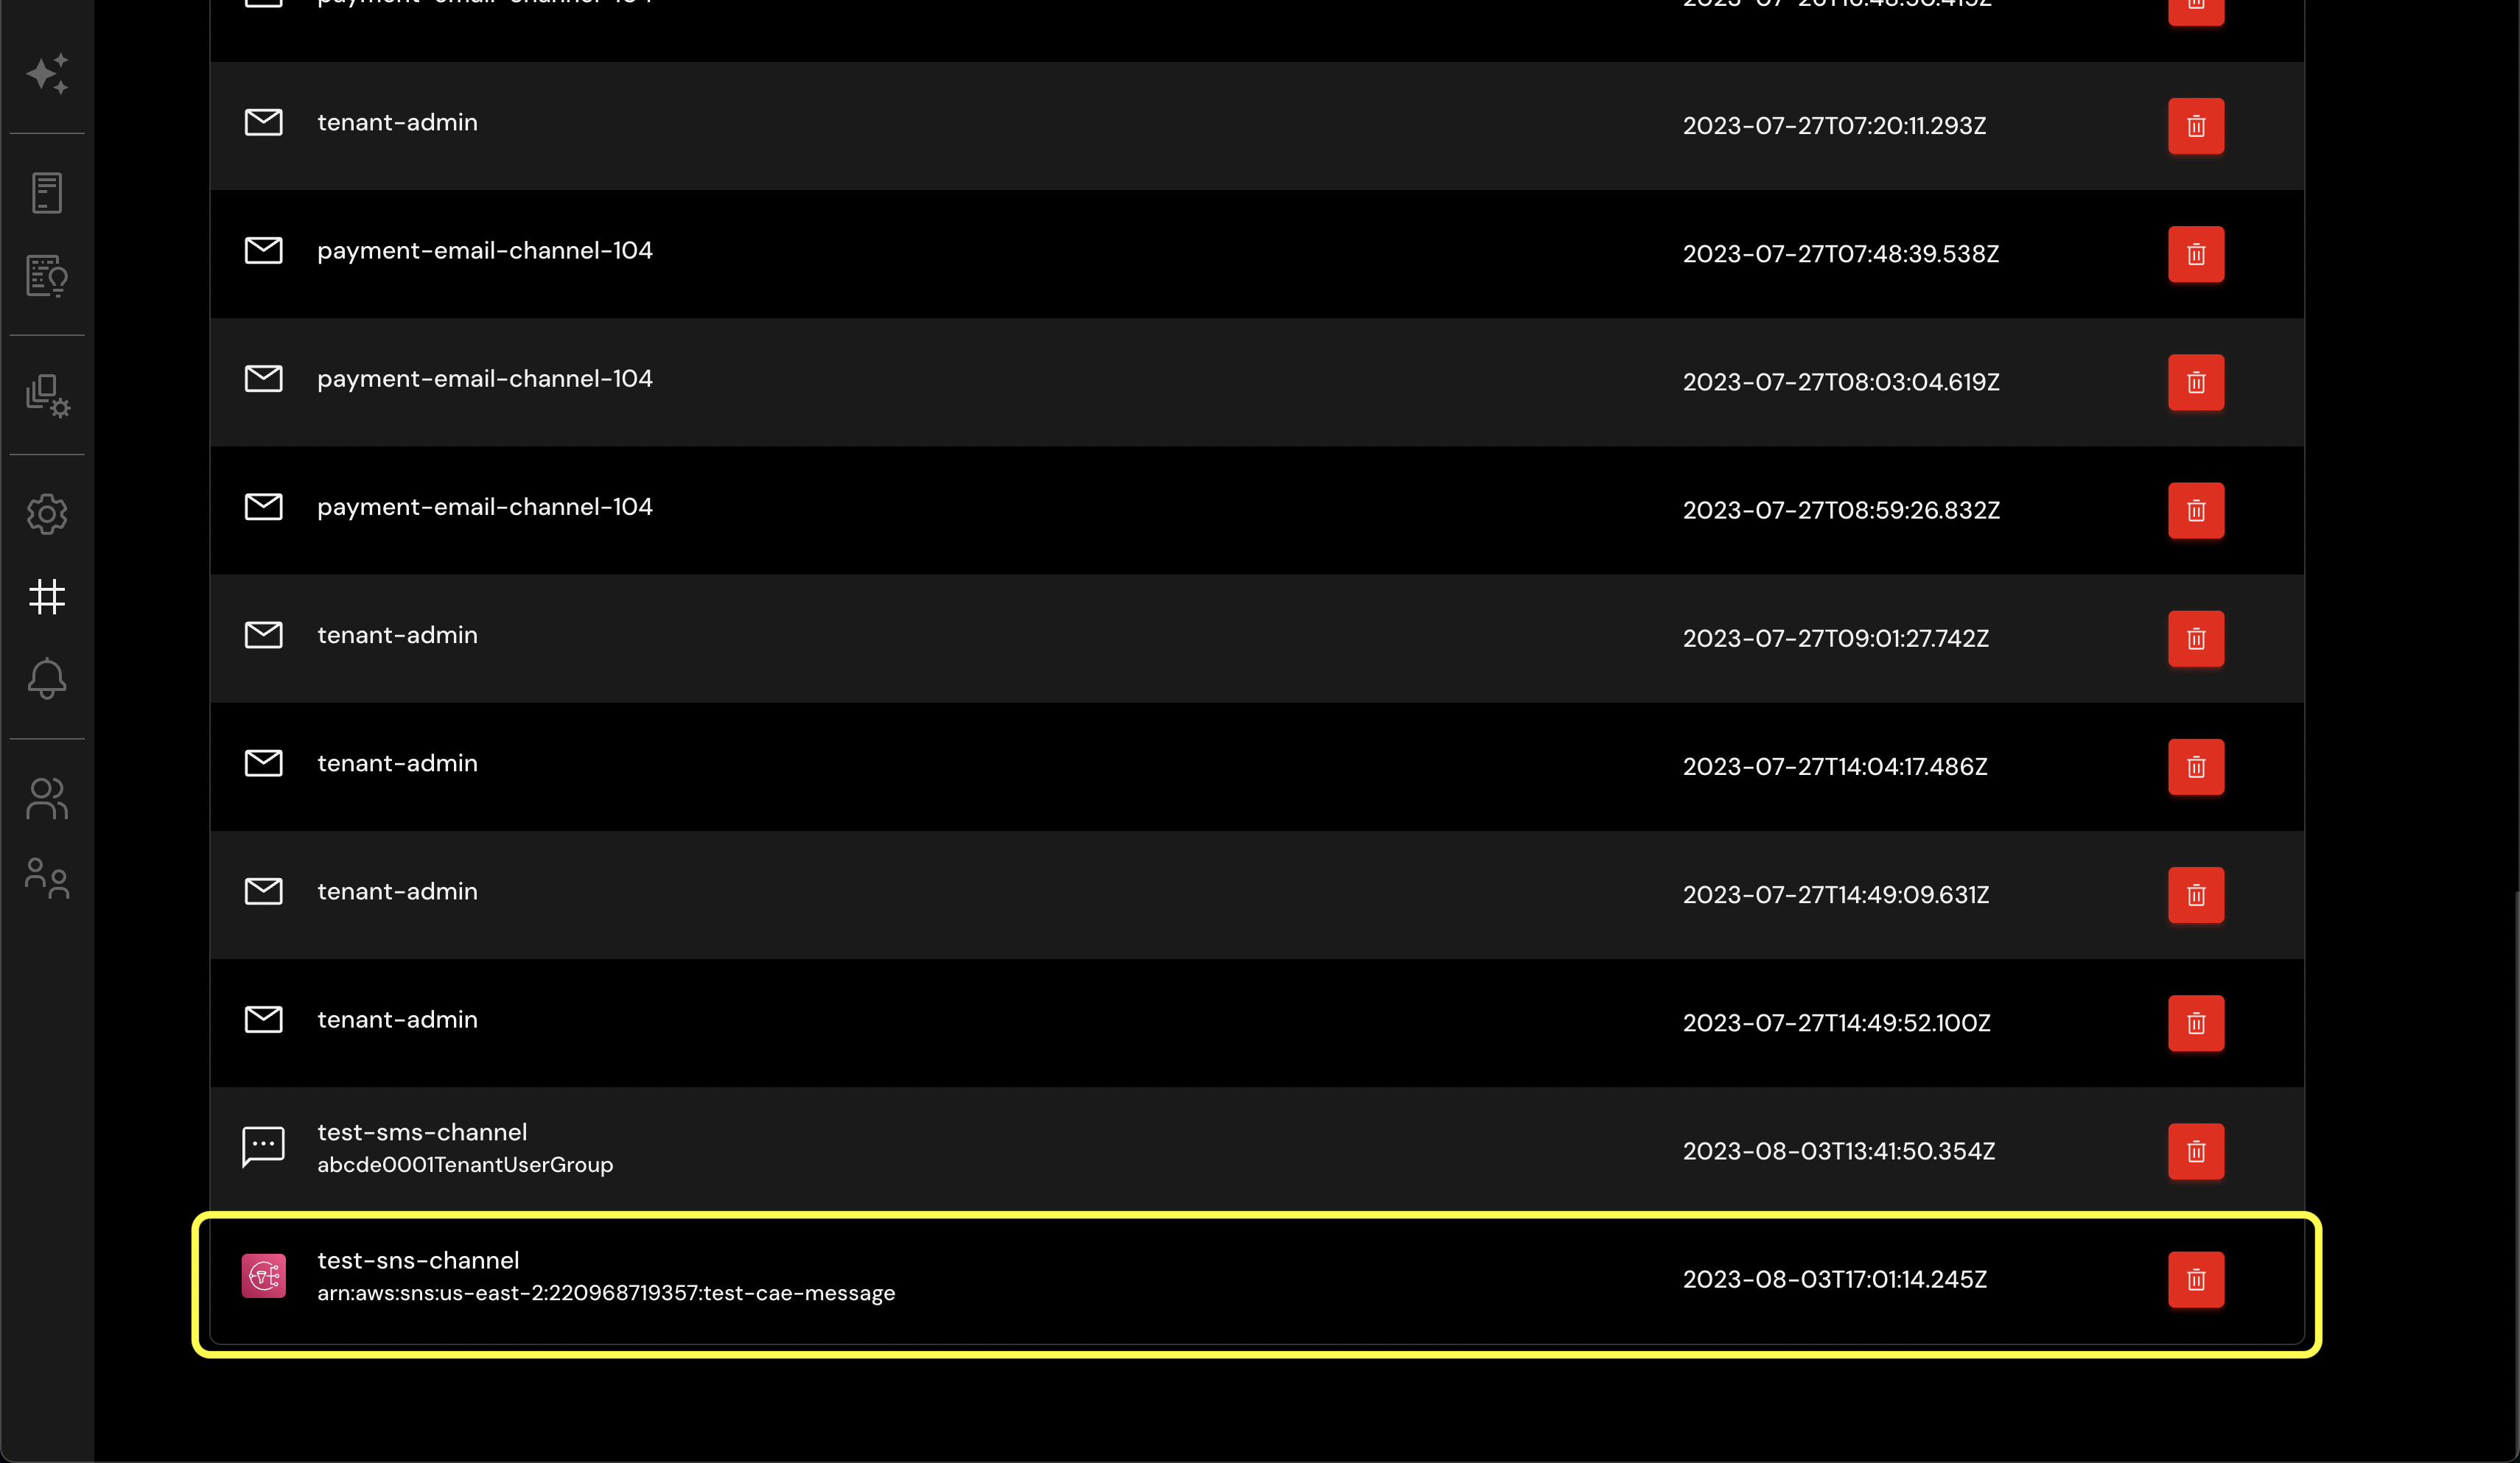
Congratulations! You have successfully integrated an SNS notification channel with CloudAEye. The newly added channel will now appear at the end of your Channels table, and you can begin receiving notifications to the specified SNS topic right away. This integration allows for more immediate and diverse notification methods, helping you stay promptly informed about critical system alerts.
Conclusion
Creating an SNS channel with CloudAEye is a straightforward and efficient way to receive vital notifications and alerts. By subscribing to specific topics and configuring the appropriate policies, you can channel important information directly to your preferred endpoints, whether they be email, SMS, or even AWS Lambda functions.
This integration not only enhances your ability to monitor critical system activities but also enables you to respond more quickly to potential issues. With the detailed steps provided in this guide, you are now equipped to set up and manage SNS channels tailored to your specific needs.