Creating an Email Channel
Overview
Integrating an Email notification channel with CloudAEye enables you to receive vital alerts and notifications directly to your chosen email address. This integration ensures you stay promptly informed about essential system updates, providing a reliable and personalized way to monitor your environment. The process of creating an Email channel is simple and secure, and this guide will walk you through each step.
Step 1: Select Email Option
Navigate to the Channels page and click on the Email option from the Create Notification dropdown. This will direct you to a new page dedicated to configuring the Email channel.
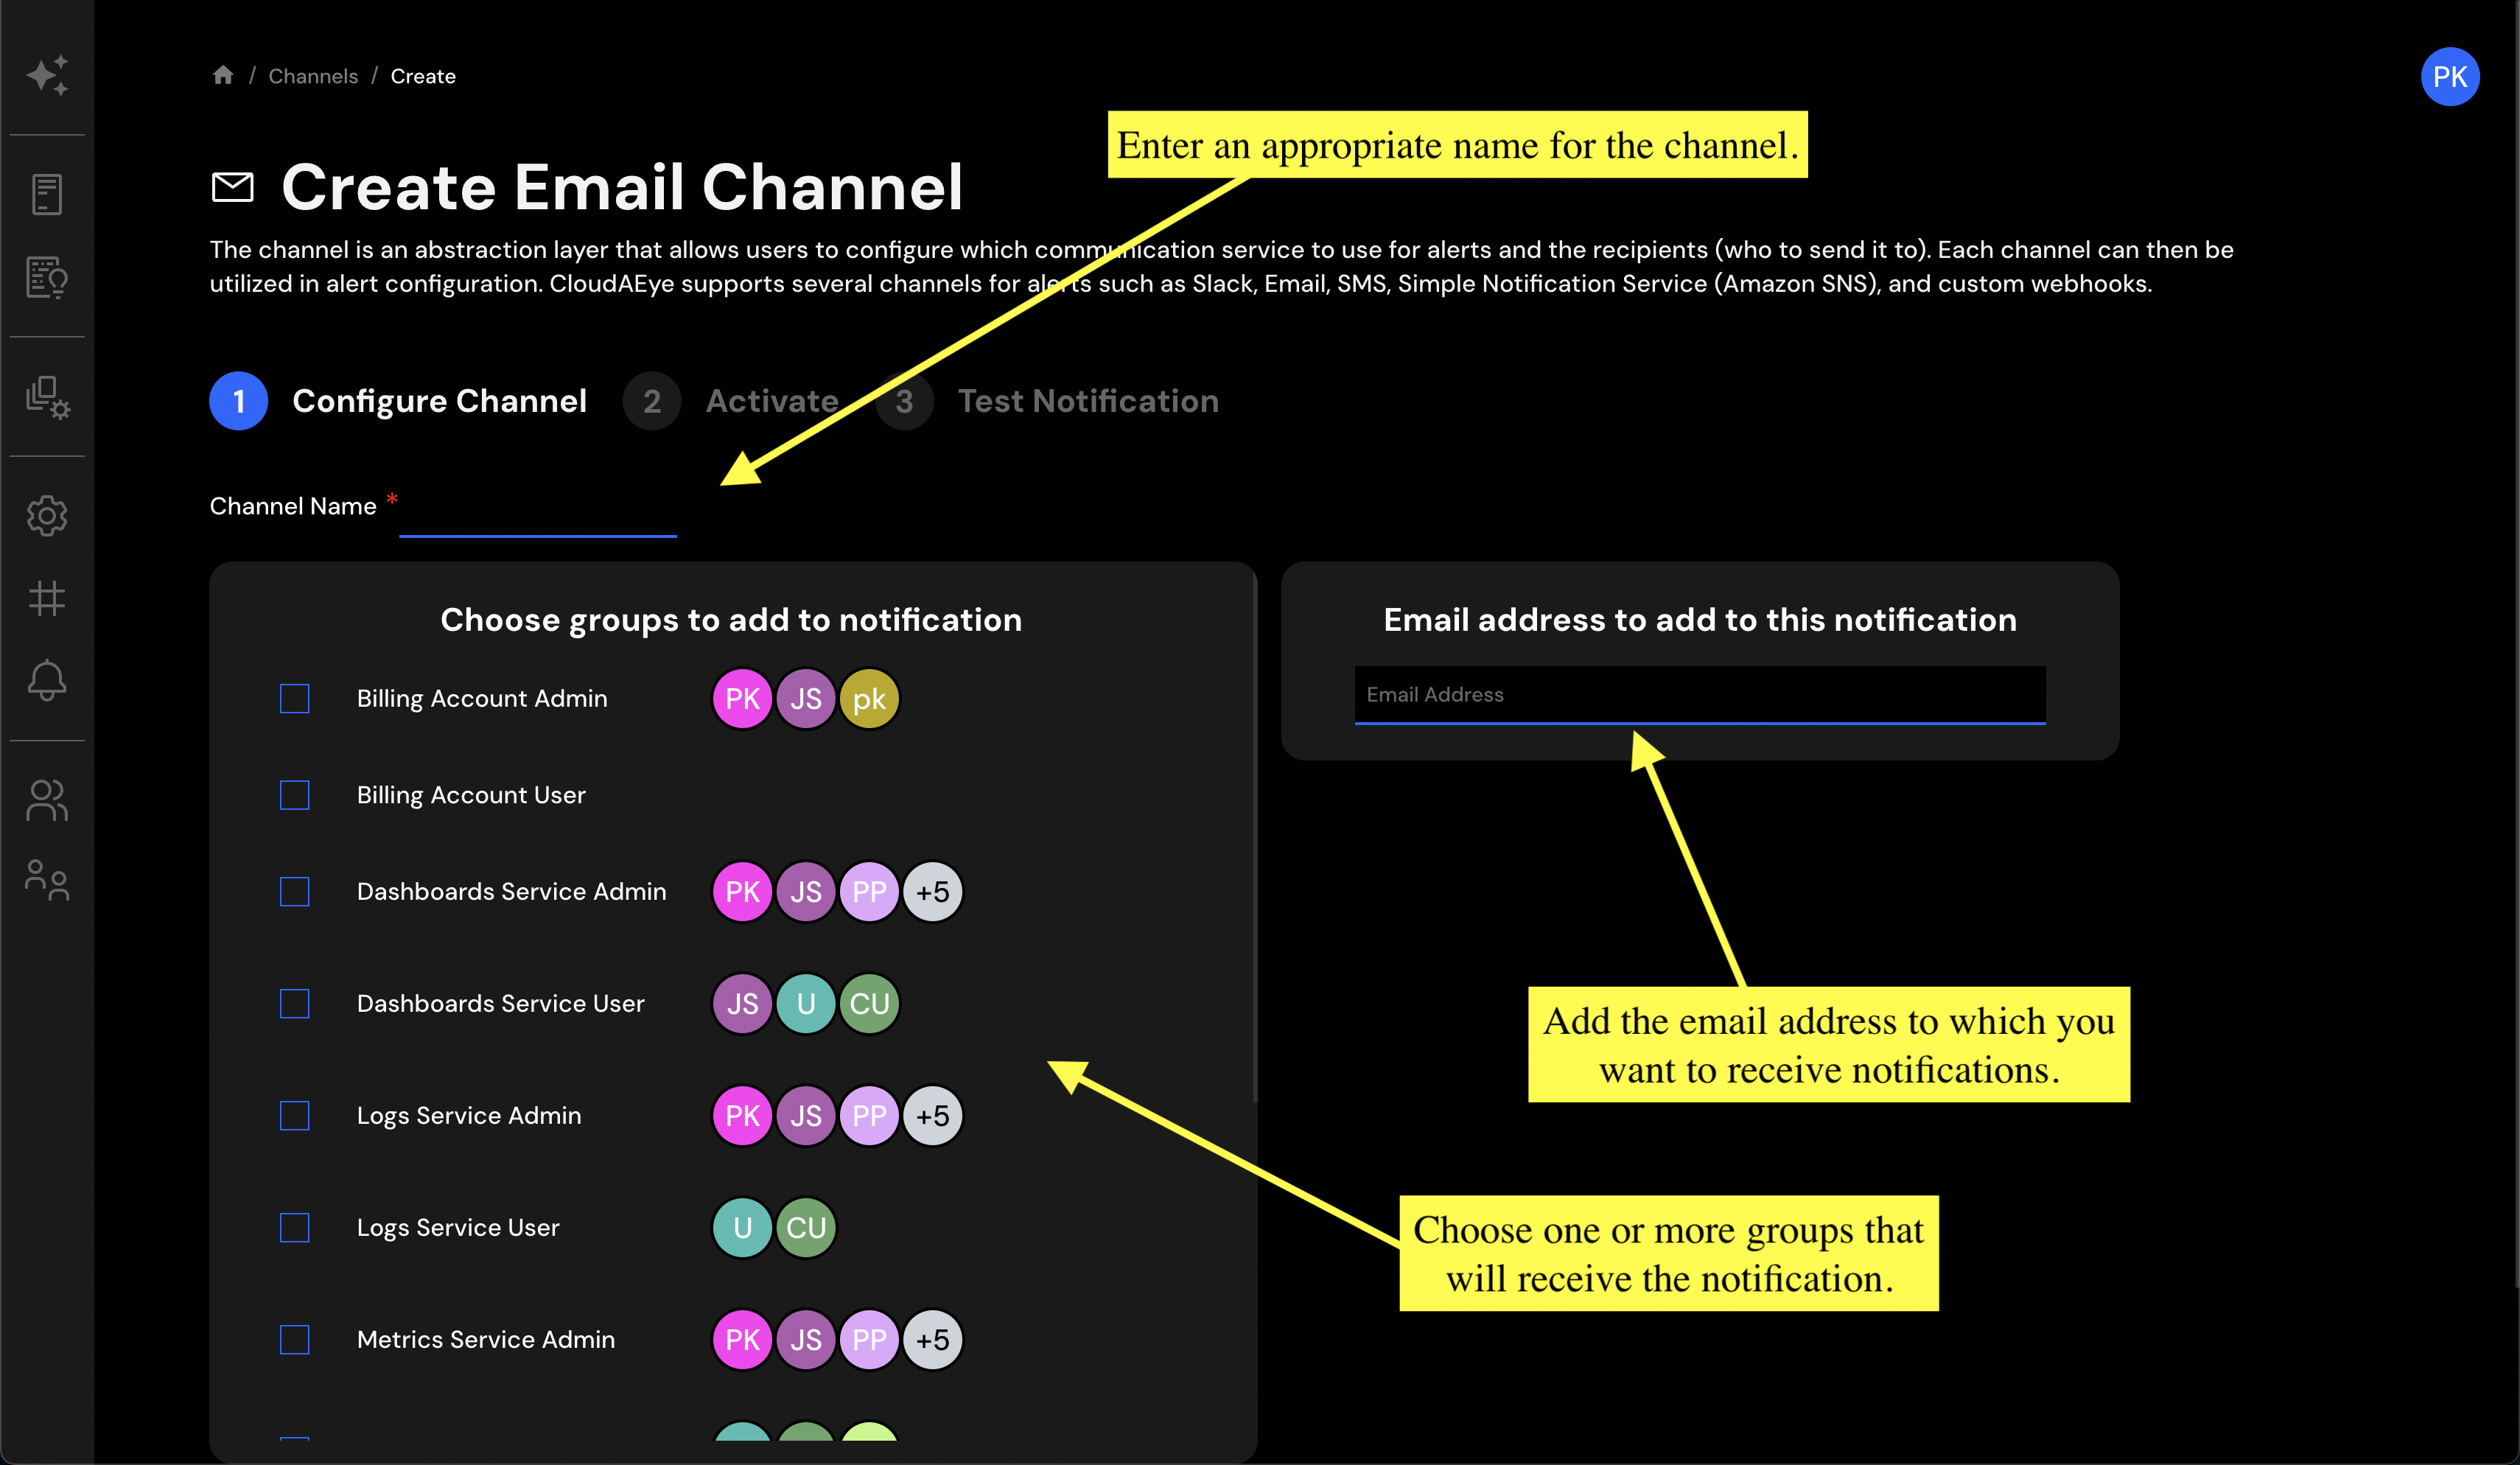
Step 2: Enter Details
On the Create Email Channel page, complete the required fields, ensuring that the email address provided is correct and accessible. Click Next once you've filled out the necessary information.

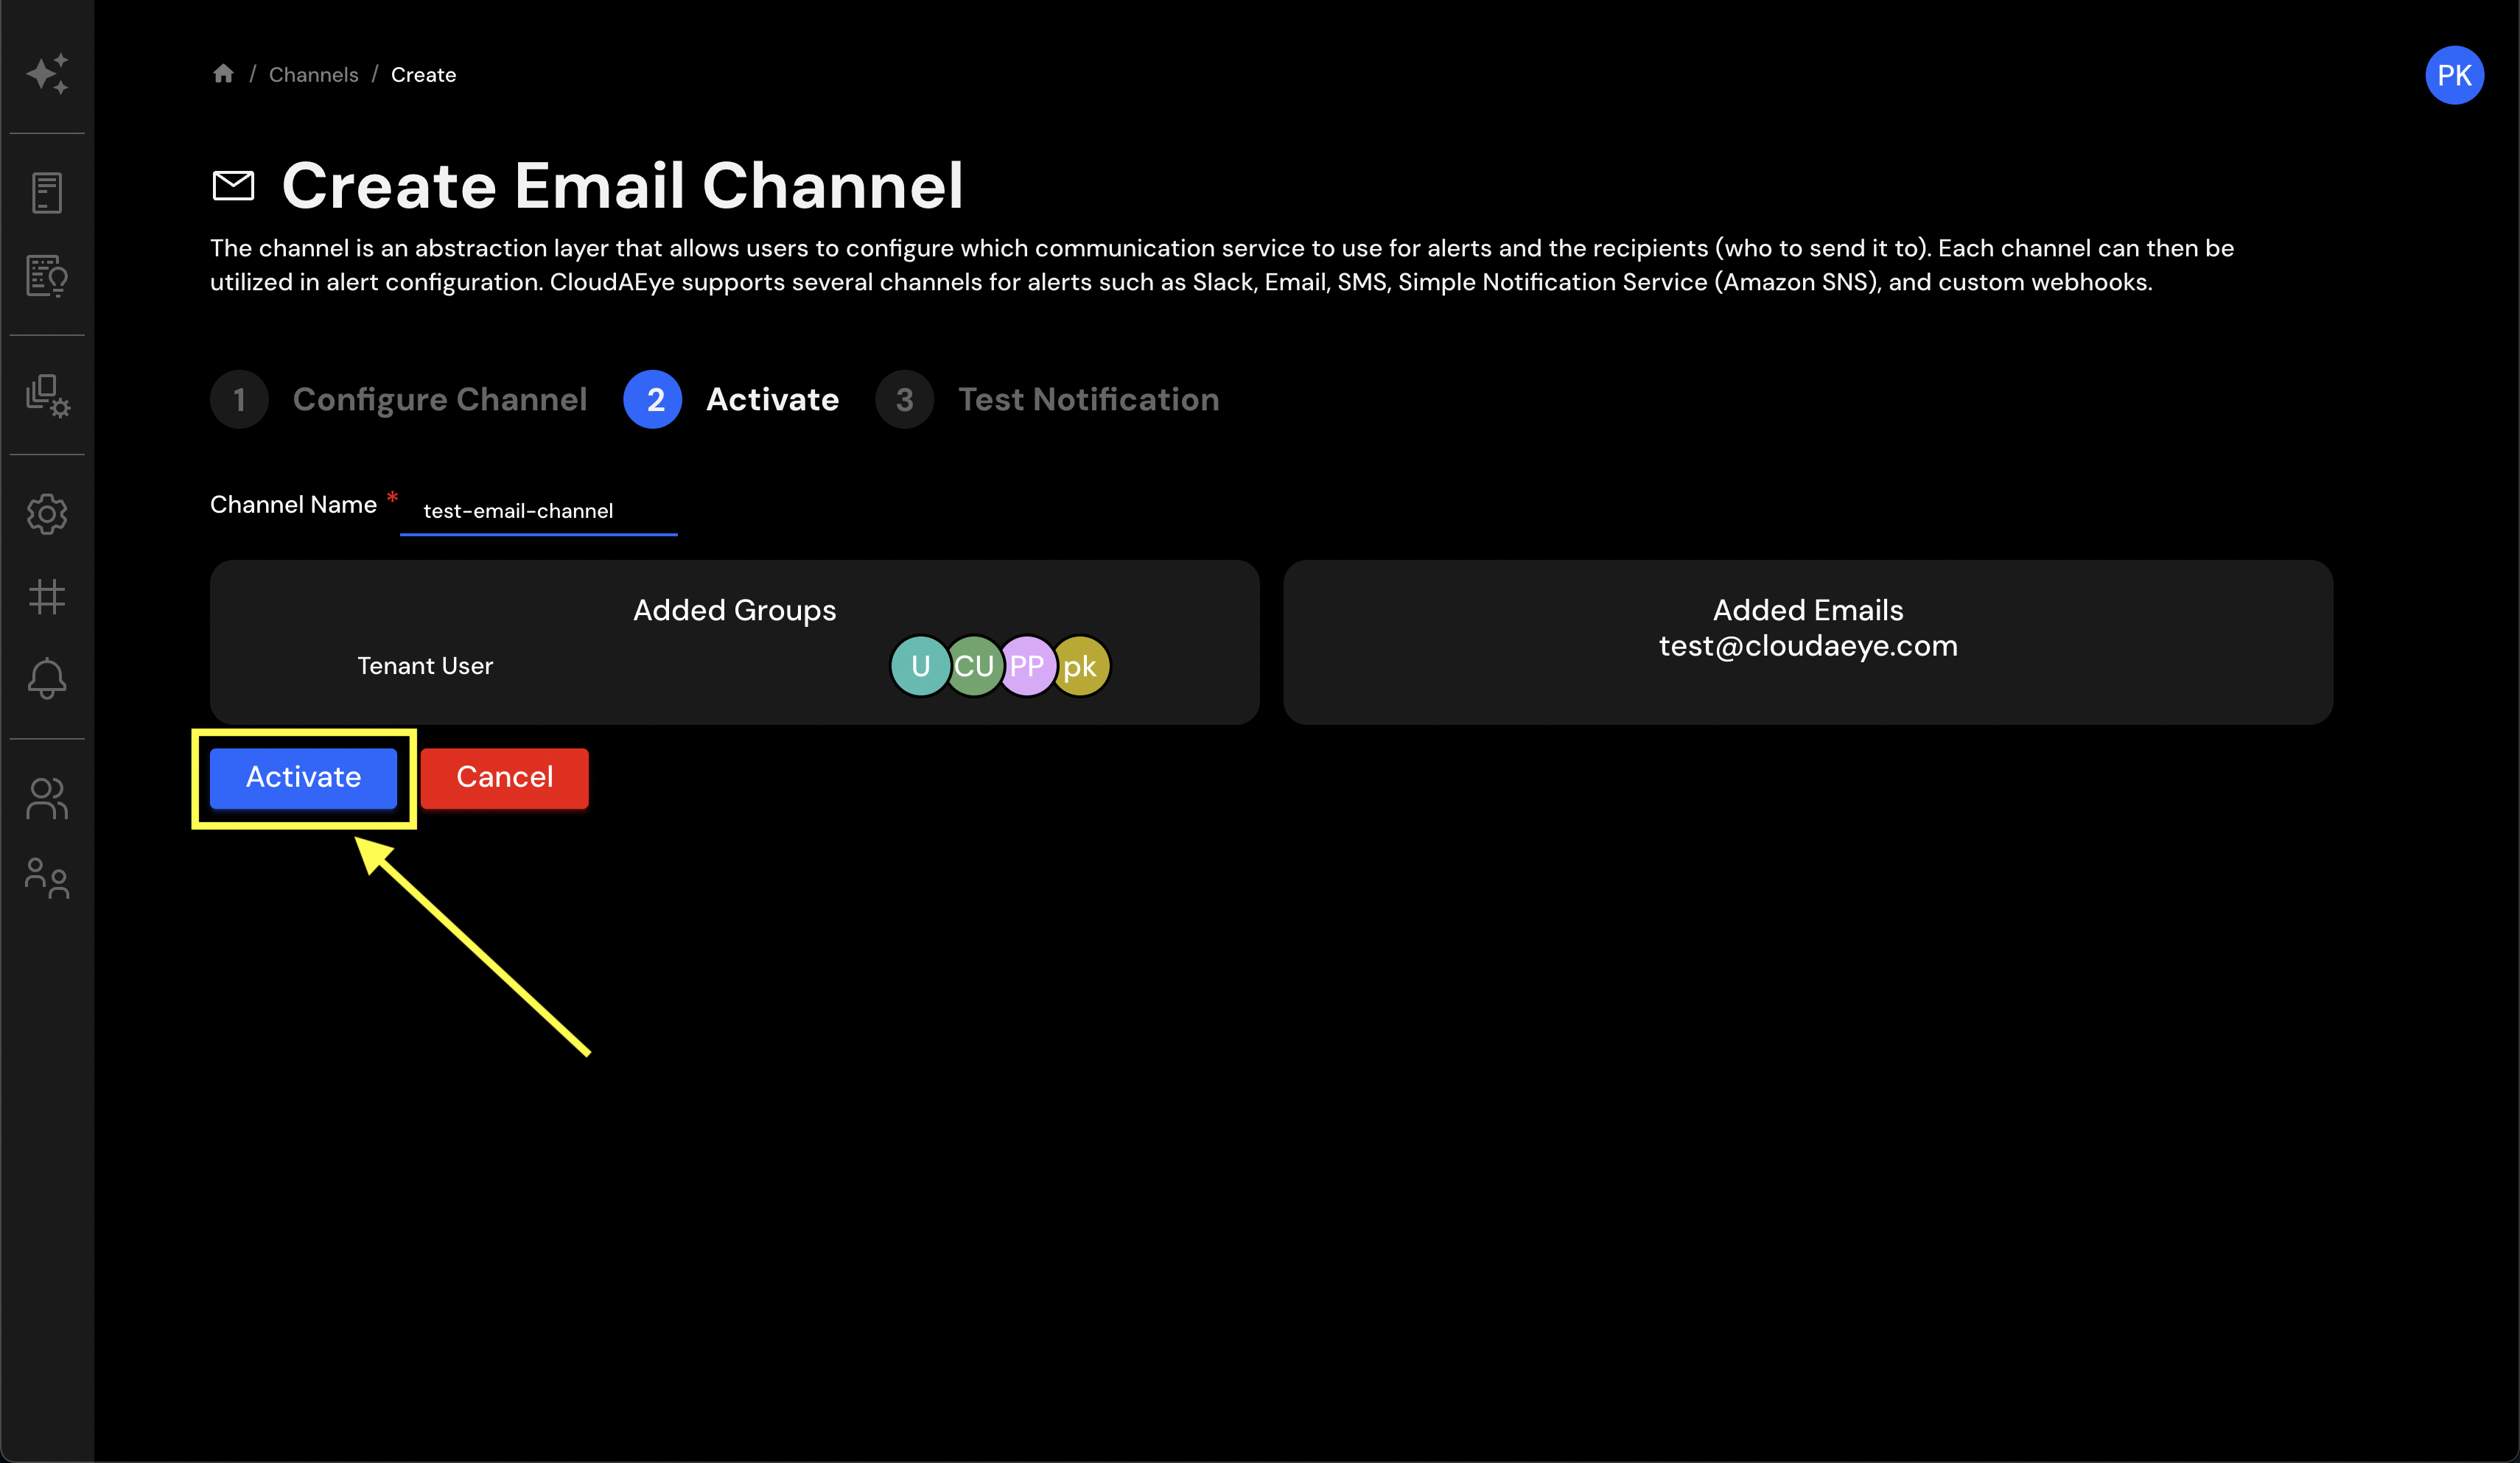
Step 3: Activate the Channel
You will be redirected to a second page. Click on the Activate button, and an email notification from info@cloudaeye.com will be sent to the email address you configured. This email confirms the activation of your Email channel.
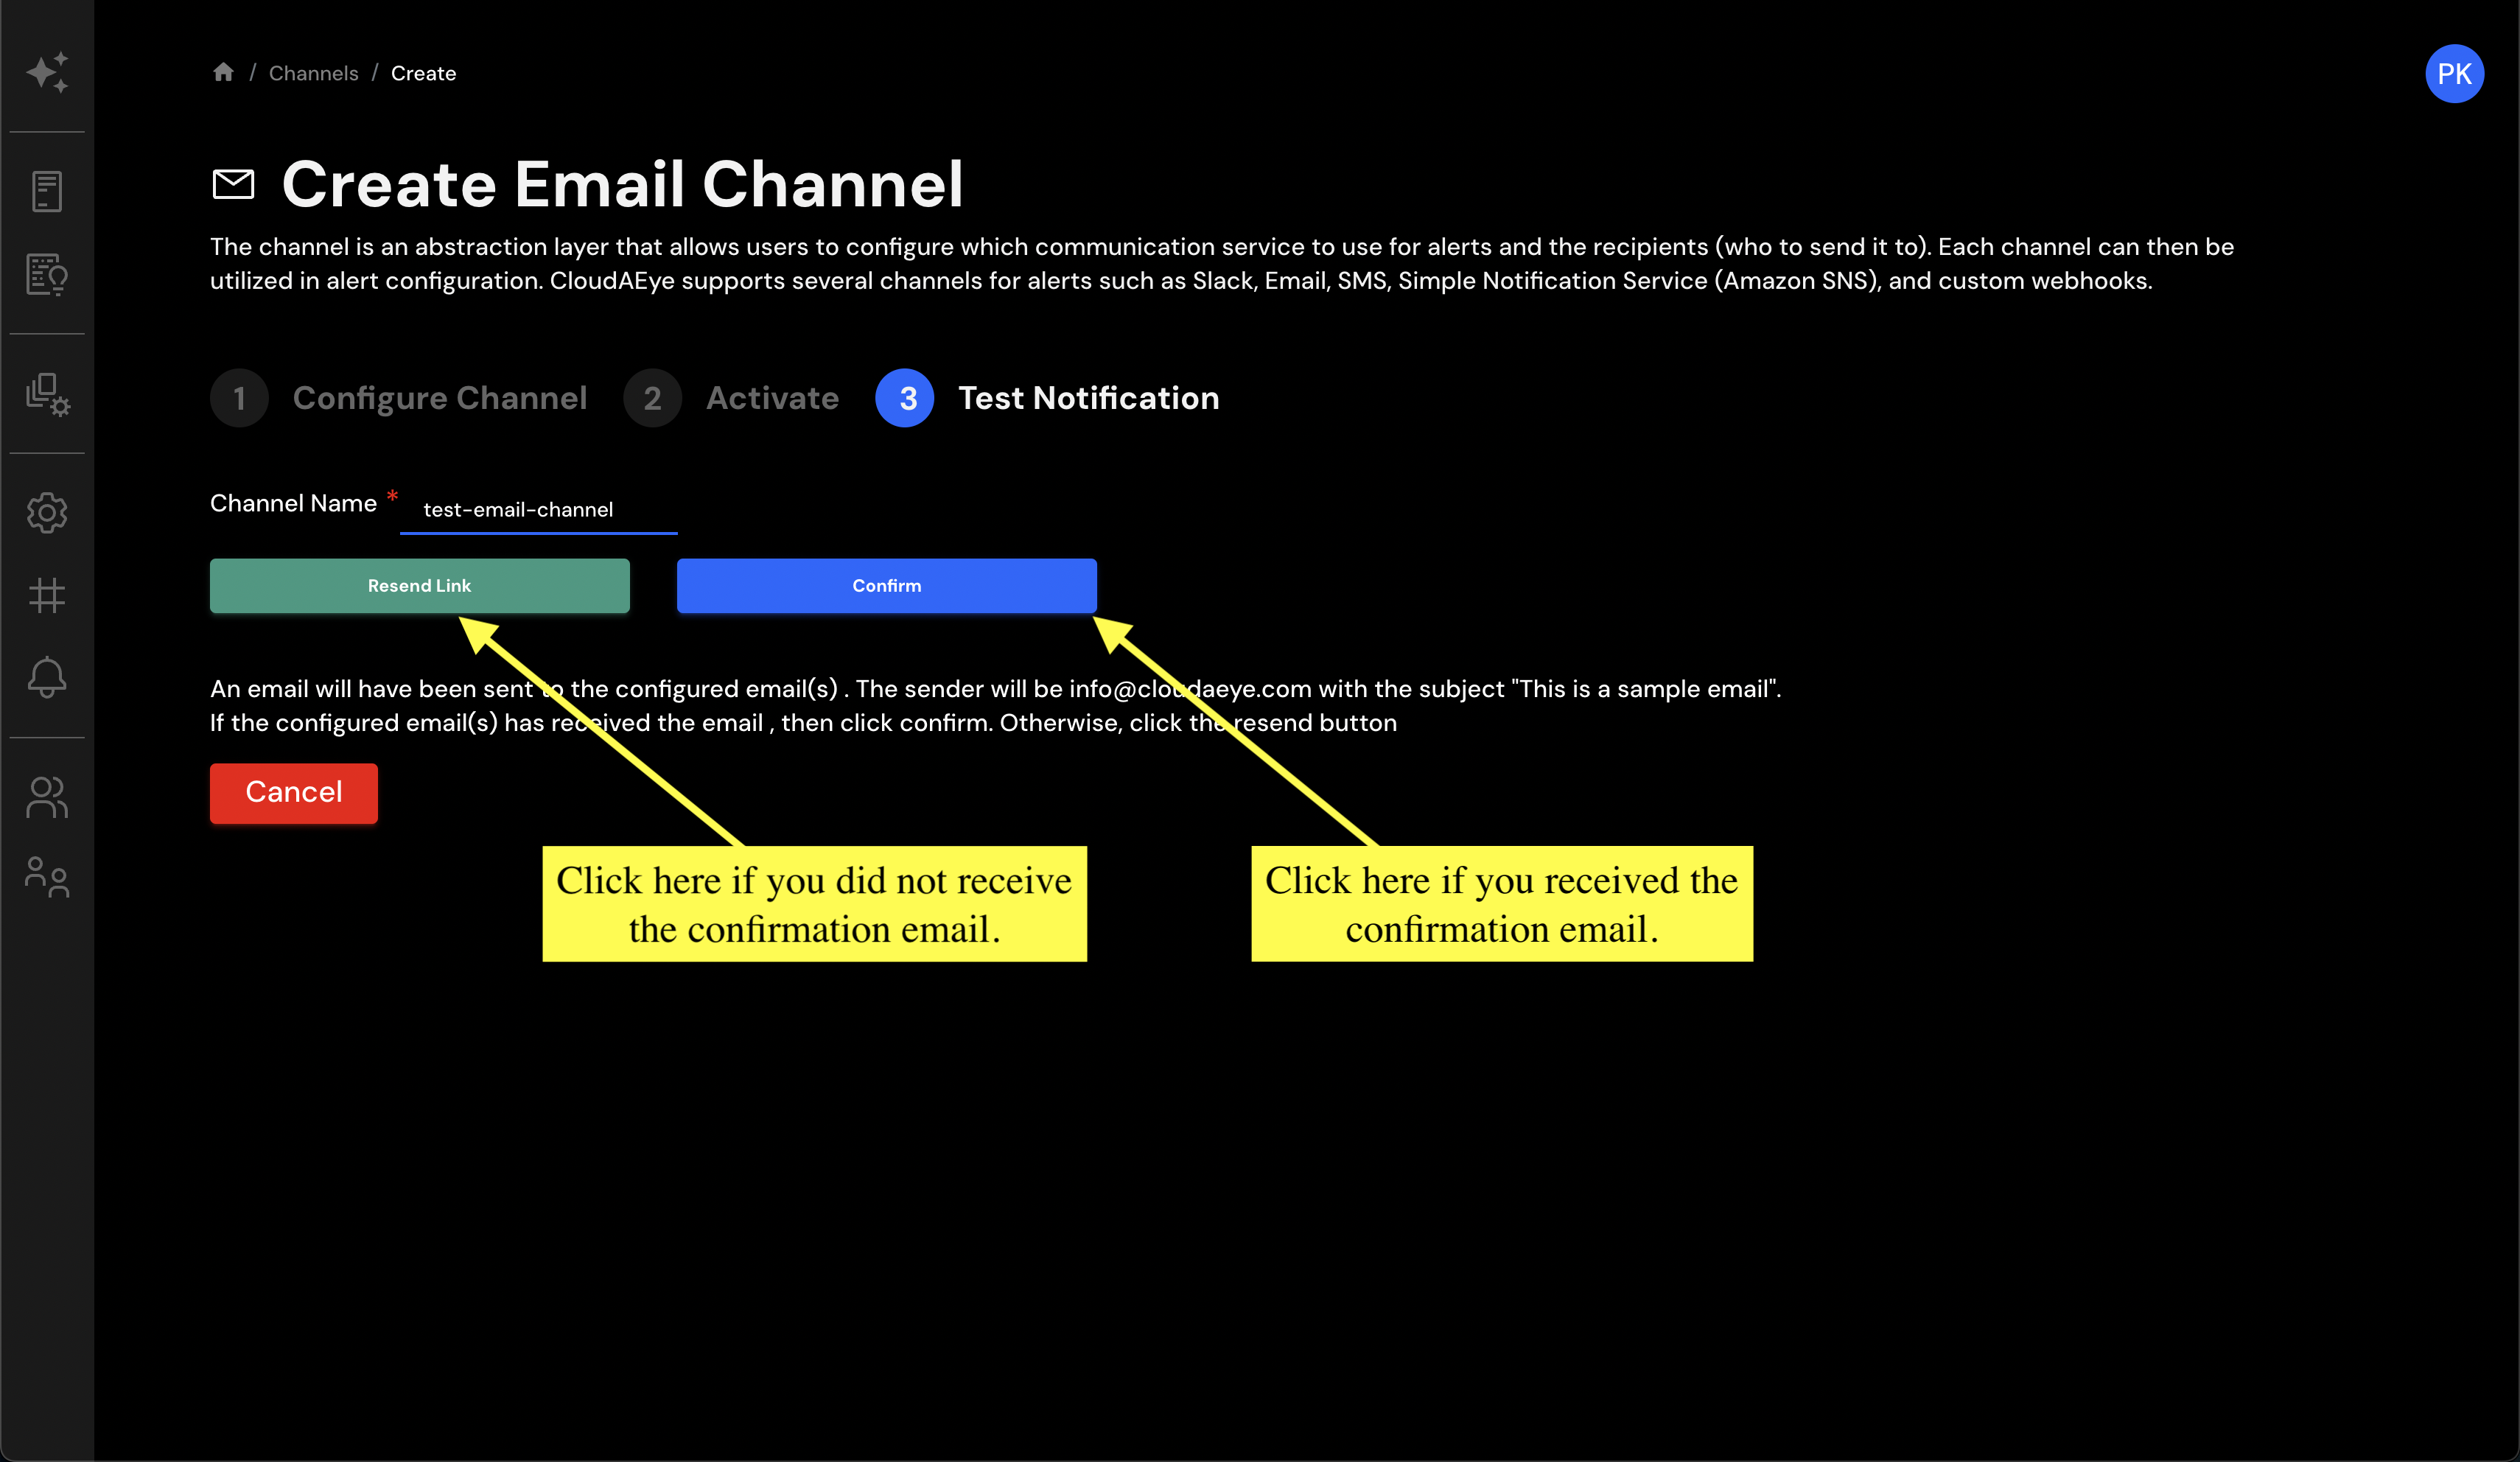
Step 4: Confirm Email Received
Check your email and ensure you received the activation notification. If successful, click on the Confirm button. If you haven't received the email, click on Resend Link to send it again.
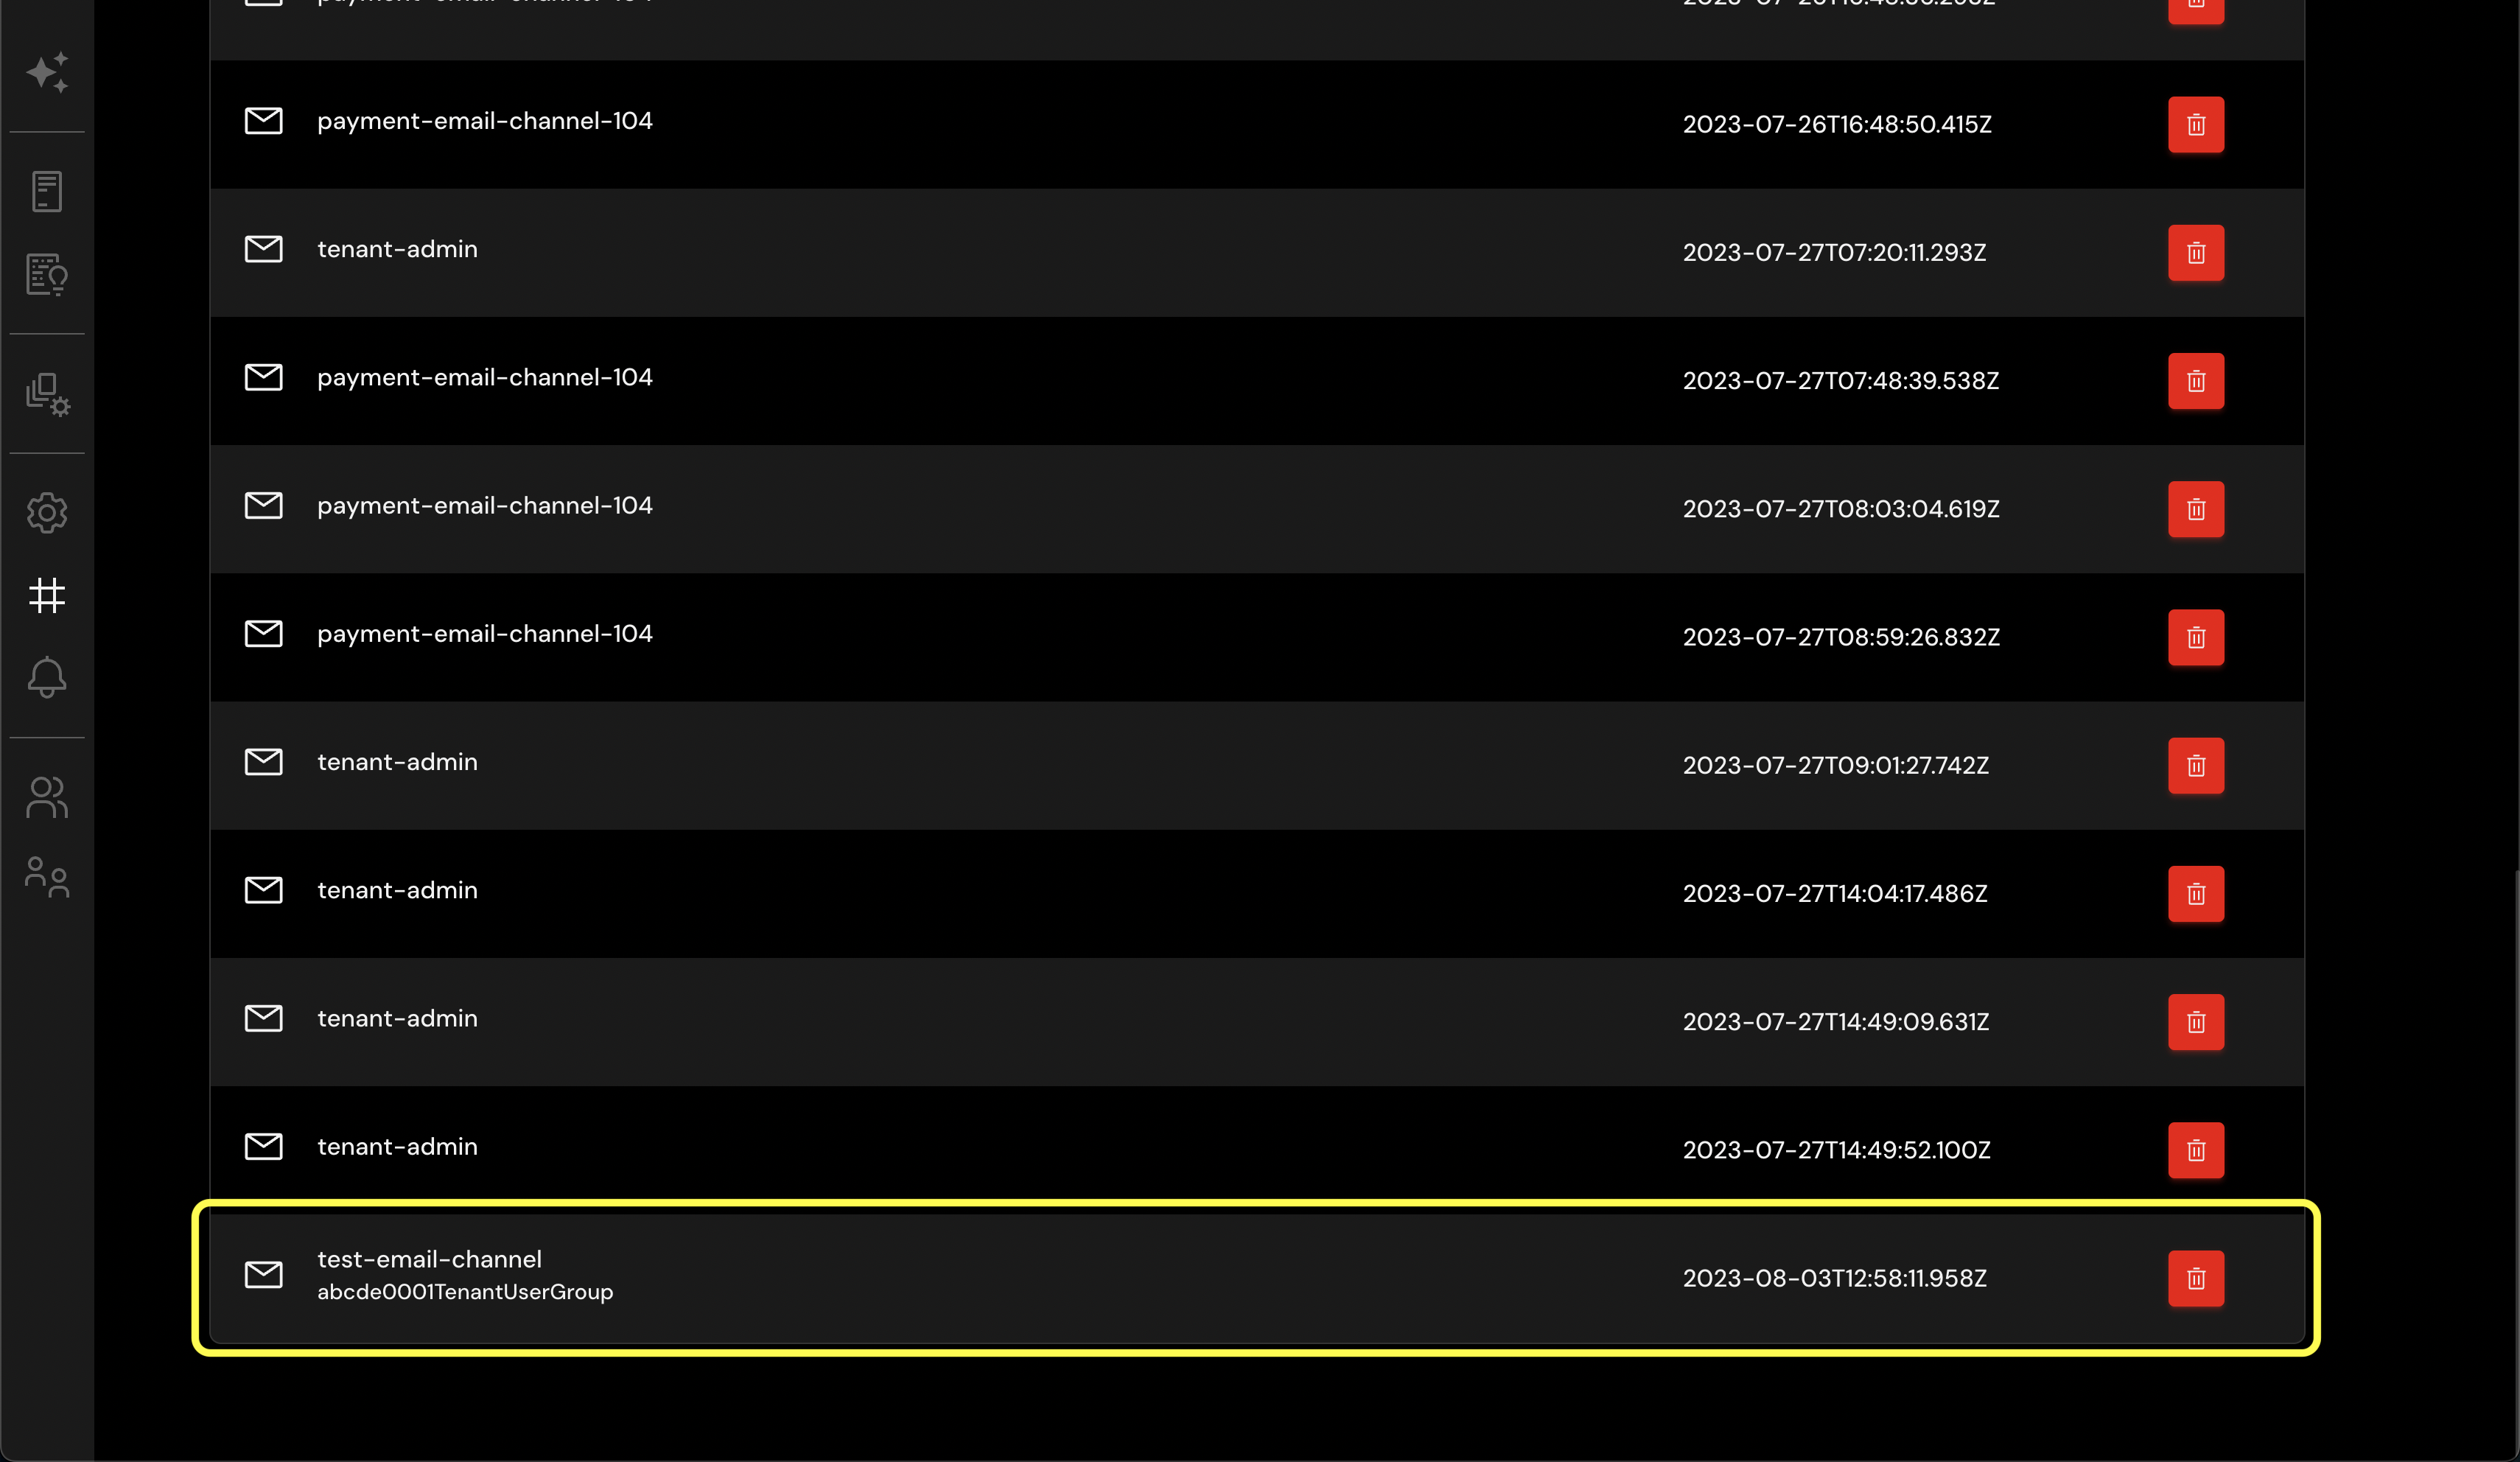
Success: Email Channel Configured!
Congratulations! You have successfully configured an Email notification channel with CloudAEye. Your newly added channel will appear at the end of your Channels table, enabling you to start receiving notifications to this email address immediately.
By setting up your Email channel with CloudAEye, you've created a direct line of communication with your system's critical alerts. This channel enhances responsiveness and provides an easily accessible way to stay in the loop. Should you need to delete this channel in the future, you can do so from the Channels page.