Configure Code Review - GitLab
Overview
This guide explains how to configure the Code Review solution for GitLab.
It walks through the following steps:
- Connecting your GitLab instance
- Adding GitLab repositories
By the end of this guide, you will have Code Review set up and ready to use for your applications.
CloudAEye supports both GitLab Cloud and GitLab Self-Managed environments. Ensure that your GitLab Self‑Managed instance is reachable from the external tool, via HTTPS on a custom domain such as
https://gitlab.mycompany.com.
Prerequisites
Setup Code Review
After you get access to CloudAEye SaaS, do the following steps:
Step 2: Connect GitLab
In the Code Review setup flow, choose GitLab. You will be asked to connect your GitLab account. You may connect using a service account and personal access token OR project access token.
2.1 Service Account & Access Token
In GitLab, you create a "service account" and then generate a personal access token (PAT) for that specific service account. This token is used to authenticate automated requests.
Refer to official docs from GitLab on service account.
Create the Service Account
- On the top bar, select Search or go to and find your top-level group.
- Select Service accounts from the left sidebar.
- Select Add service account.
- Enter a name for the account (a username and email are automatically generated).
- Select Create service account.
Create the Token
- On the Access Tokens page, select Add new token.
- Enter a Token name and an optional description.
- Set an Expiration date. By default, it's 365 days, but you can clear the expiration checkbox to create a token that never expires (if enabled by a group owner).
- Select the scopes to define the permissions for the token:
apito access all API endpoints,read_repositoryfor read-only access to repository code. - Select Create personal access token.
Securely Store the Token
- Crucially, copy the generated token immediately. GitLab will not show the token value again after you leave this page.
- Store the token in a secure location, such as a secrets manager.
You can now use this token to authenticate API requests or Git operations as the service account user. The service account bot user does not count towards your licensed seat count.
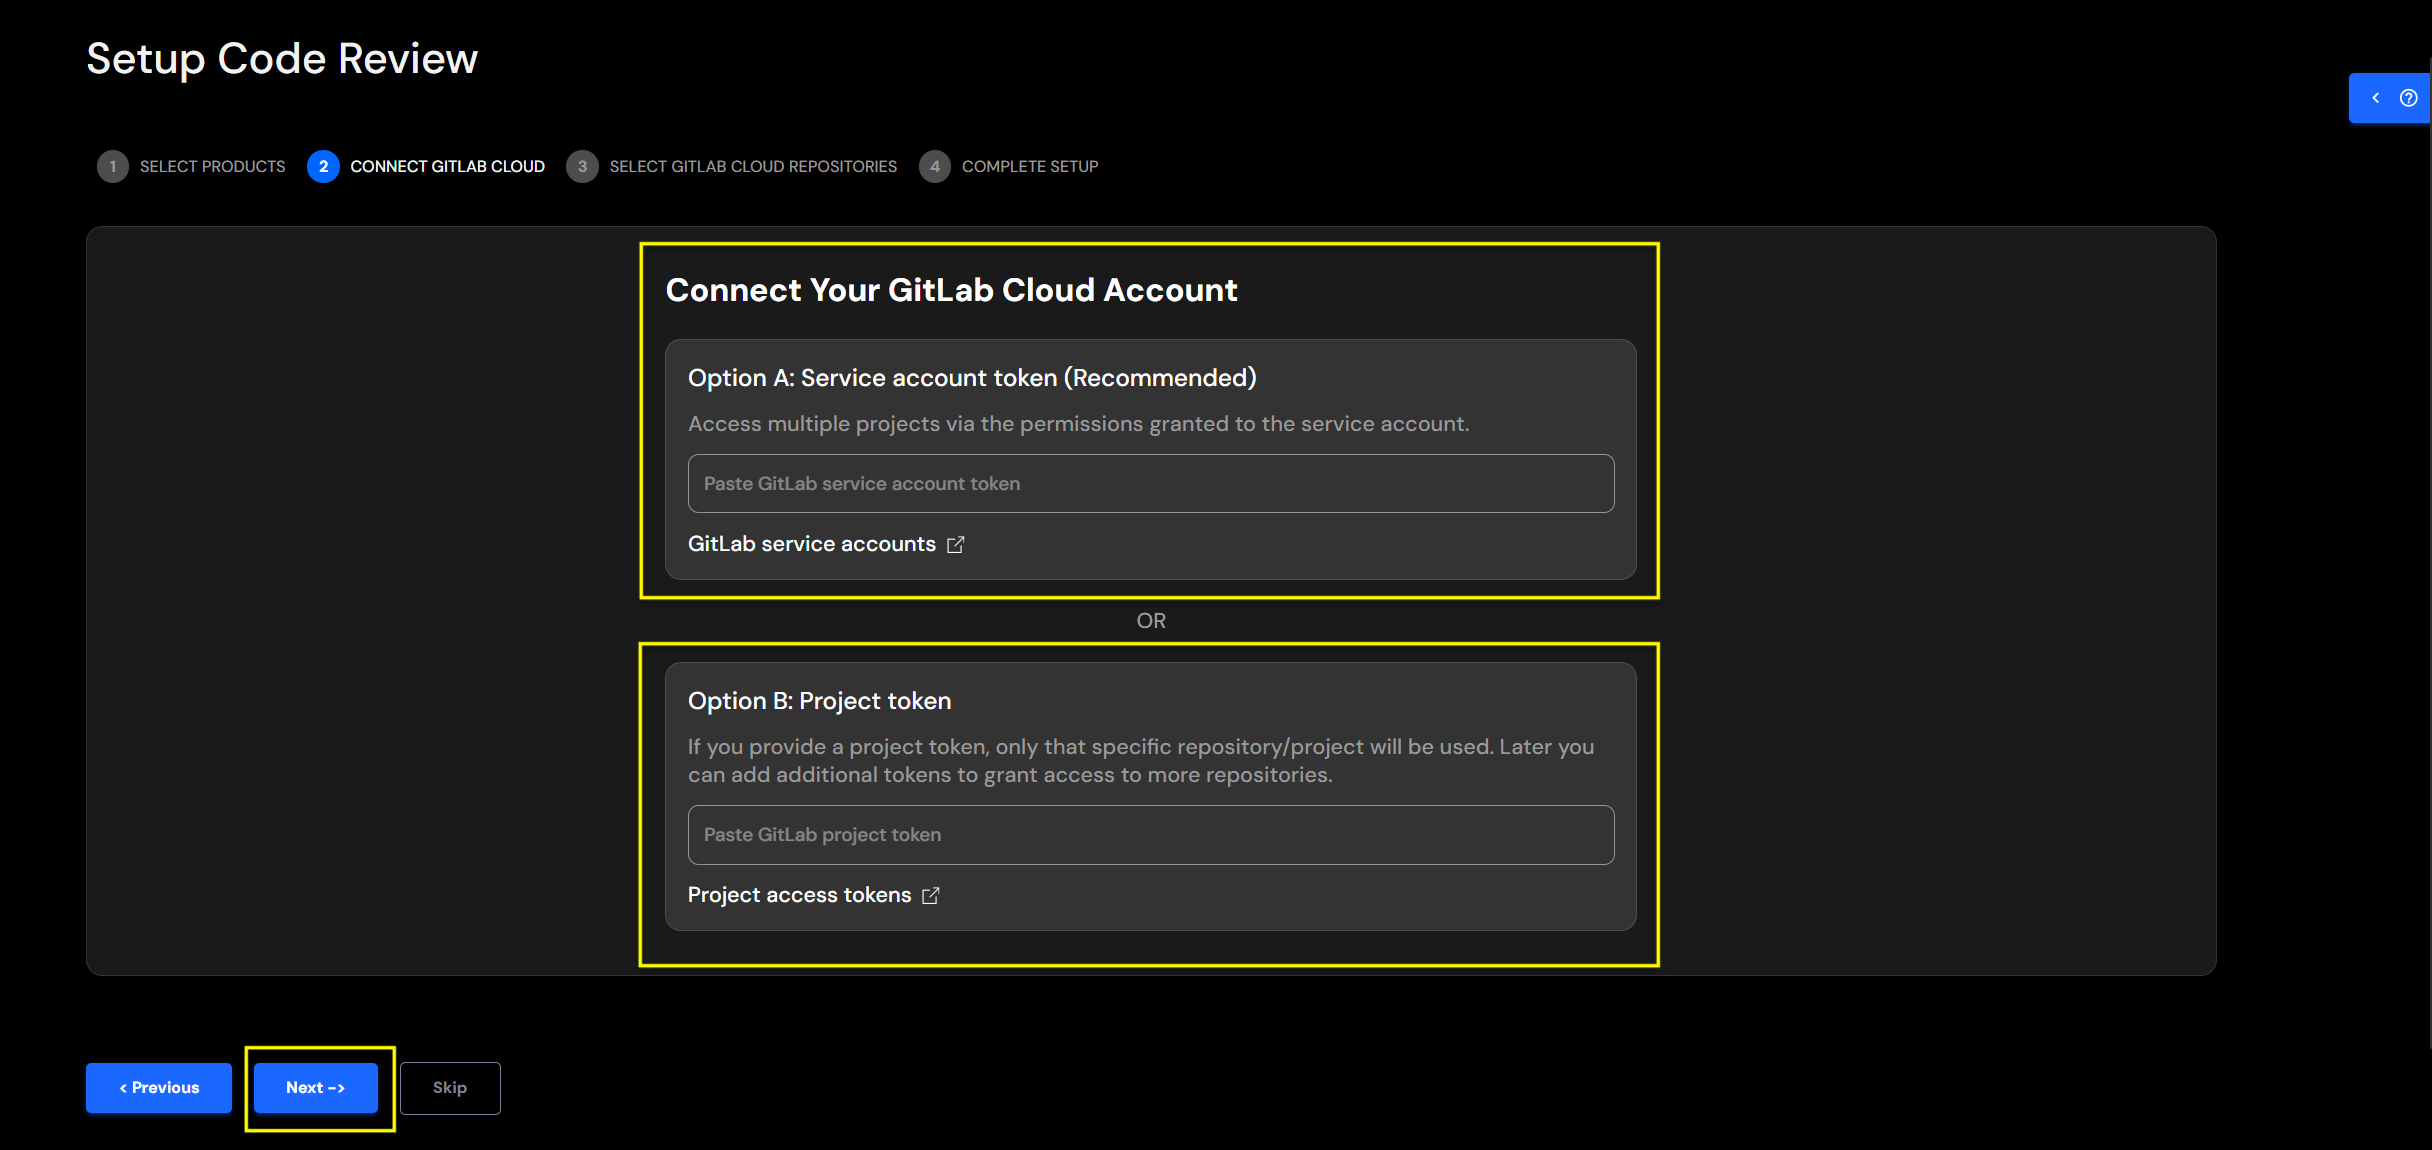
2.2 Project Access Token
To create a project access token in GitLab, navigate to your project's settings, specify the token's details and permissions, and generate it. This token acts as a password for programmatic access to the project's resources.
Refer to official docs from GitLab on project access token. You need to have at least the Maintainer role for the project to create a project access token.
Create a Project Access Token
- Navigate to your Project: Sign in to GitLab and go to your project.
- Open Settings: On the left sidebar, select Settings > Access Tokens.
- Add a New Token: Select the Add new token button.
- Enter Token Details:
- Token name: Enter a descriptive name for the token.
- Expiration date: Set an expiration date. You will need to renew the token after this duration.
- Role: Select the required role (
Developer) for the token. This determines the overall access level within the project. - Define Scopes: Select the scopes, which define the specific actions the token can perform:
api,read_repository. - Create the Token: Select Create project access token.
- Save the Token: The new project access token will be displayed. Crucially, copy and save this token immediately in a secure location. For security reasons, you cannot view the token value again after you leave or refresh the page.
Step 3: Connect your GitHub Repositories
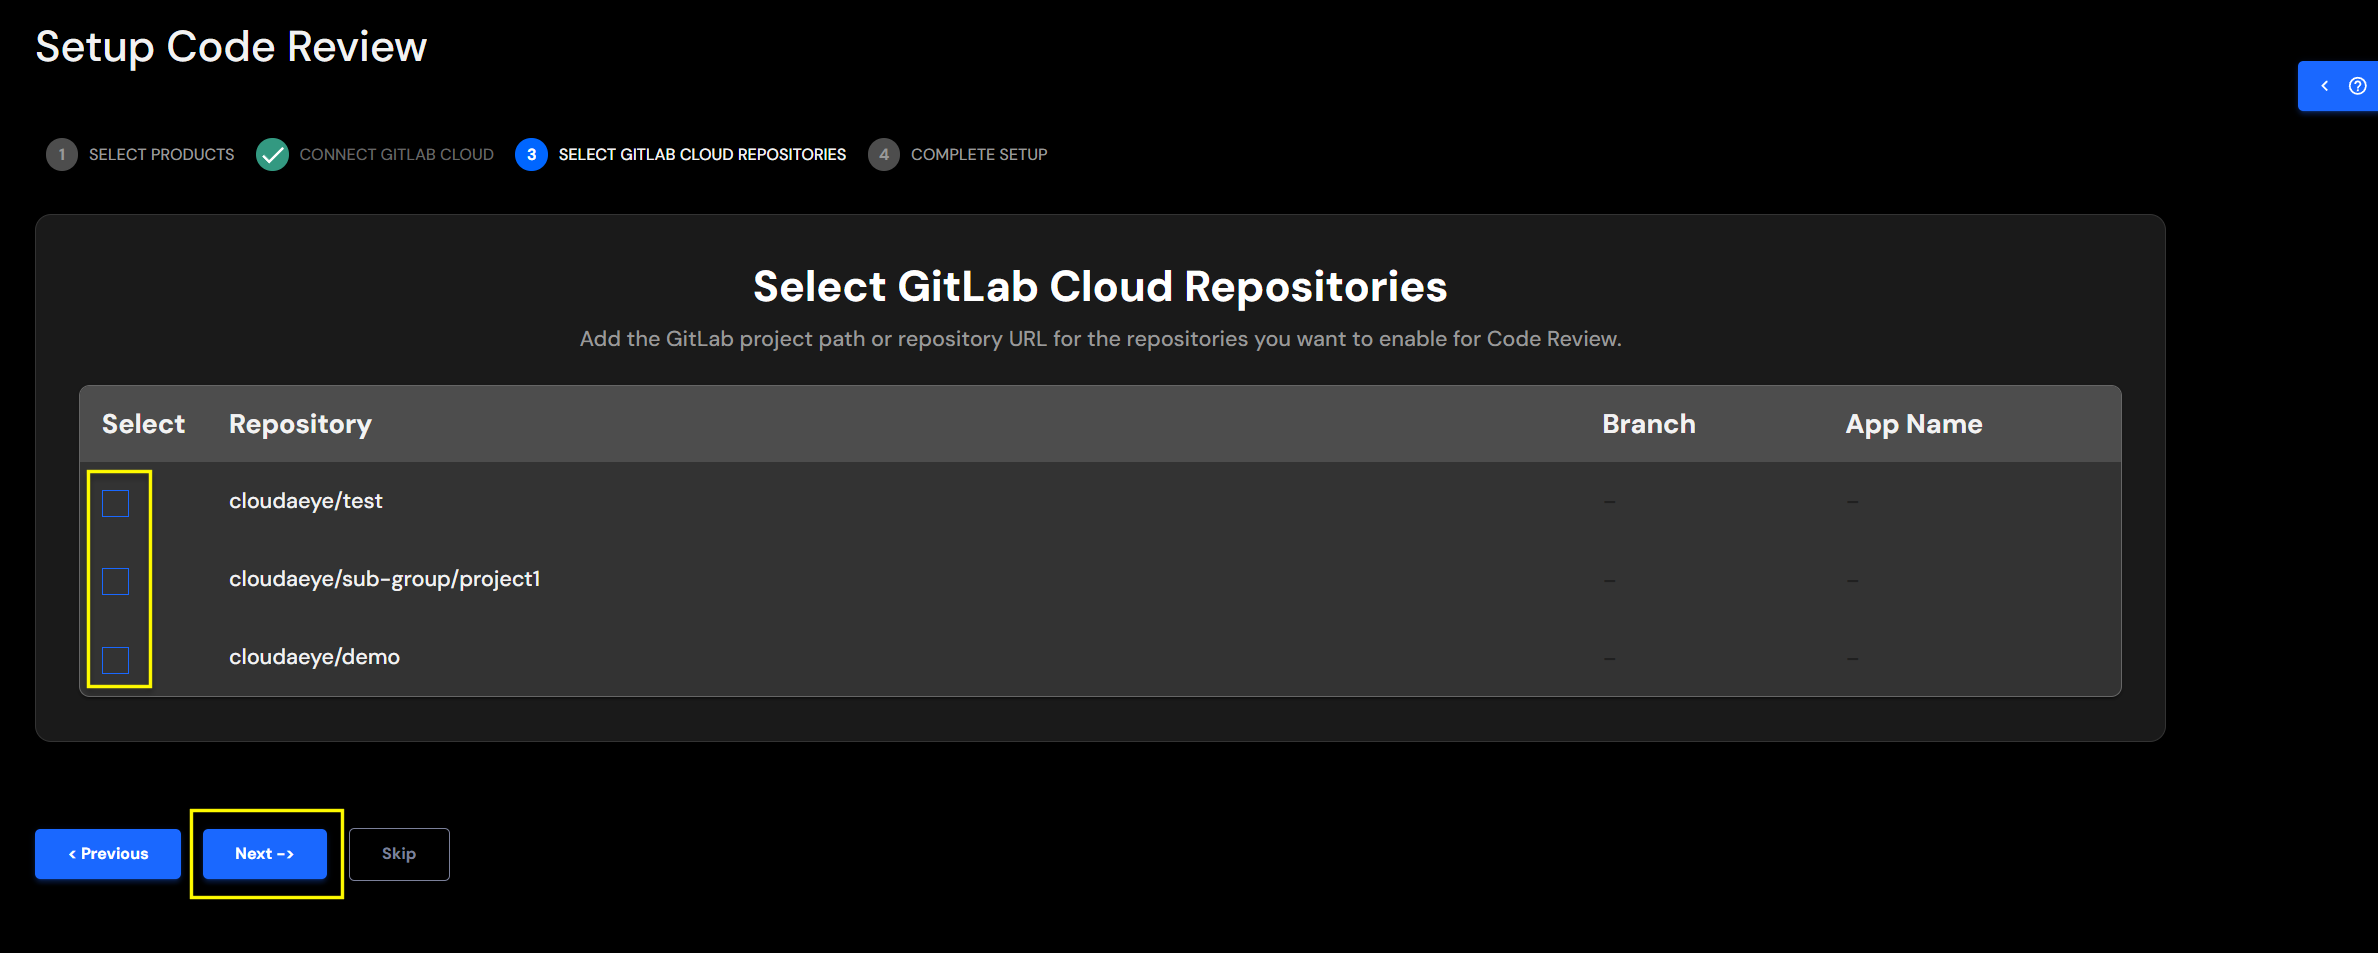
Add GitLab Repositories
Select the repositories you would like to monitor for Code Review.
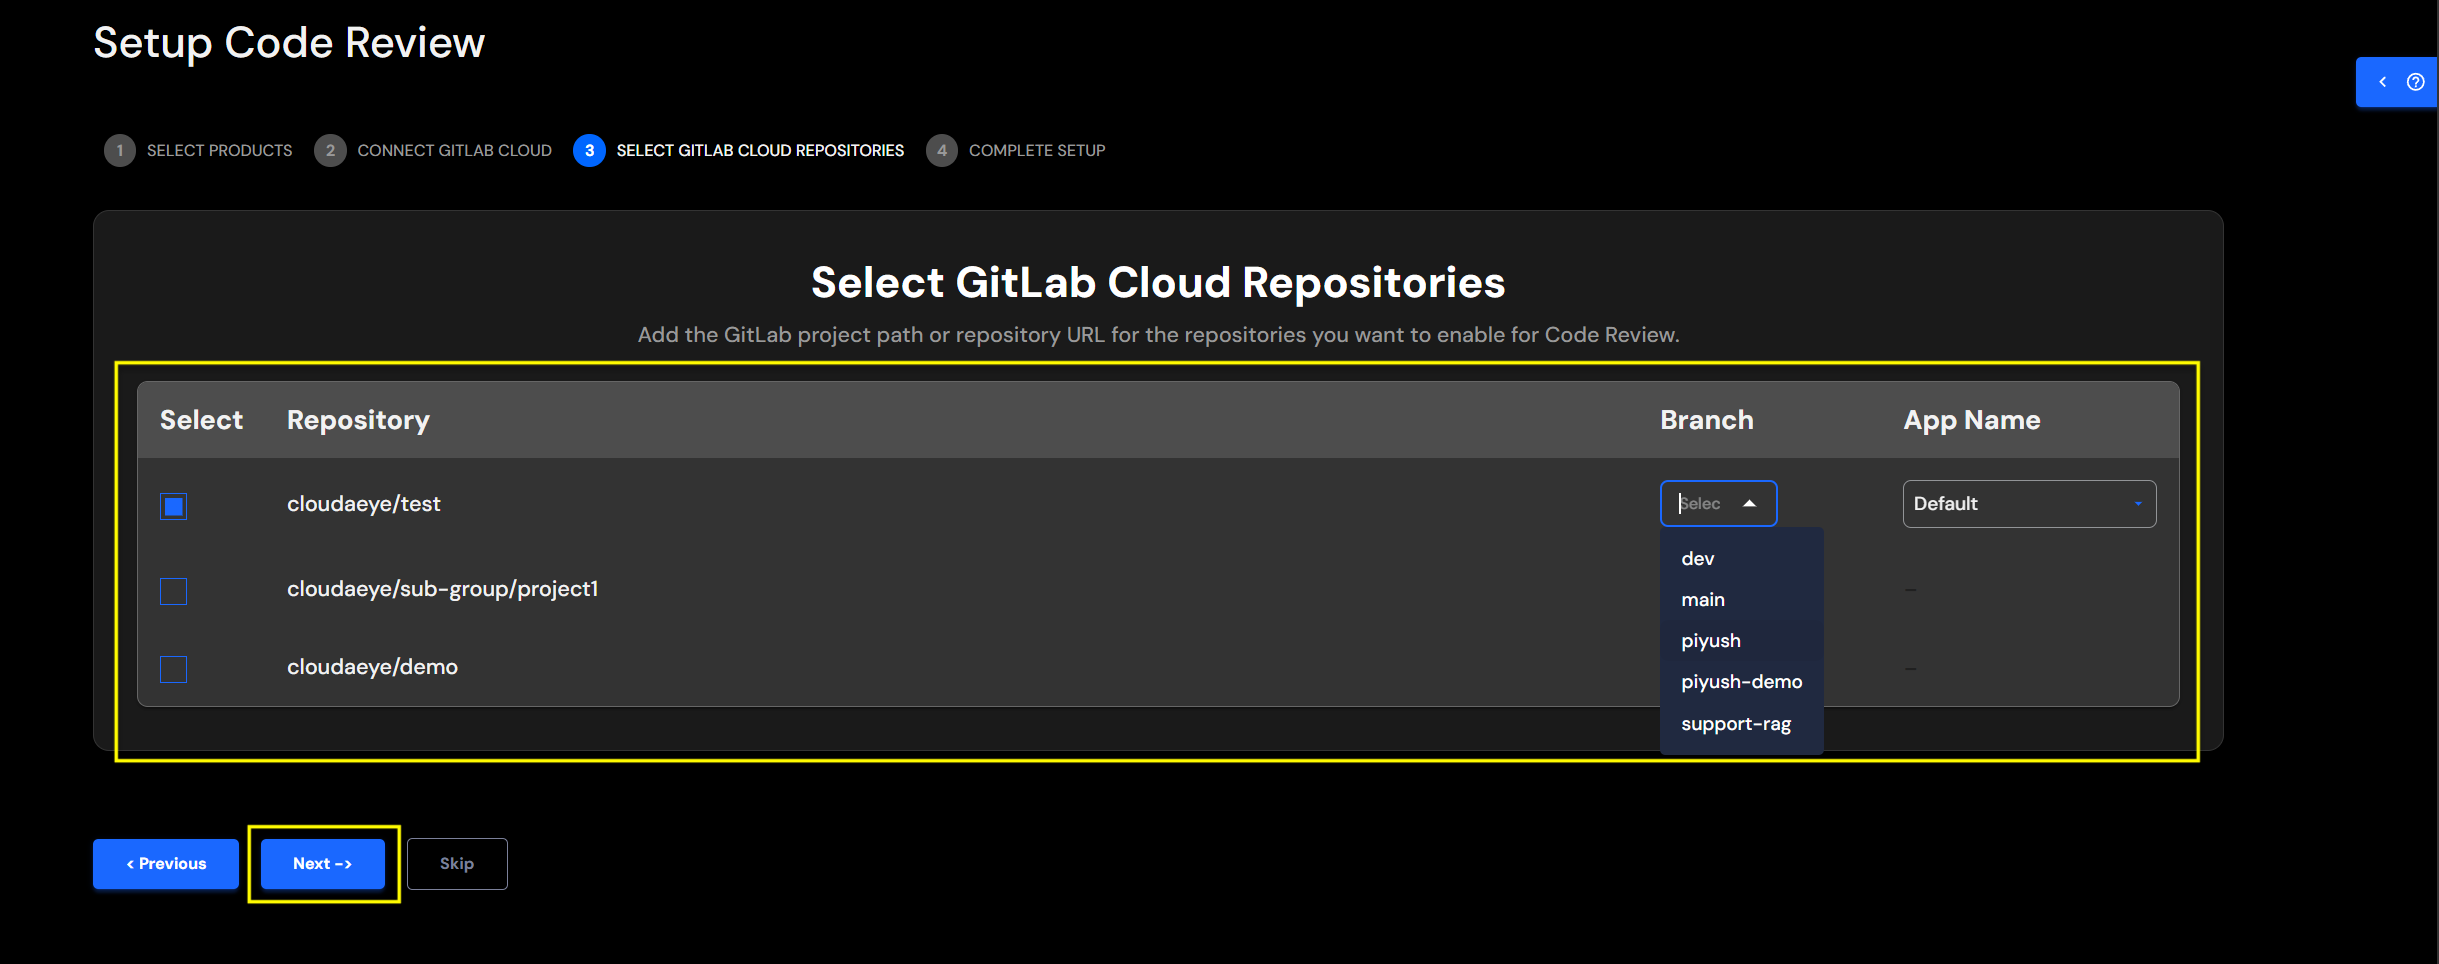
Map Repository Details
Add the details for all selected repositories.
- Repository Name: Name of the repository that you selected.
- Branch: From the drop-down menu, select the code branch. This branch will be used for codebase context.
- App Name: Provide your application's name. You may select an existing application name from the drop down or add a new application name. For example, SockShop.
Congratulations! You have successfully configured `Code Review' for GitLab.
Edit GitLab Repo Integration
From the left navigation, open the Integrations page.
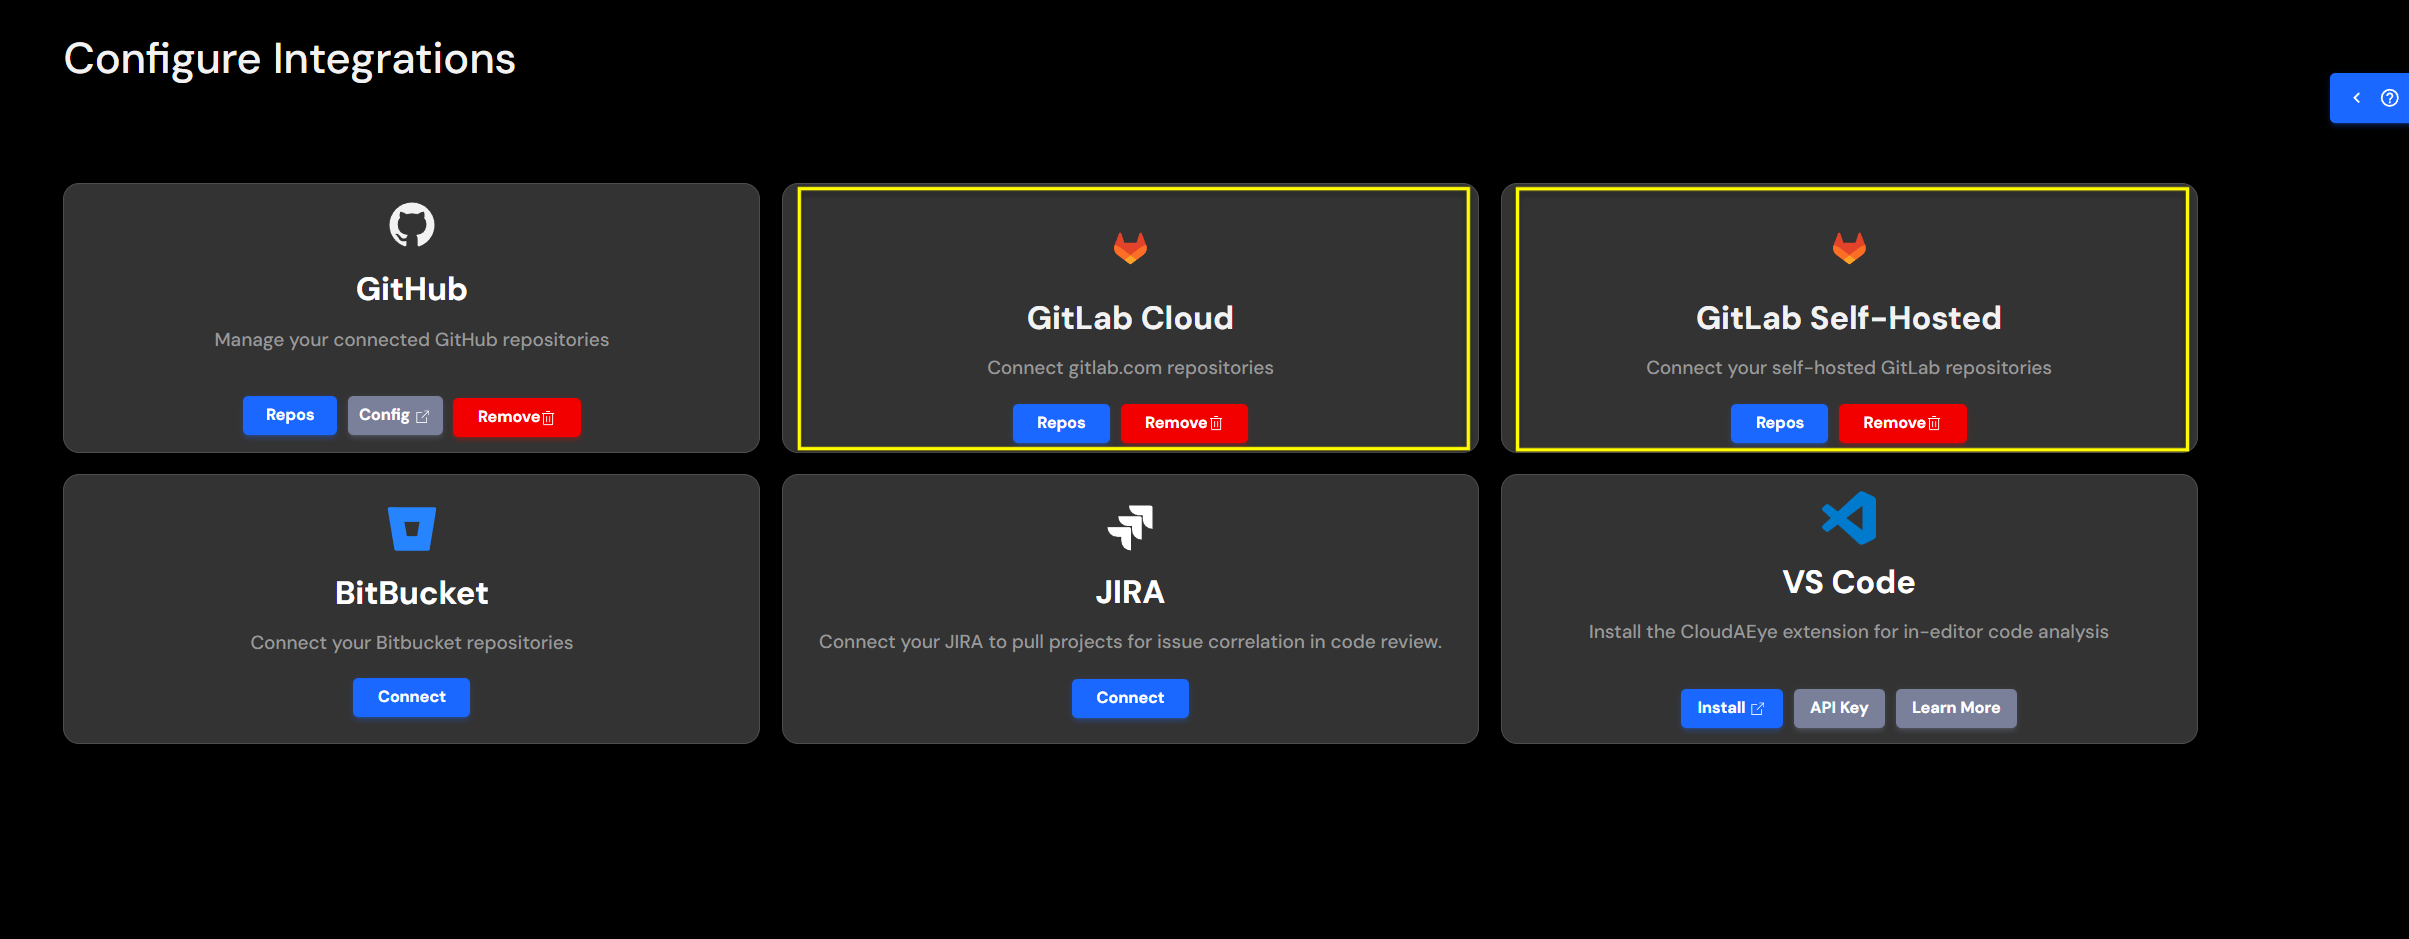
Select Repos button under GitLab to view your list of GitLab repositories.
For each repository, you may modify the branch, configure automated PR reviews, define the app name, specify tech stack context URLs, and manage linter and unit test settings.

When you're finished, click Save to apply your changes.
Remove GitLab Repo Integration
From the left navigation, open the Integrations page.
Select Repos button under GitLab to view your list of GitLab repositories.
When you click on the Disable button for a specific repository, you will see a confirmation page.
Click on the Disable button again to confirm.
Remove the Integration
From the left navigation, open the Integrations page.
Click on Remove (trash) button to remove GitLab integration.
You may remove the service account and personal access token or project access token if you no longer need them.
For any further queries or additional information, please explore our Support Page or contact our team directly at support@cloudaeye.com.