Editing alerts
Overview
Once you have created an alert, you have the ability to edit it. Editing an alert allows you to fine-tune and adapt the alerting criteria to your evolving needs, ensuring that your monitoring system stays aligned with your operational requirements and goals.
Whether you need to adjust the thresholds that trigger an alert, change the notification channels, update the assigned team member, or modify any other aspect of an alert's configuration, the editing feature provides a flexible way to keep your alerts up-to-date and relevant.
By understanding how to effectively edit alerts, you can respond swiftly to changes in your system's behavior, performance metrics, or security landscape, maintaining a proactive monitoring strategy that reflects the real-time state of your environment.
In the following sections, you will find detailed instructions on how to perform quick edits and navigate the Edit Alerts Page, making the process of altering your alerts as seamless and intuitive as possible.
Keep in mind that editing an alert is a critical task that can directly impact how your system responds to specific events. Therefore, it's essential to approach this task with clear understanding and caution. Explore the subsequent sections to gain the knowledge and confidence needed to make these changes successfully.
Quick Edits
Quick Edits provide a streamlined approach to modifying certain aspects of an alert directly from the Alerts page. This functionality is designed for efficiency, allowing you to make common changes without navigating to a separate editing interface.
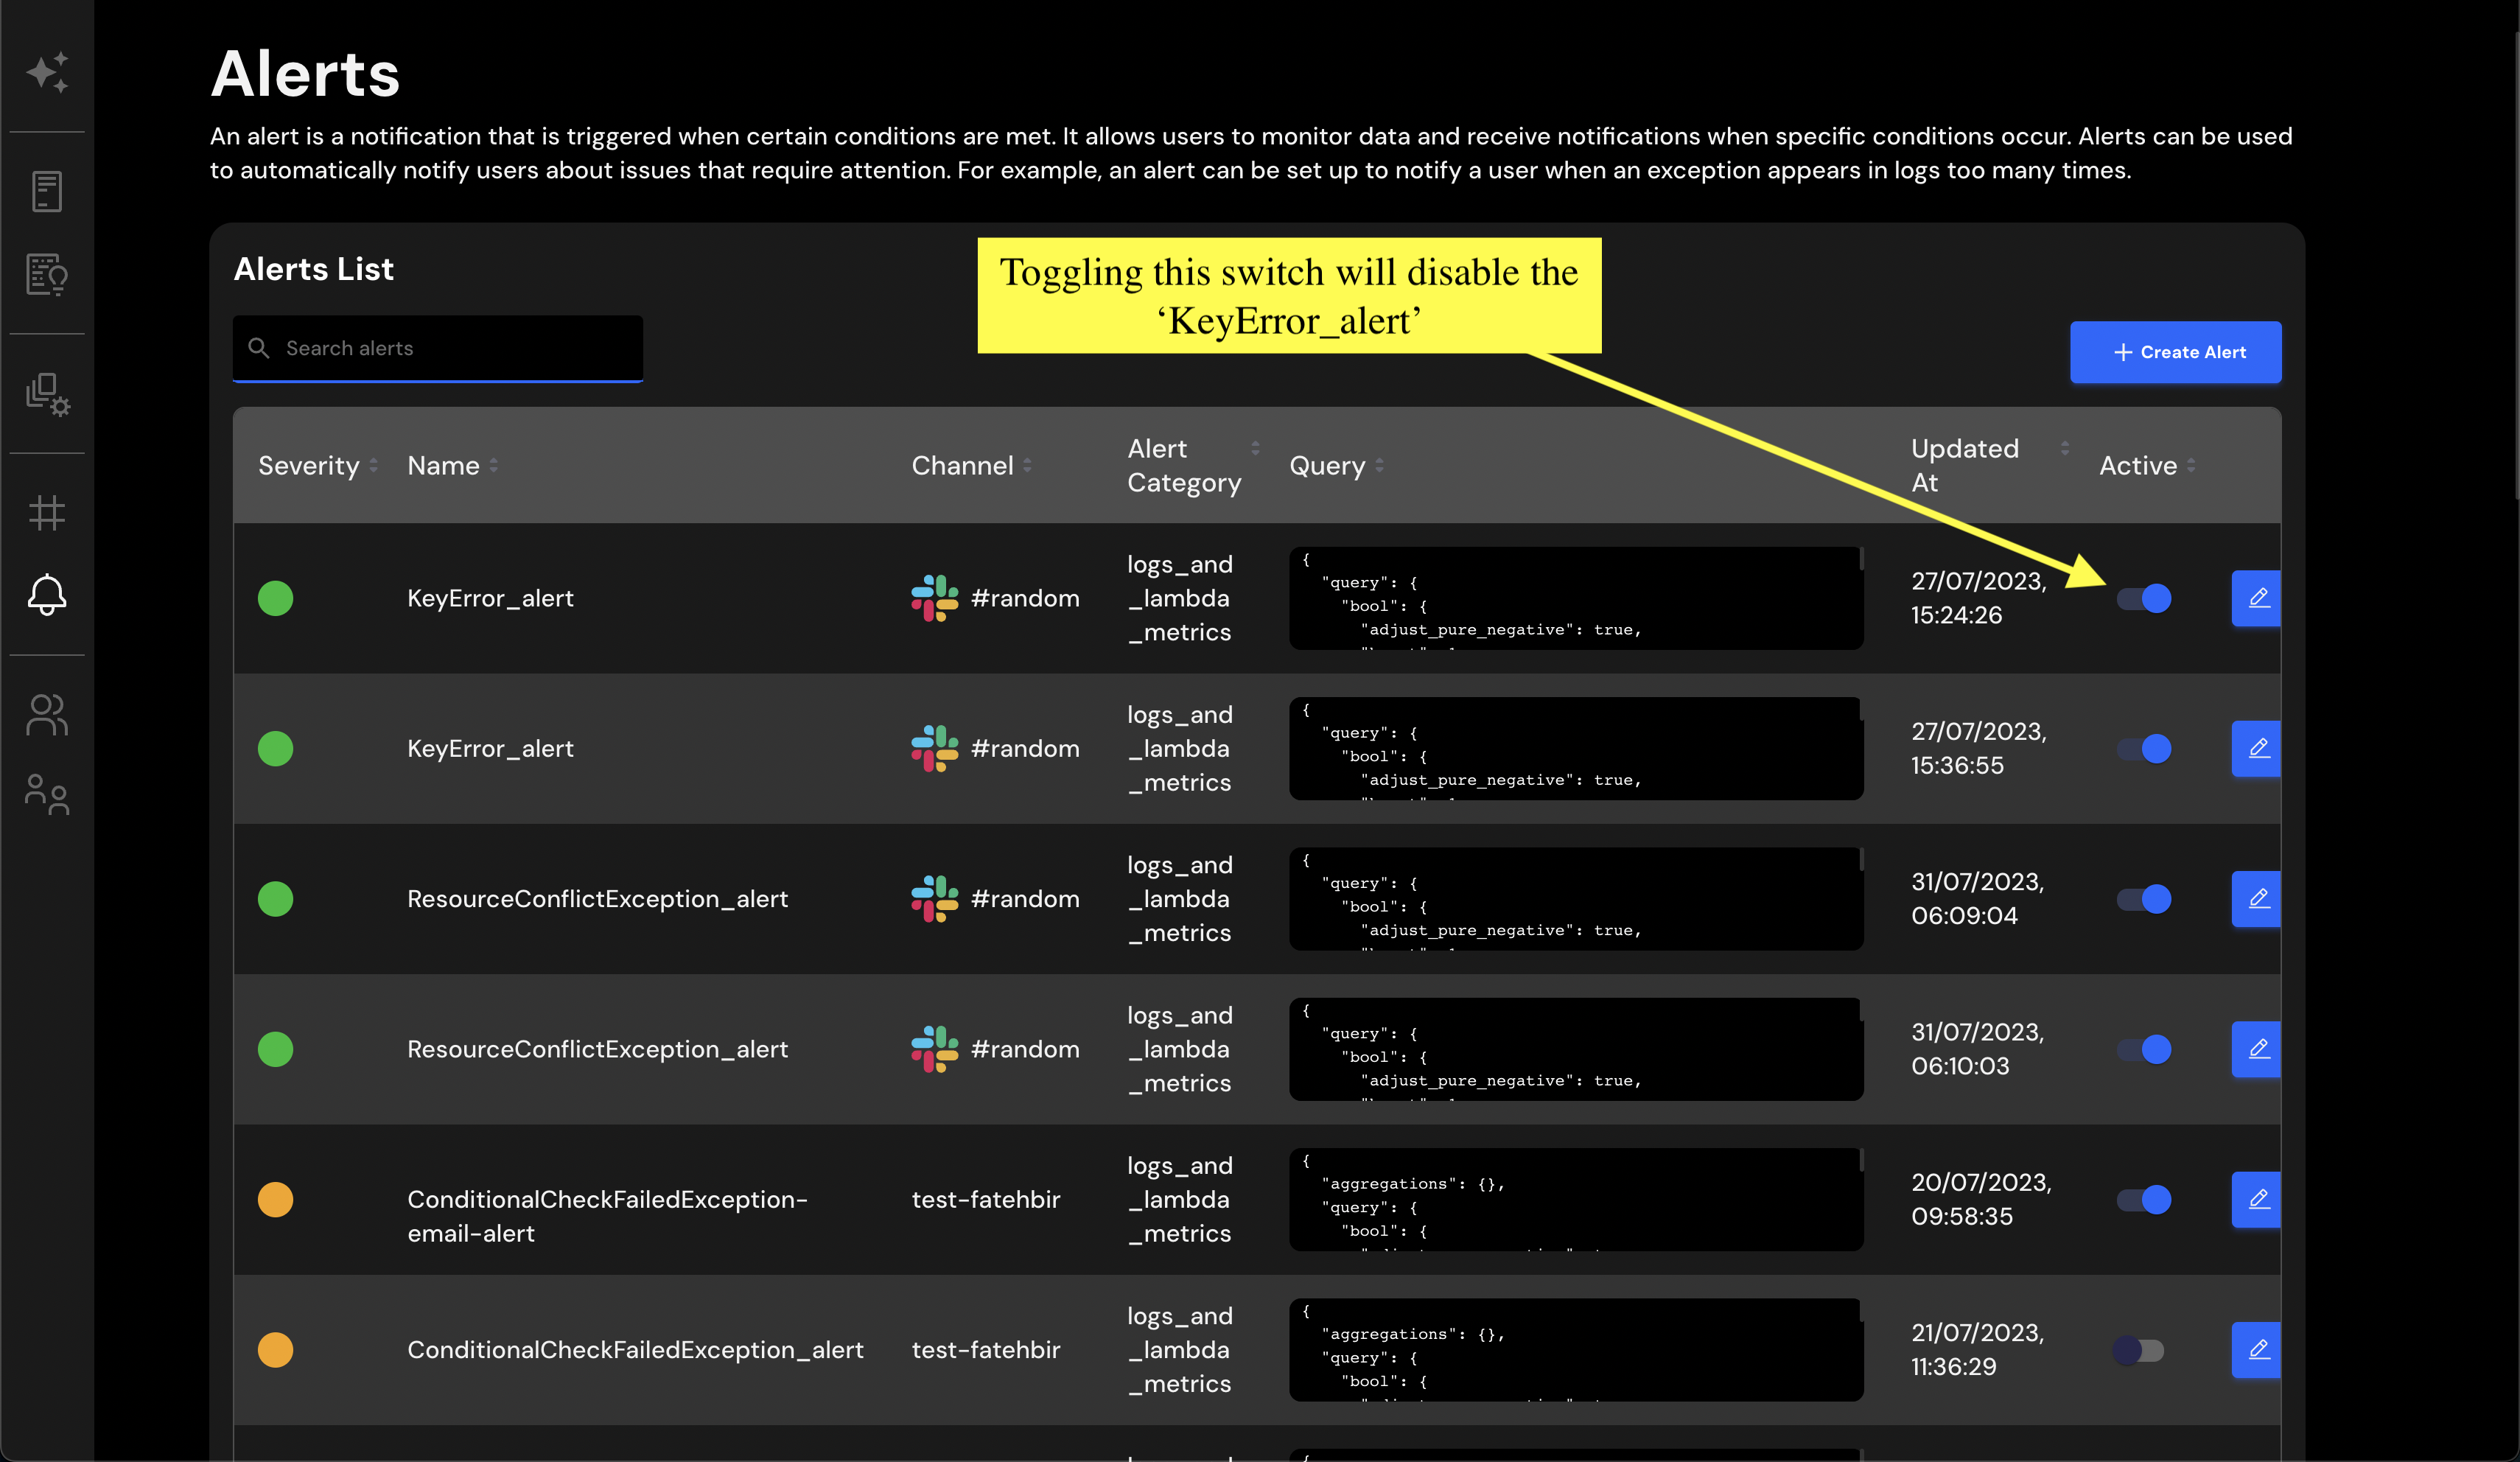
Enabling/Disabling an Alert
Alerts can be rapidly toggled between active and inactive states. Within the Alerts List table, the Active column shows the current status of each alert. Simply use the toggle switch corresponding to the alert you wish to change, and the status will be updated immediately.
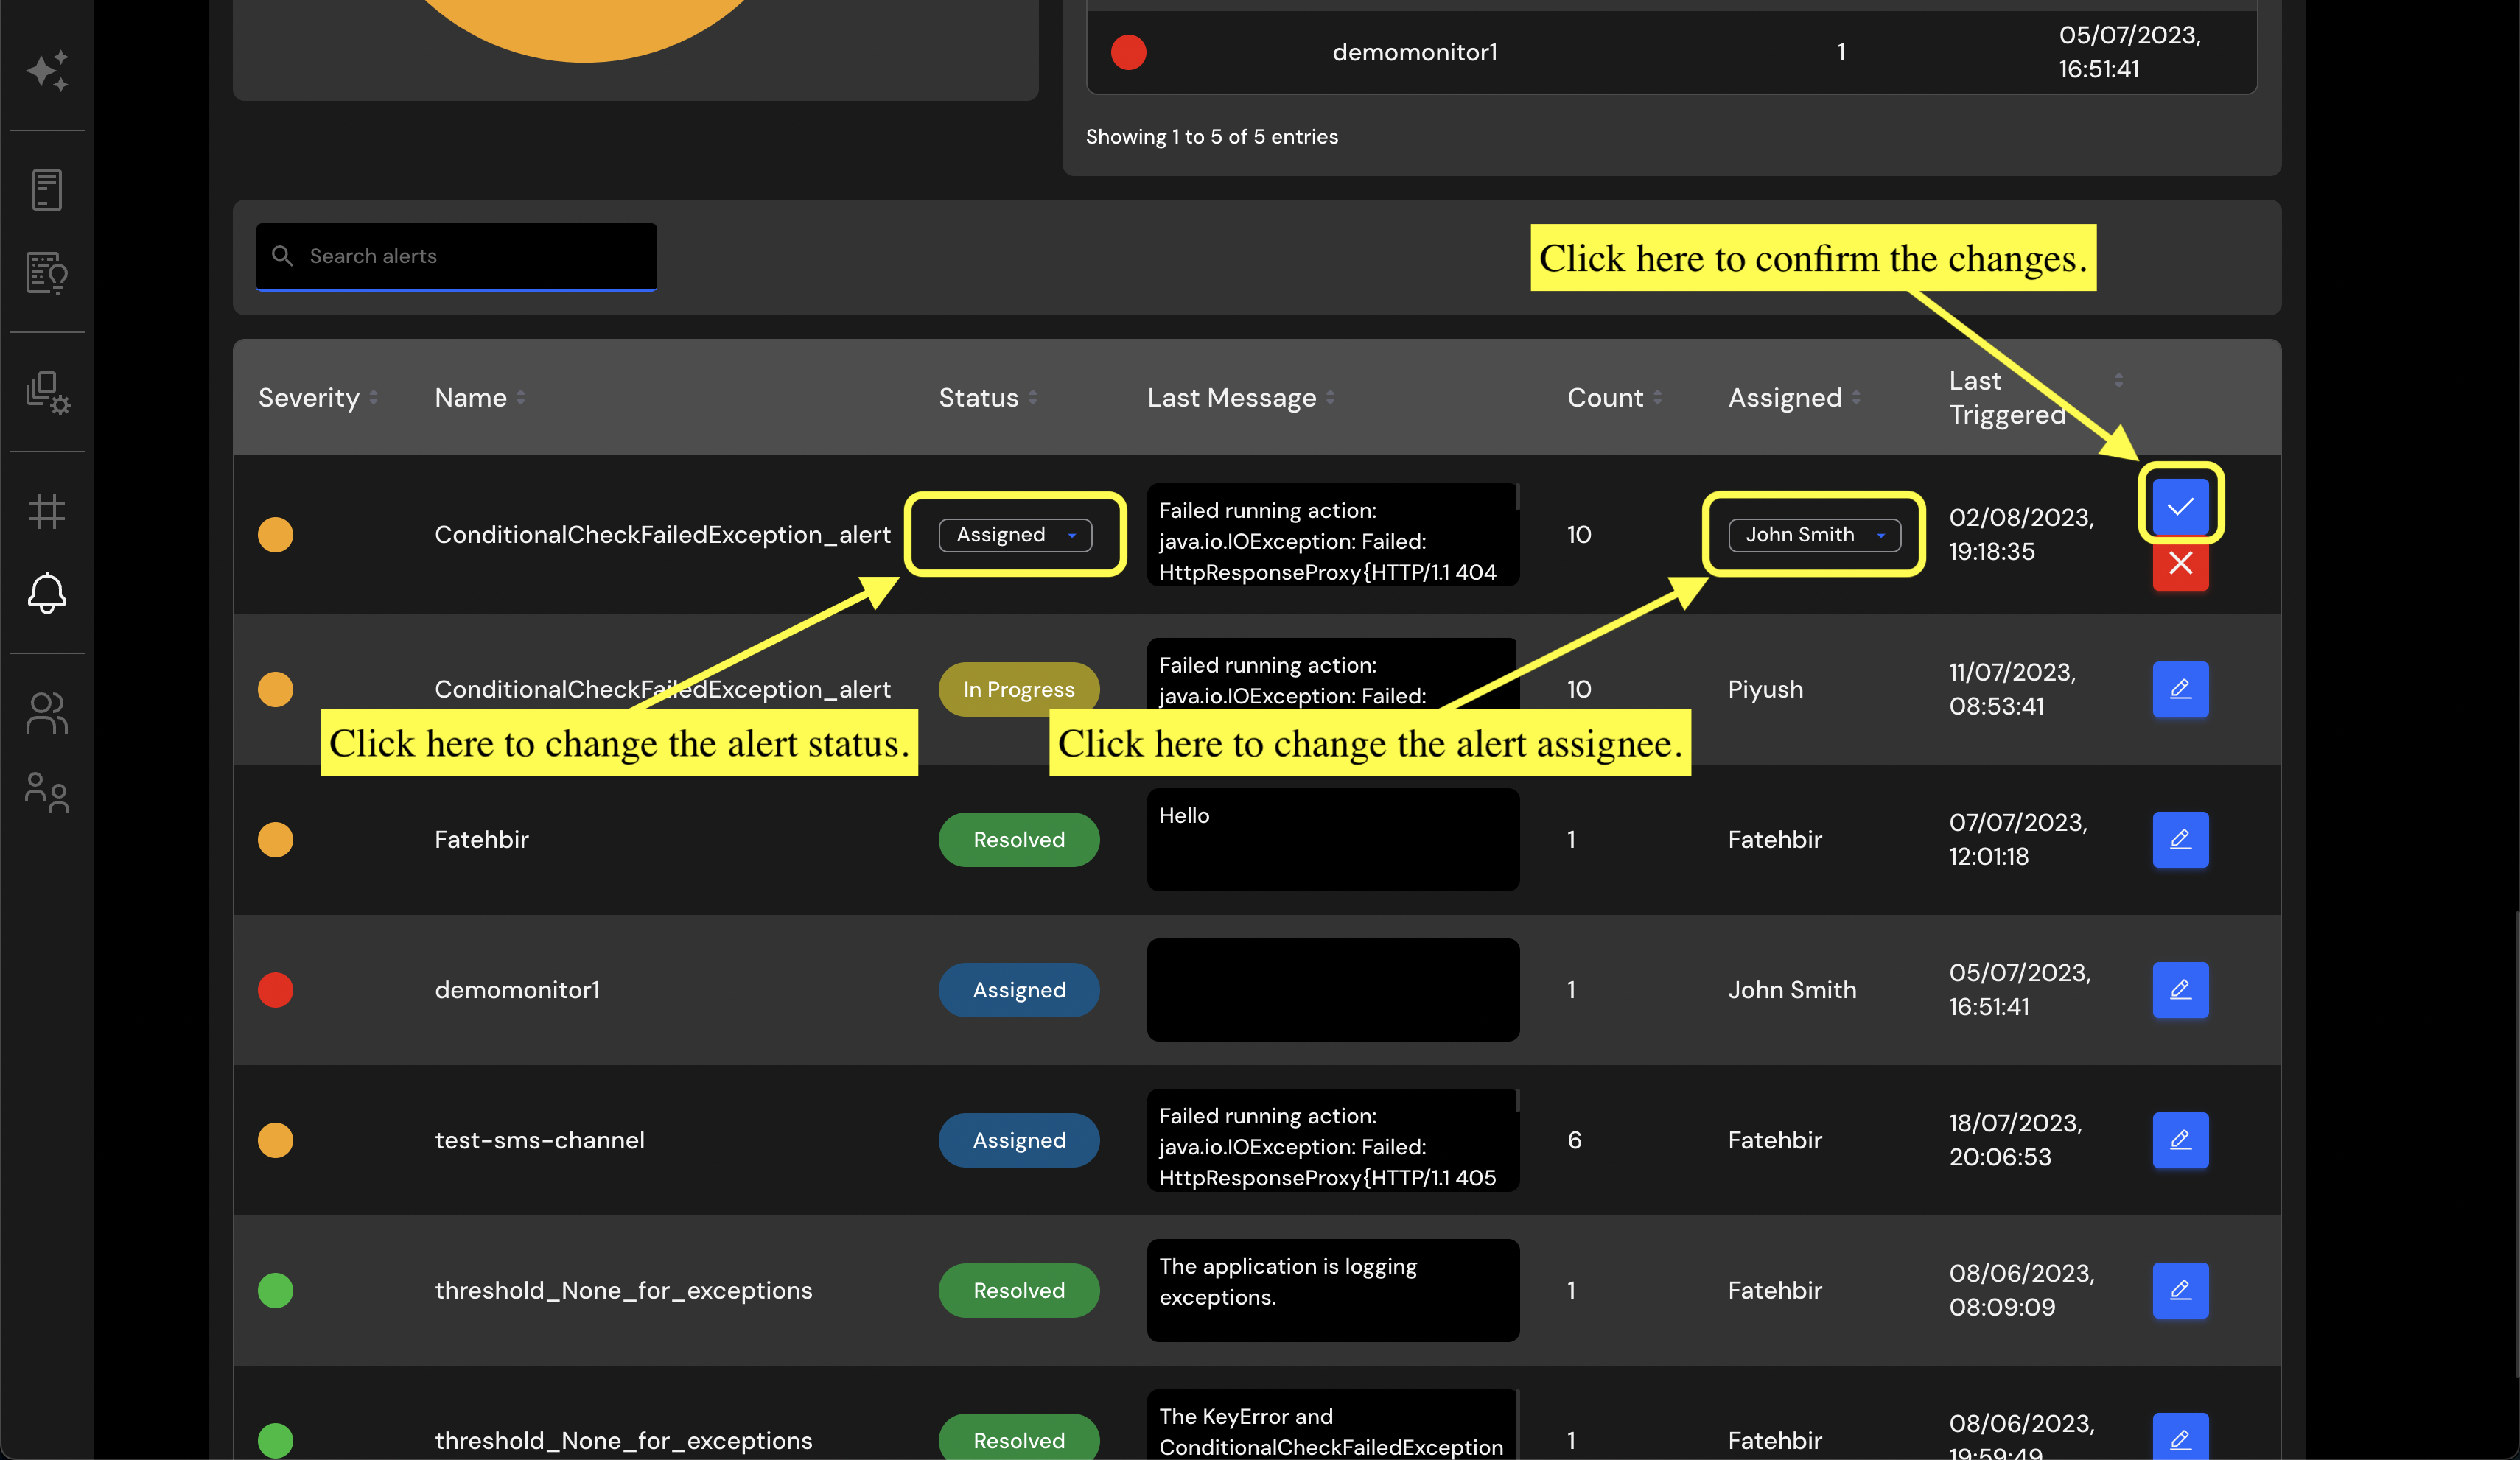
Updating Alert Status and Assignee
You can also quickly update the alert status and the assignee responsible for handling it. Here's how to do it:
- Navigate to the Alerts page, and locate the last table.
- Find the alert you wish to update, and click on the edit icon in the last column of the table.
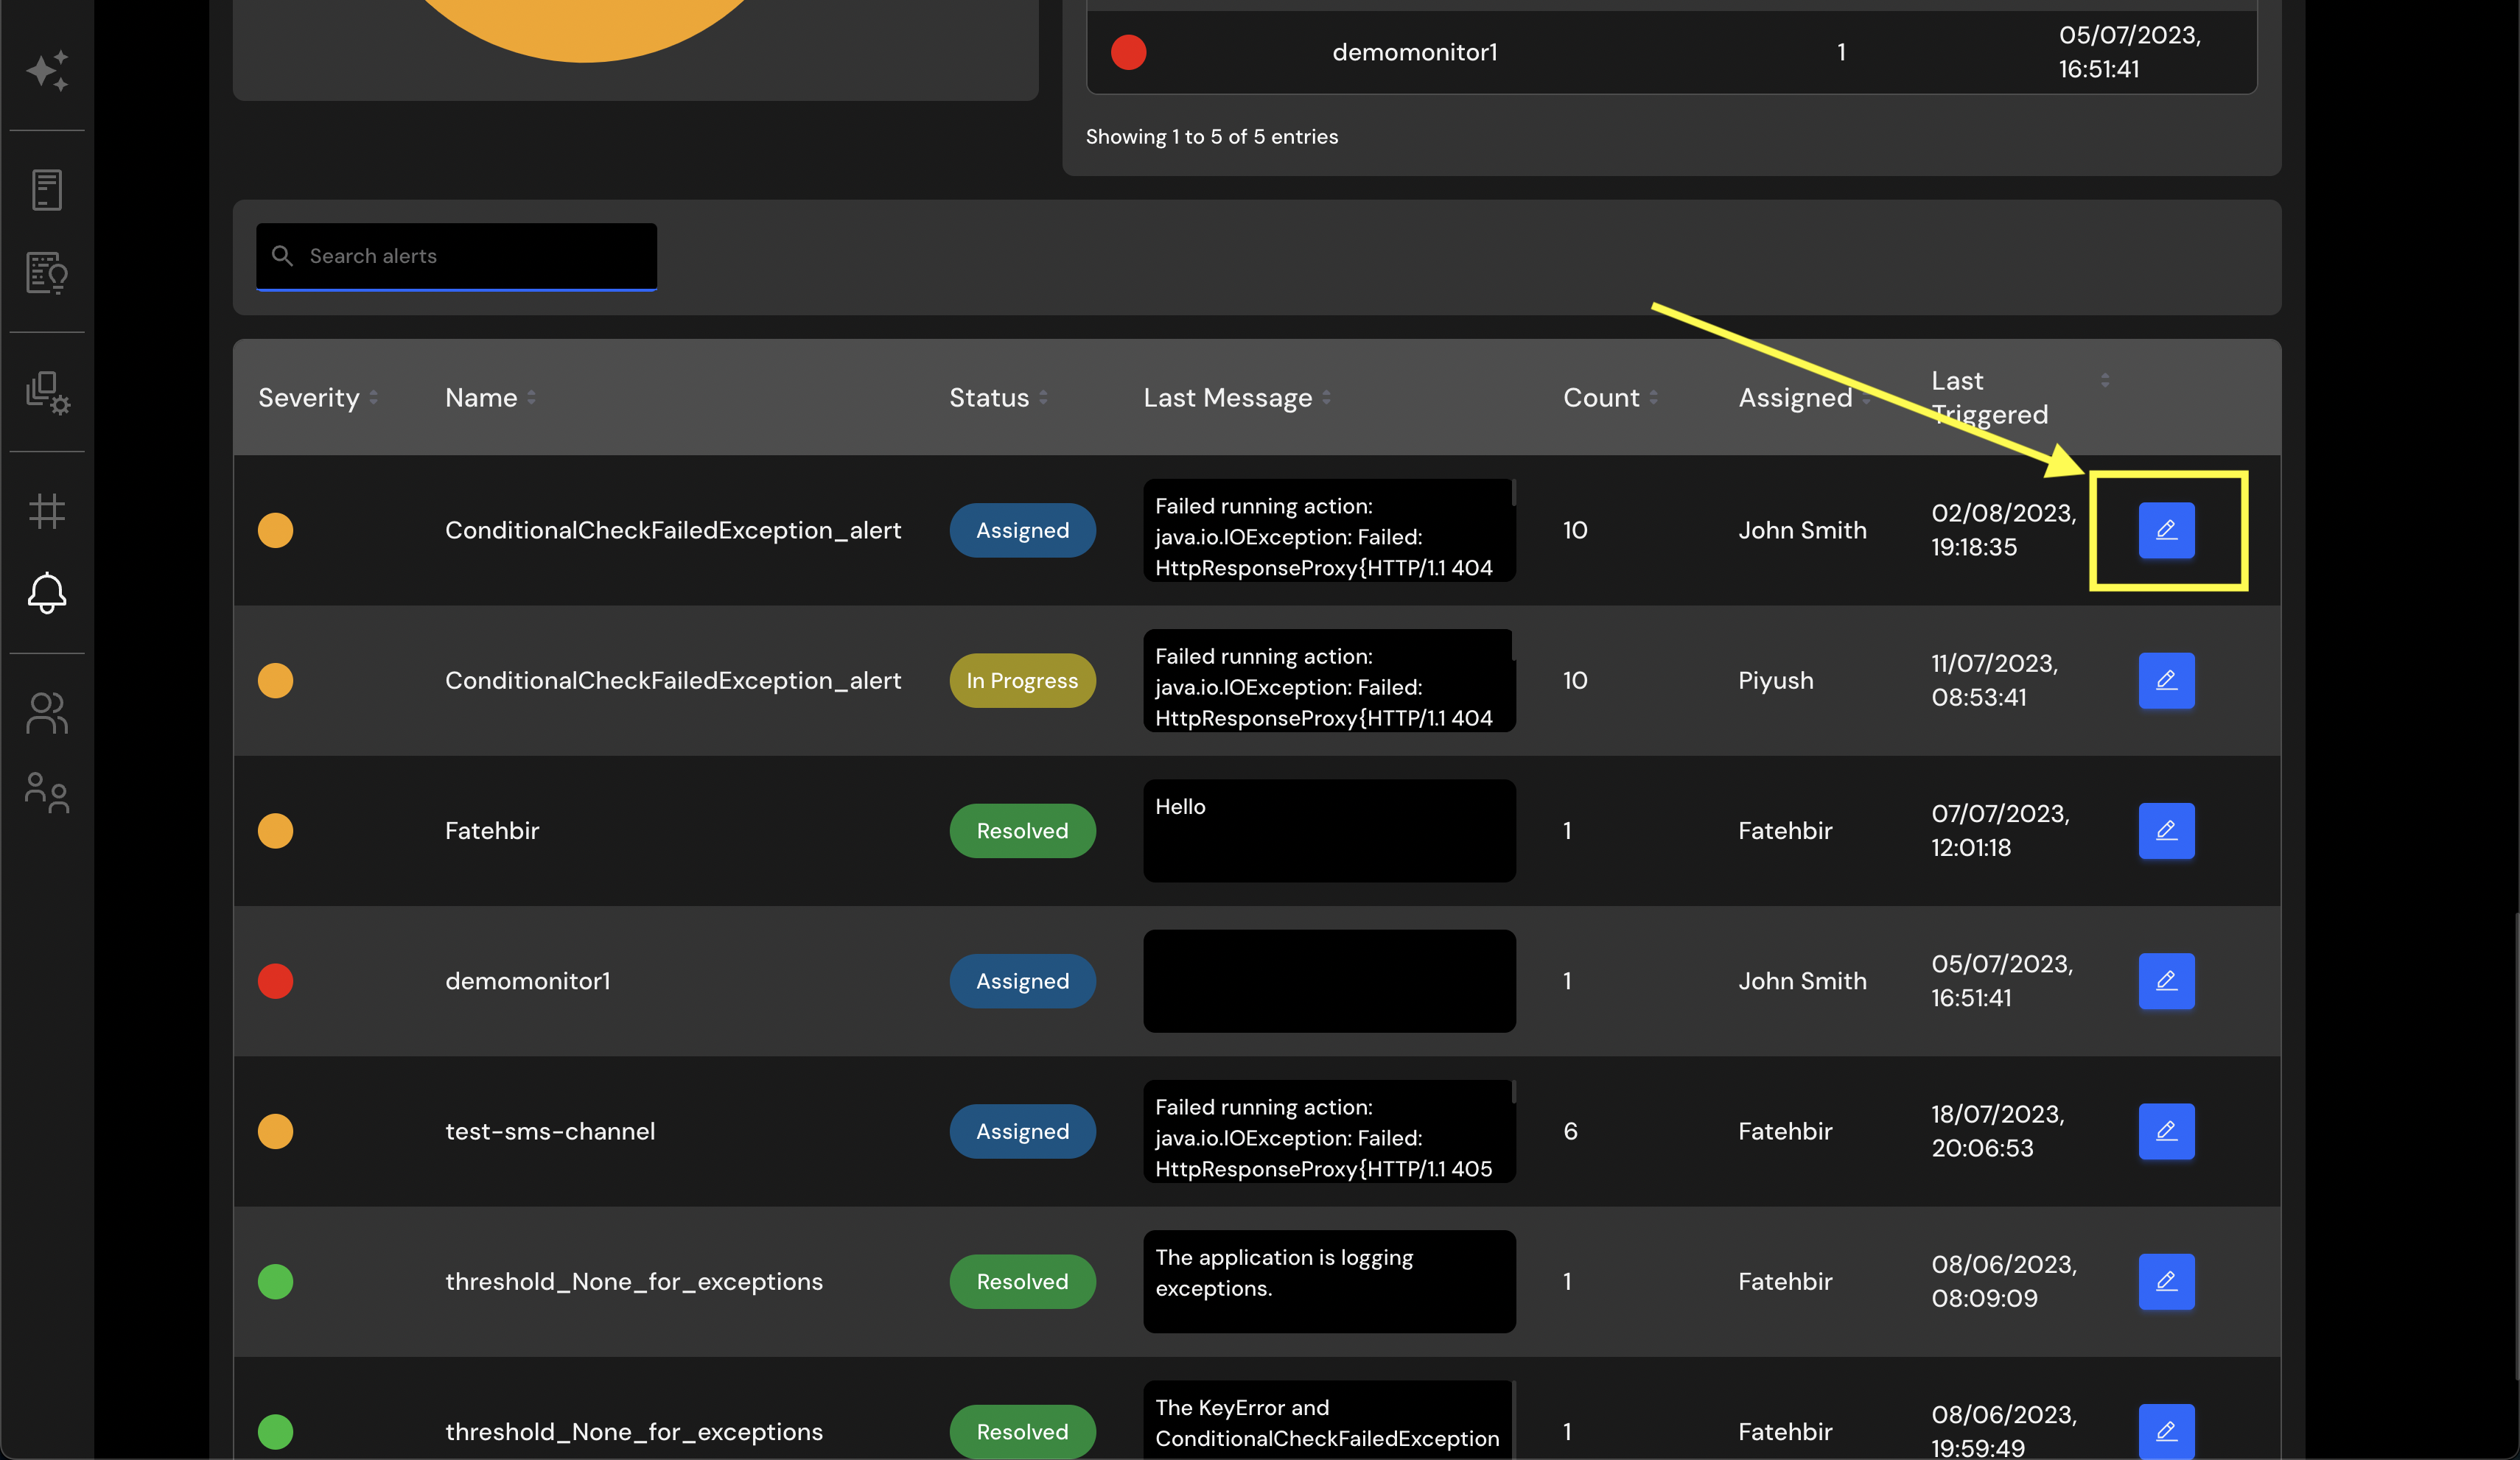
- A new interface will appear, allowing you to modify the Status and Assigned columns. Select the new values as needed, and the changes will be applied.
Quick Edits are designed for convenience and can be a significant time-saver, especially when managing a large number of alerts. This functionality empowers you to make essential changes on-the-fly, ensuring that your alerting system remains agile and responsive to the ever-changing dynamics of your environment.
The Edit Alerts Page
The Edit Alerts page is a specialized interface designed for making comprehensive modifications to an existing alert. This page enables you to change critical details, such as the alert name, the associated Elasticsearch query, scheduling, notifications, and more.
Here's how you can access and utilize the Edit Alerts page:
Accessing the Edit Alerts Page
- Navigate to the Alerts page.
- In the Alerts List table, locate the alert that you wish to edit.
- Look for the edit icon towards the end of the row and click on it.

Upon clicking, you'll be redirected to the Edit Alerts page.
Understanding the Edit Alerts Page
You'll find that the Edit Alerts page resembles the Create Alert page, providing a consistent user experience. All the sections you initially used to configure the alert are present, now pre-populated with the existing alert's details.
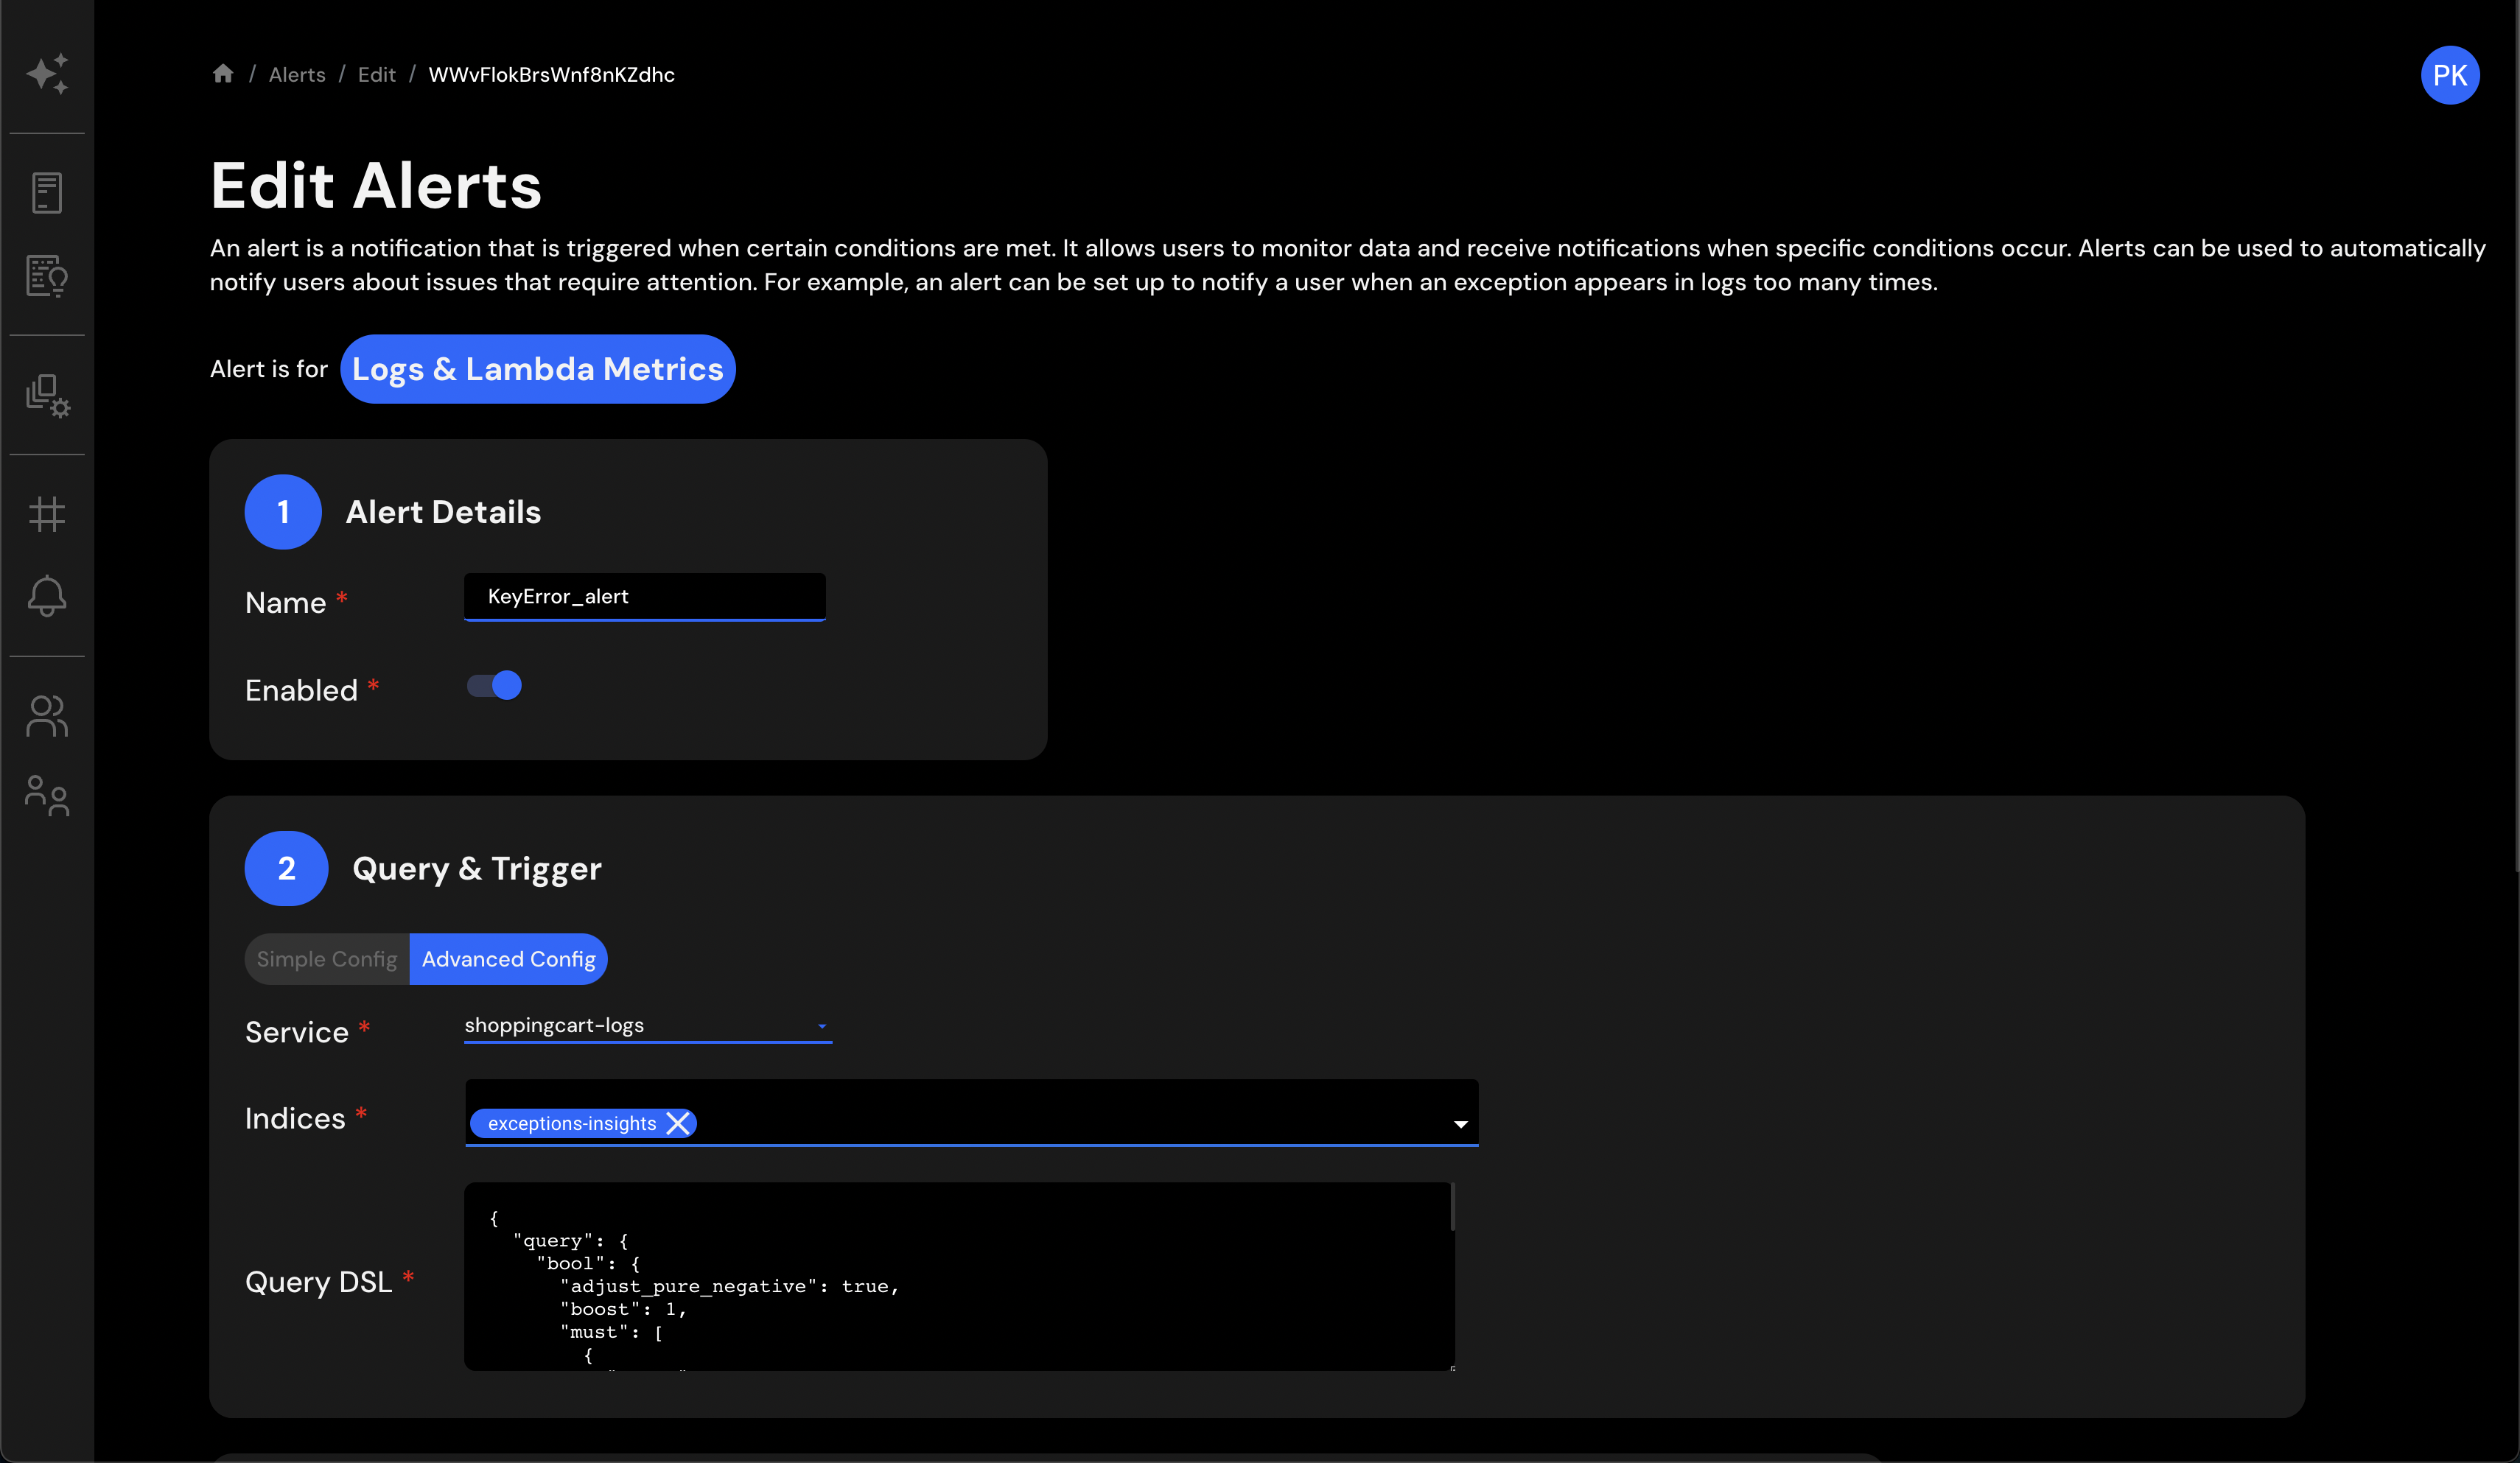
Editing Alert Details
You can modify various aspects of the alert, such as:
- Alert Name
- Elasticsearch Query
- Scheduling Preferences
- Notification Settings
Simply make the desired changes and save them.
Need a Refresher?
If you need a reminder of how to navigate the different sections and fields, the Configuring an Alert guide contains a comprehensive walkthrough, which applies equally to editing alerts.